MikroTikブリッジ設定の完全ガイド:ステップバイステップ解説
概要 > このガイドでは、MikroTikブリッジ設定の基本を紹介し、複数の物理ポートを論理インターフェースに統合する方法を解説します。設定手順、STPによるループ防止、MKControllerやNatCloudによるISPや企業のリモート管理簡略化も解説します。
MikroTikブリッジ設定の完全ガイド:ステップバイステップ解説
MikroTikのRouterOSにおいて、Bridgeはネットワーク管理者にとって最も基本的かつ強力なツールの一つです。ブリッジは仮想スイッチとして機能し、複数の物理インターフェース(Ethernetポートや無線ラジオなど)を単一の論理セグメントとして統合できます。
ネットワークでブリッジを使う理由
ブリッジを使う主な目的は統合です。5つの異なる物理ポートにIPアドレスやDHCPサーバーを割り当てる代わりに、1つのBridgeインターフェースを作成し、そこにIPを割り当てて物理ポートを「メンバー」として追加します。
メリットは以下の通りです:
- 管理の簡素化: 多数のインターフェースではなく1つのインターフェースに対してファイアウォールルールやキューを適用可能。
- レイヤ2の透過性: 異なる物理ポート上の端末も同じスイッチ上にいるかのように通信できる。
- サービス提供: 複数の部屋やセクターにまたがって利用可能なPPPoEサーバーやホットスポットのホスティングに最適。
ブリッジ設定のステップバイステップ
ブリッジを設定するには「ブリッジ」コンテナの作成と「ポート」の割り当ての2つの手順があります。
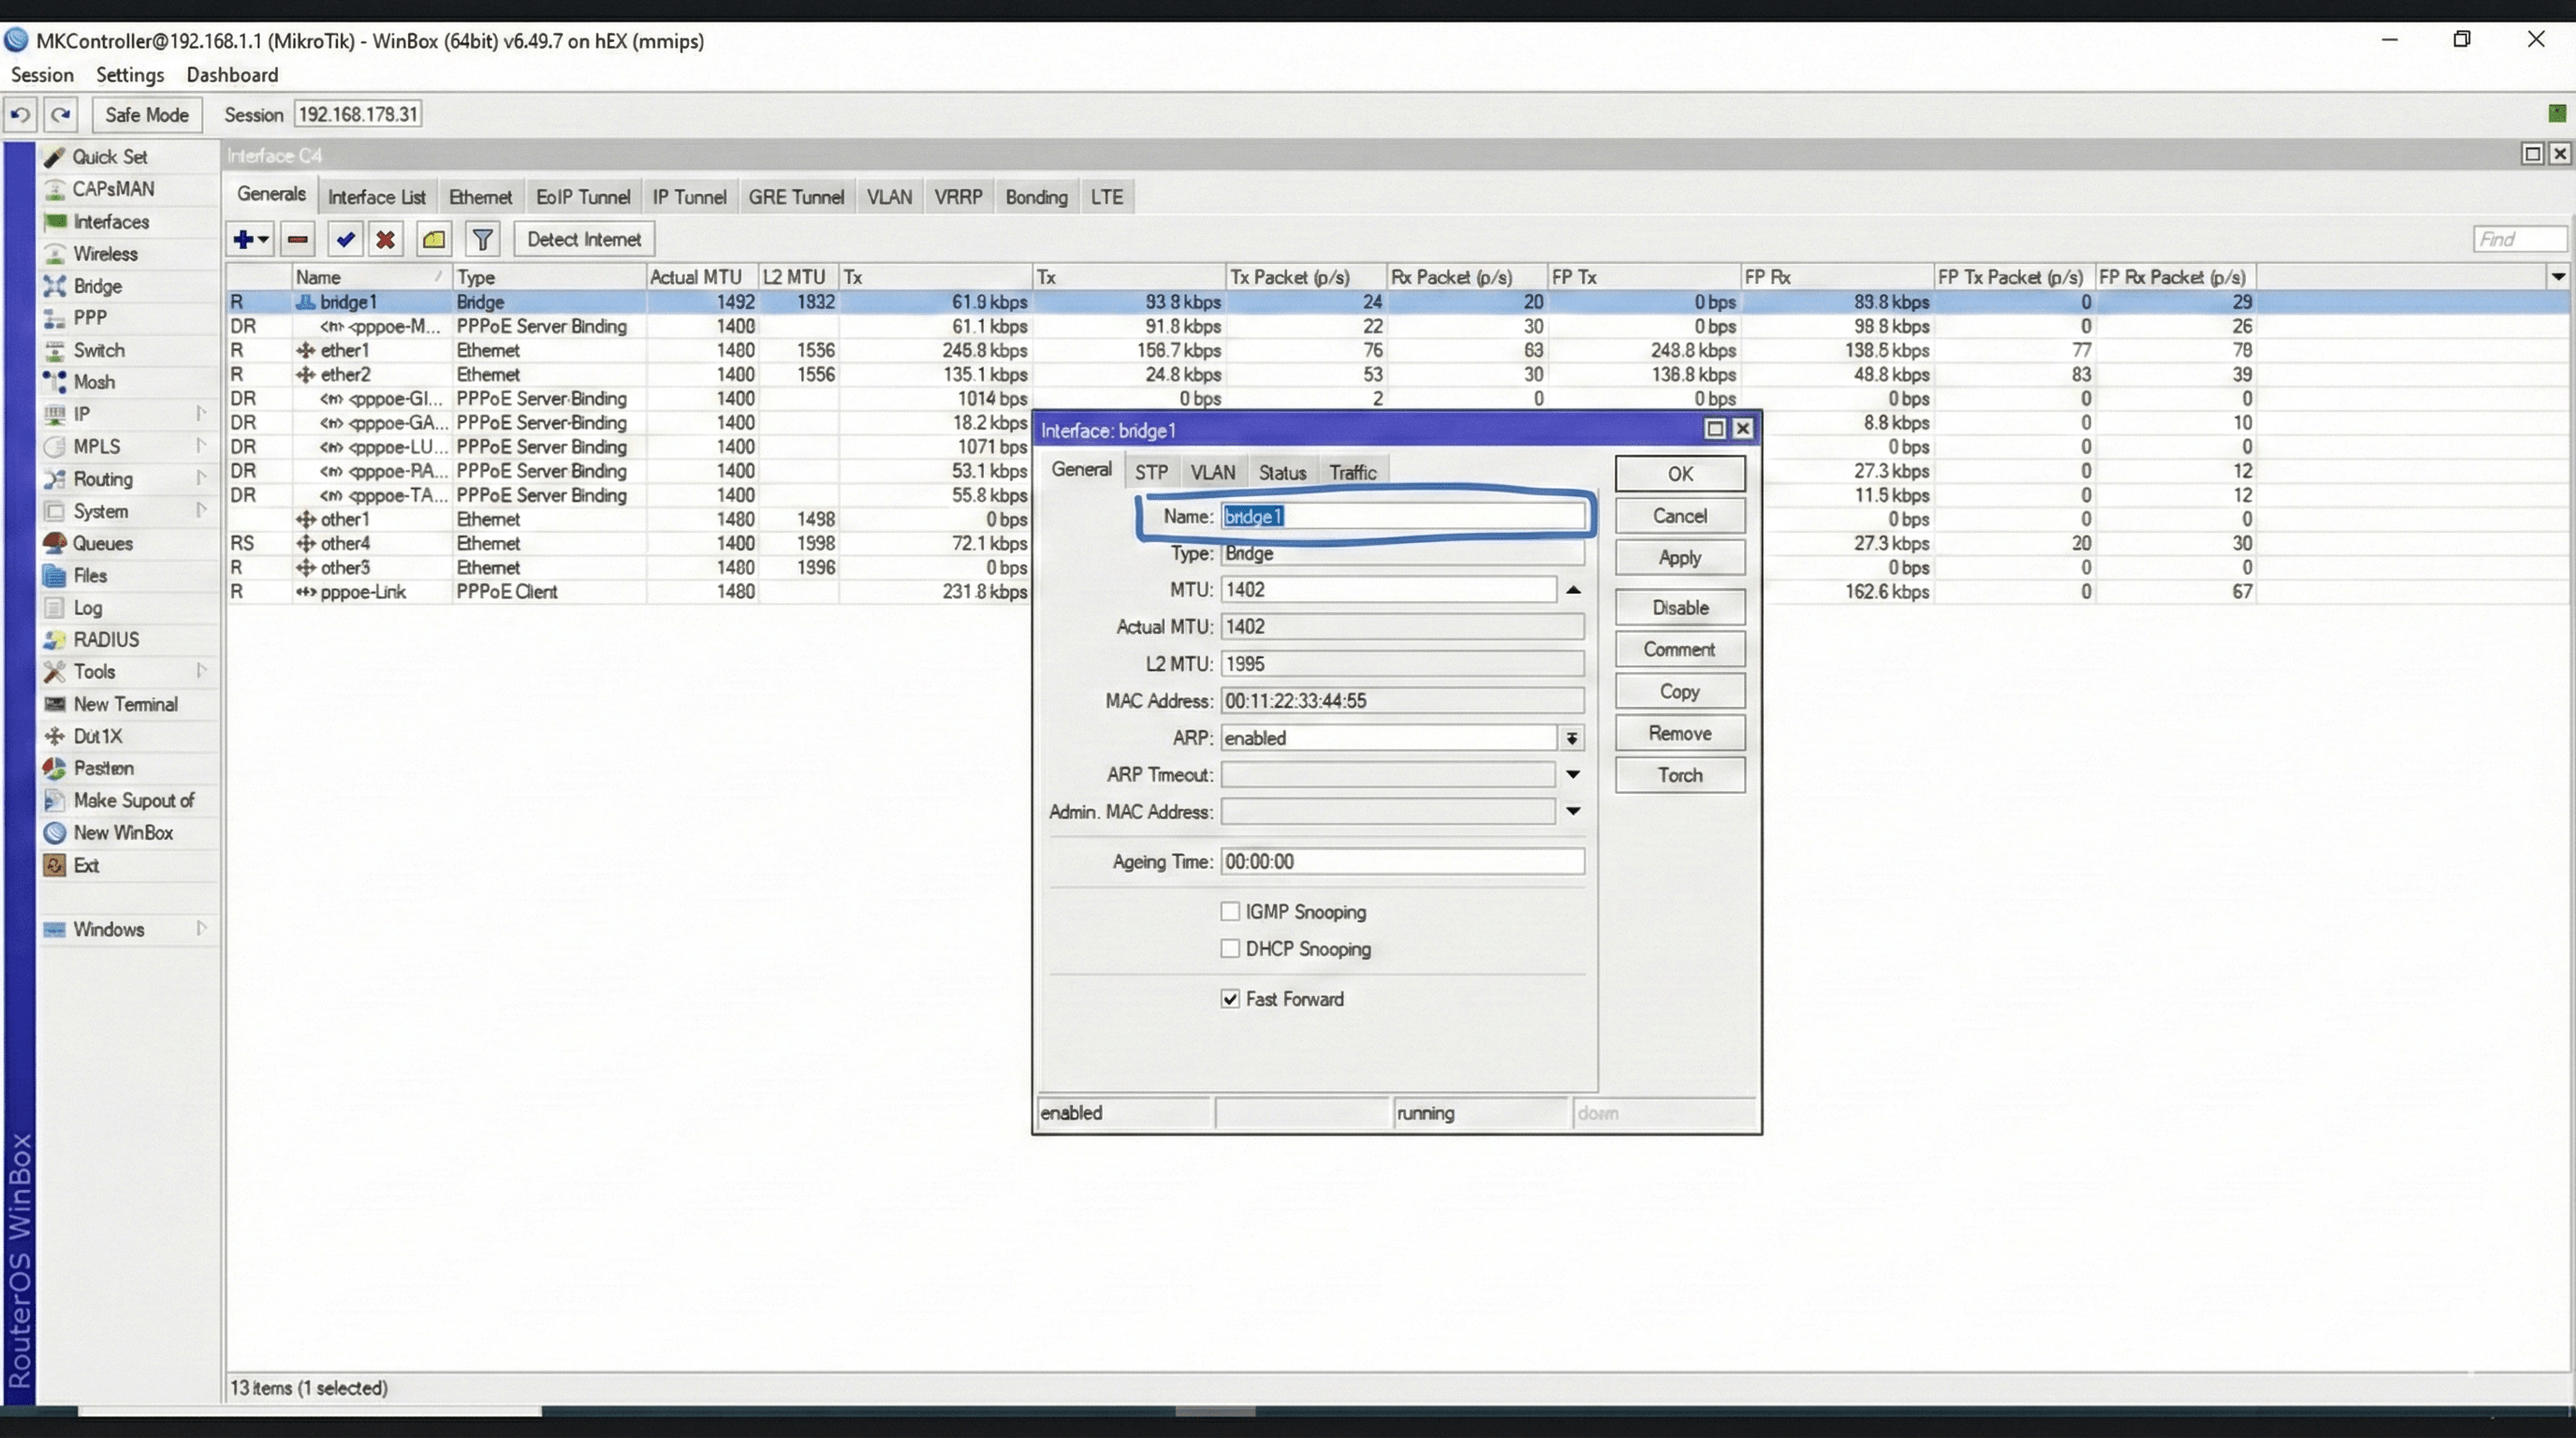
1. ブリッジインターフェースの作成
Winboxで左側のBridgeメニューを開きます。+アイコンをクリックしてbridge-lanなどわかりやすい名前を付けます。「STP」タブでRSTPなどのプロトコルを選択しネットワークループの防止を有効にします。
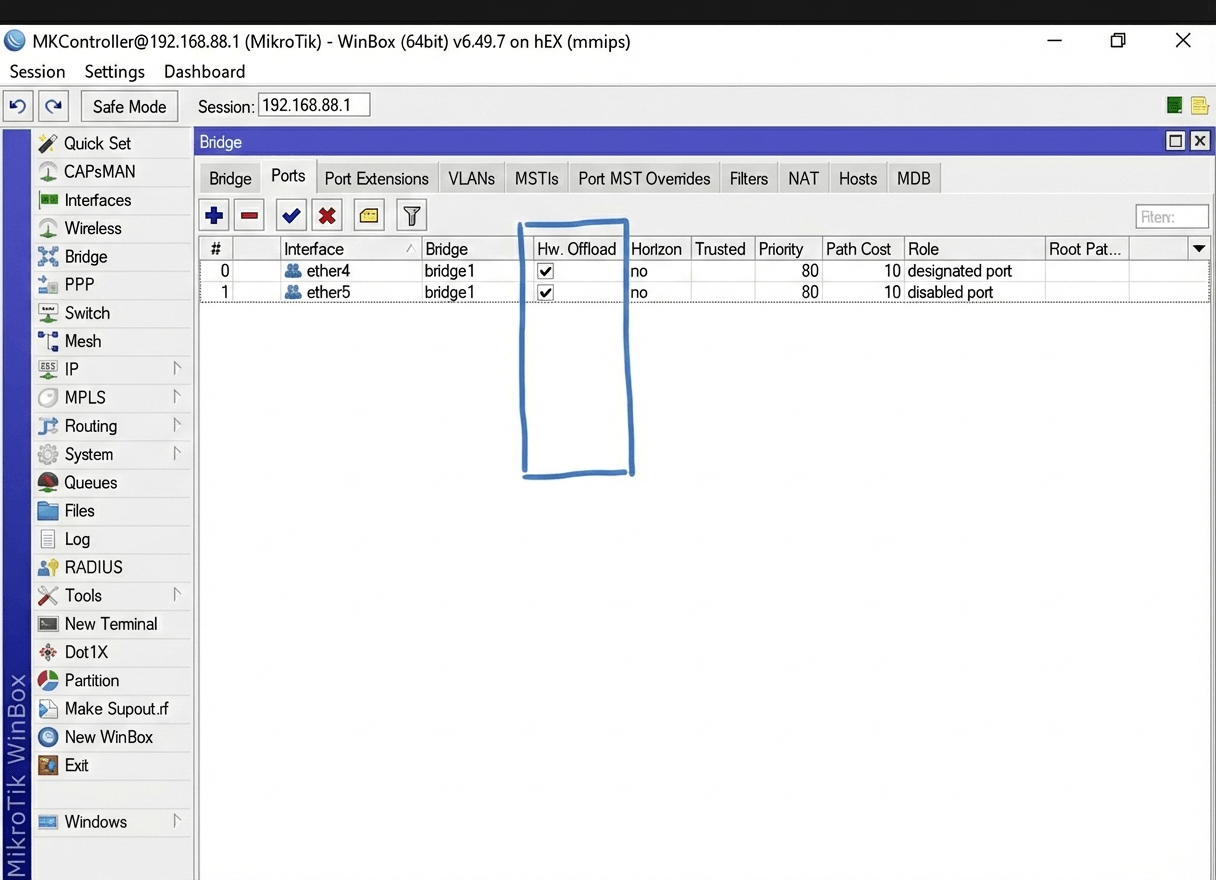
2. ブリッジへのポートの追加
ブリッジ作成後、同じウィンドウのPortsタブに切り替えます。
+をクリック。- 物理インターフェース(例:
ether2)を選択。 - 新しいブリッジ(
bridge-lan)に割り当て。 ether3やwlan1など他のポートも同様に追加。
注意: 接続中のポートをブリッジに追加すると、Winboxセッションが一時的に切断されることがあります。これはインターフェースがブリッジのロジックに切り替わる正常な動作です。
ハードウェアオフロード(Hw. Offload)
MikroTikブリッジ設定で最も重要な技術がハードウェアオフロードです。ポート設定で「Hw. Offload」を有効にすると、ポート間の通信がメインCPUではなく内蔵スイッチチップで処理されます。
無効にしたり、スイッチチップ非対応の複雑なブリッジフィルターを使うと、CPUがパケット処理を担い、特に高速リンクでレイテンシ増大やスループット低下を招きます。対応機能はMikroTik公式ドキュメントでご確認ください。
よくある問題点とトラブルシューティング
多くの技術者がブリッジが「動かない」と感じる理由は正しい手順を踏んでいないためです。代表的な問題は:
- IPアドレスの割り当て場所: IPは必ずブリッジインターフェースに割り当てます。物理ポート(例:
ether2)にIPを割り当てると接続が切れる可能性が高いです。 - DHCPサーバーの誤設定: DHCPサーバーもブリッジインターフェース上で動作させる必要があります。
- ネットワークループ: 同じブリッジの2つのポートをSTP未設定で同じ外部スイッチに接続するとネットワーク全体がクラッシュします。
MKControllerでのブリッジネットワーク管理
数百台のMikroTik機器を管理する場合、手動でのブリッジ設定は負担になります。そこで活躍するのがMKControllerとNatCloudです。NatCloudを使えば、CGNAT環境下でも任意のルーターのWebFigやWinboxをリモートで操作可能で、パブリックIP不要でブリッジ設定変更が行えます。
MKControllerの優位点: 全端末のブリッジインターフェース状態を一元監視、ポートダウン時アラート受信、主要設定変更前の自動バックアップが可能です。
VLANを含む複雑な環境やTR-069管理にも対応し、NatCloudの安定したリモートアクセス経路があれば、設定ミス時でも確実に通信機器に到達できます。NatCloud入門もぜひご覧ください。
MKControllerについて
この記事がMikroTikやインターネット環境の理解に役立てば幸いです!🚀
設定調整から混乱するネットワークの整理まで、MKControllerが皆様の管理をシンプルにします。
クラウド一元管理、自動セキュリティ更新、誰でも使えるダッシュボードで運用レベルをワンランク上げましょう。
👉 無料3日間トライアルはこちら - mkcontroller.comで、簡単操作のネットワーク管理を体感してください。