Tutorial
Block Traffic by Country on MikroTik
Block traffic to or from specific countries on MikroTik routers using IPDeny address lists and a single firewall drop rule.
Summary MikroTik RouterOS doesn’t have a built-in “block country X” toggle, but you can implement geographic blocking cleanly using IPDeny zone files, an Address List, and a single firewall filter rule. This guide walks through the four steps: download the country block list, format it for RouterOS, import via the Winbox terminal, and create the drop rule. The result blocks all traffic to (or from) the chosen country with one rule, and updates easily as IP allocations shift.
How do you block country traffic on MikroTik?
To block traffic to a specific country on MikroTik, you build an address list of every IP block allocated to that country, then add a firewall drop rule that matches the address list. RouterOS doesn’t ship a “Block Country X” button, but the combination of Address Lists and Firewall Filters reproduces the same functionality with one drop rule and a list you can refresh quarterly.
The data source is the key piece. IPDeny publishes aggregated country zone files updated frequently and free of charge, so you don’t have to maintain the IP allocations yourself. The workflow is: download the zone file, paste it into a spreadsheet that prefixes each line with a RouterOS command, paste the resulting commands into the router’s terminal, then add one firewall filter rule that drops anything matching the address list. The whole thing takes about fifteen minutes per country once you’ve done it once.
Step 1: Source the IP blocks from IPDeny
The country zone files at IPDeny are aggregated CIDR blocks per country, updated on a regular schedule.
- Open ipdeny.com and navigate to the IP Country Blocks section.
- Locate the country you want to block.
- Download the zone file — typically a
.txtcontaining one CIDR block per line (e.g.,1.2.3.0/24).
IP allocations shift over time as carriers transfer blocks between regions. Plan to refresh the list quarterly so you don’t end up blocking new legitimate IPs or missing reassigned ones.

Step 2: Format the data for RouterOS
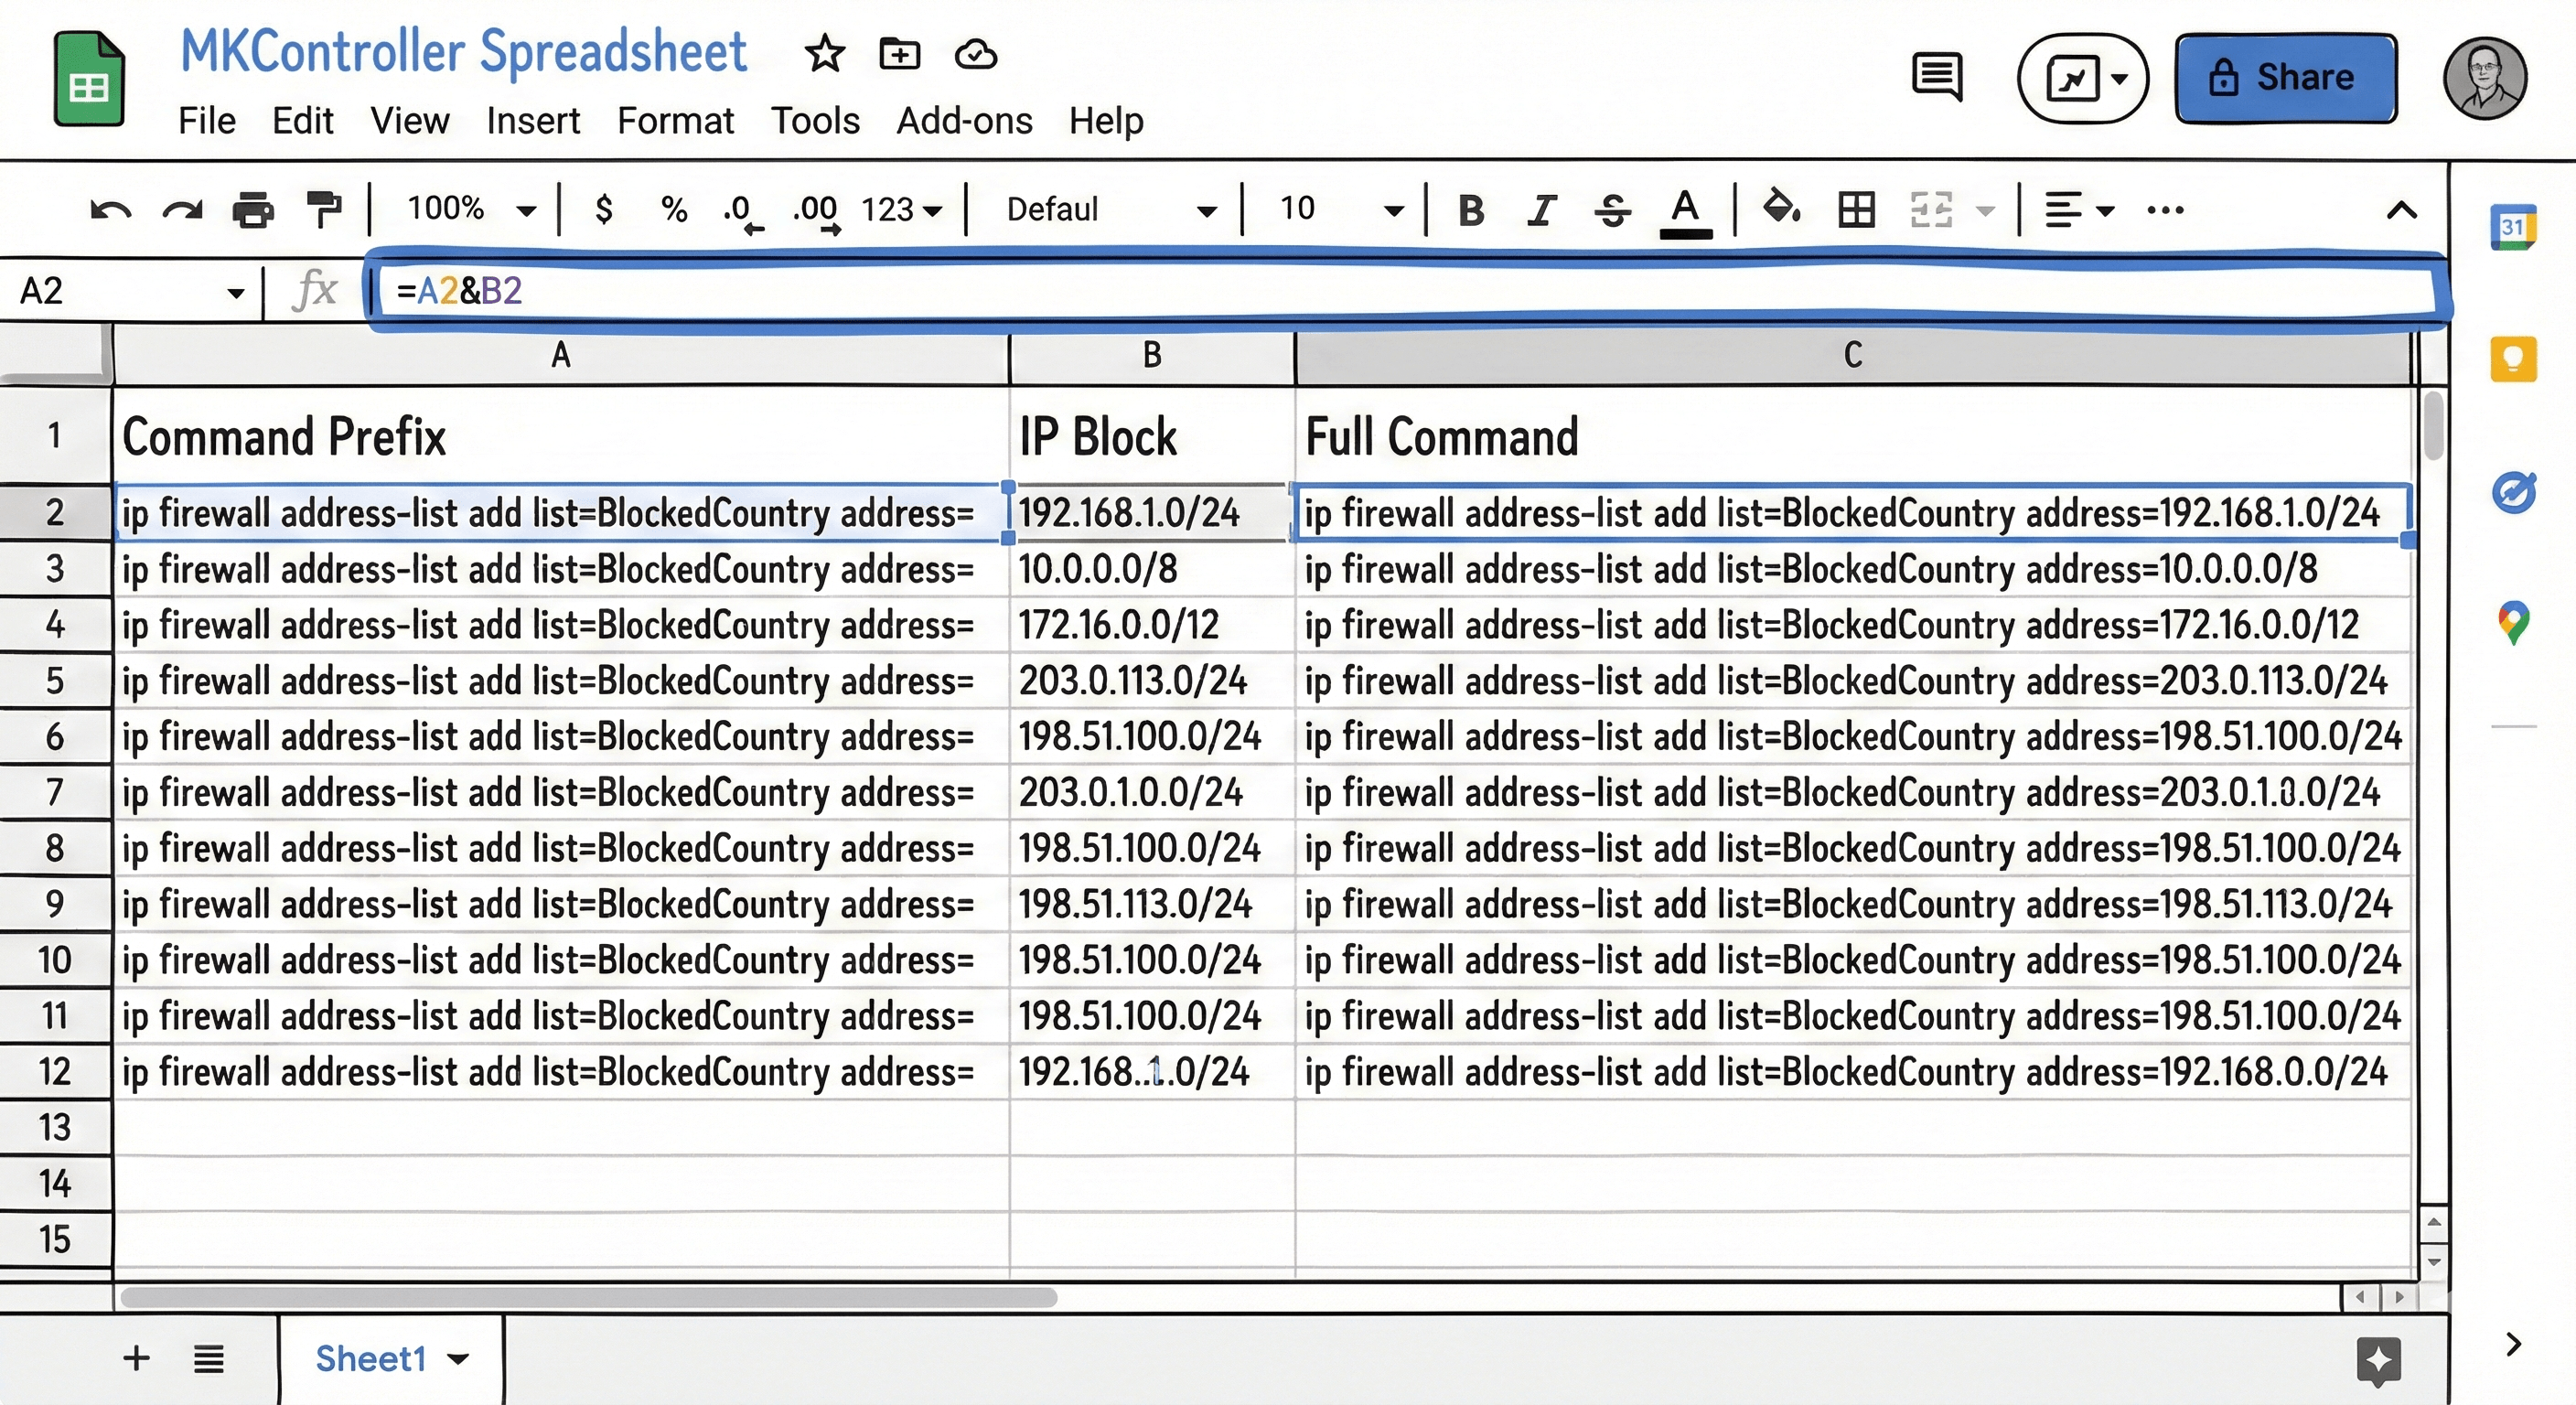
The zone file is raw CIDRs; the router expects each line to be a full RouterOS command. A spreadsheet handles the formatting cleanly:
- Open Excel, Google Sheets, or LibreOffice Calc.
- In Column B, paste the CIDR list from the zone file.
- In Column A, enter the command prefix for every row:
/ip firewall address-list add list=BlockedCountry address= - In Column C, use a concatenation formula to combine:
=A1 & B1 - Drag the formula down to cover every row.
Column C now contains a complete list of RouterOS commands, one per CIDR block, ready to paste into the router.
Step 3: Import the address list
- Copy the generated commands from Column C in the spreadsheet.
- Open Winbox and connect to the MikroTik router.
- Open a New Terminal window.
- Paste the commands. For a large country zone file, the paste can take several seconds to process — let it finish.
Verify the import by opening IP → Firewall → Address Lists. You should see thousands of entries under the list name (BlockedCountry). If the count looks dramatically lower than the line count from the zone file, check for spreadsheet formatting issues — extra spaces or missing prefixes will cause silent failures during paste.
Step 4: Create the firewall drop rule
Now tell the router what to do with traffic matching the list.
- Go to
IP → Firewall → Filter Rules. - Click
+to create a new rule.
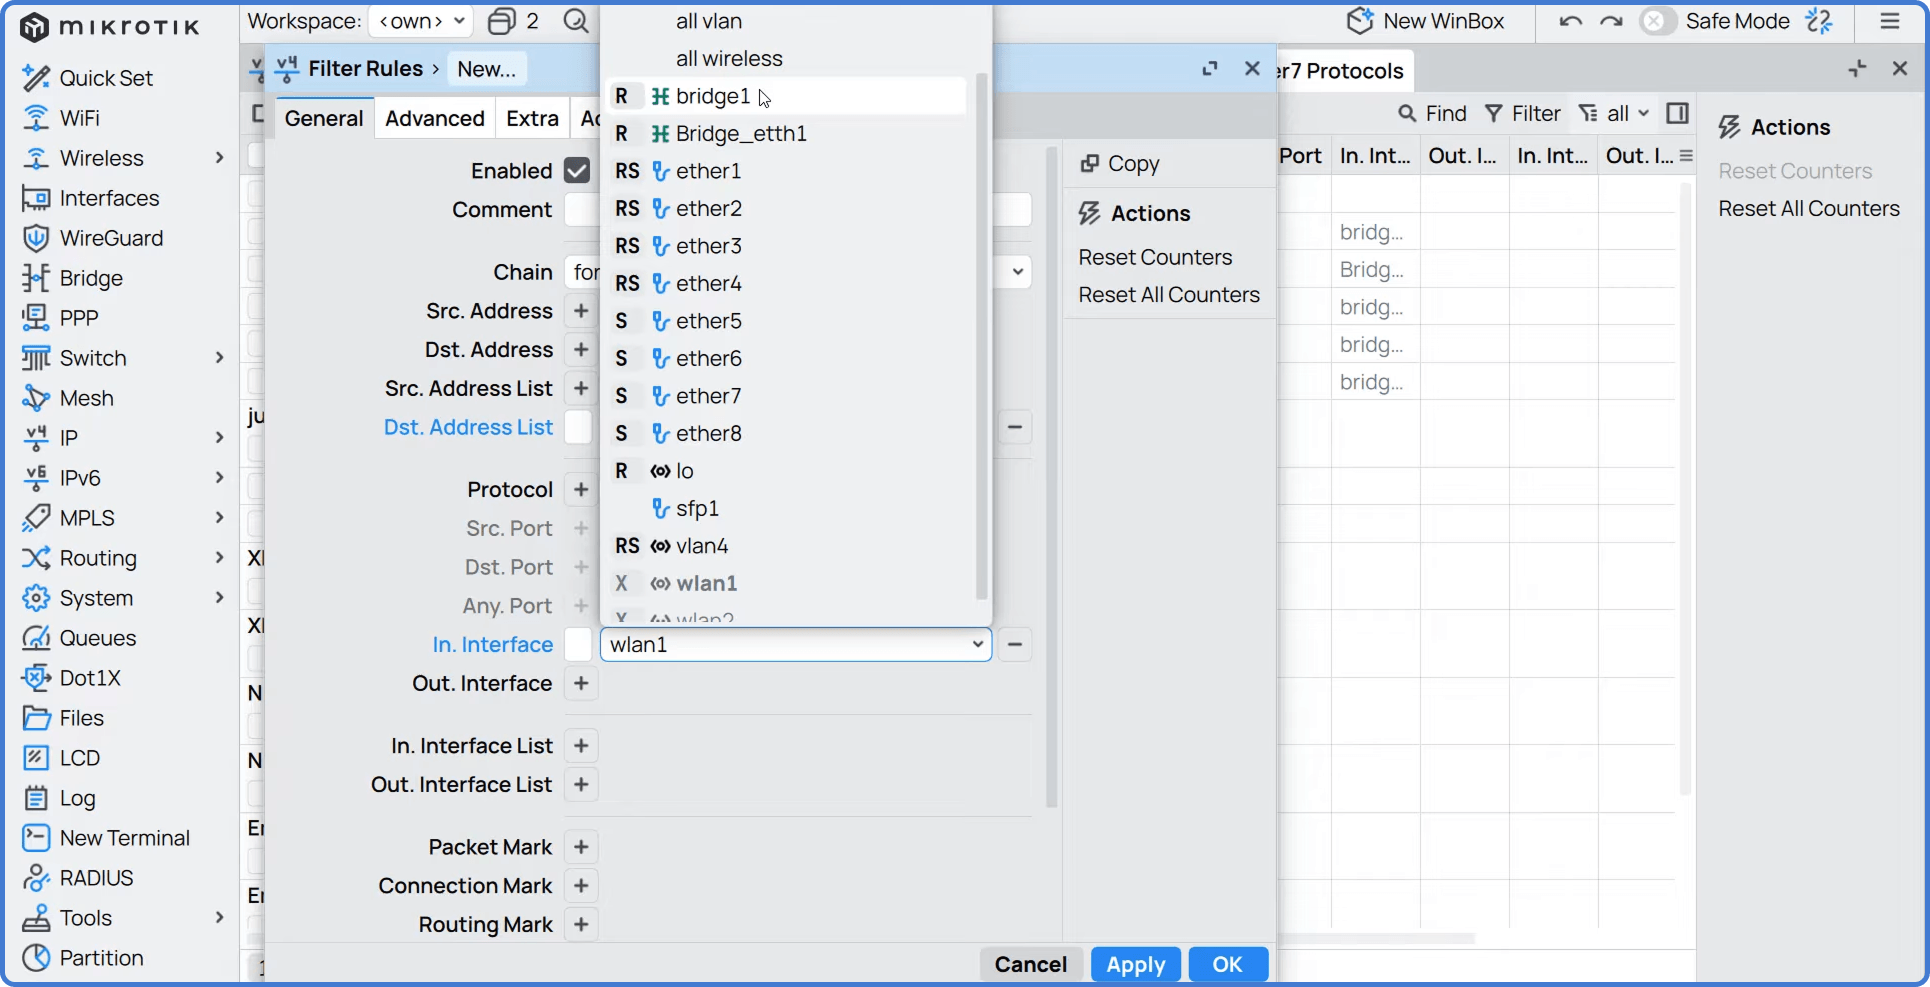
General tab:
- Chain:
forward(traffic passing through the router, LAN to internet) - In. Interface: the LAN bridge or interface
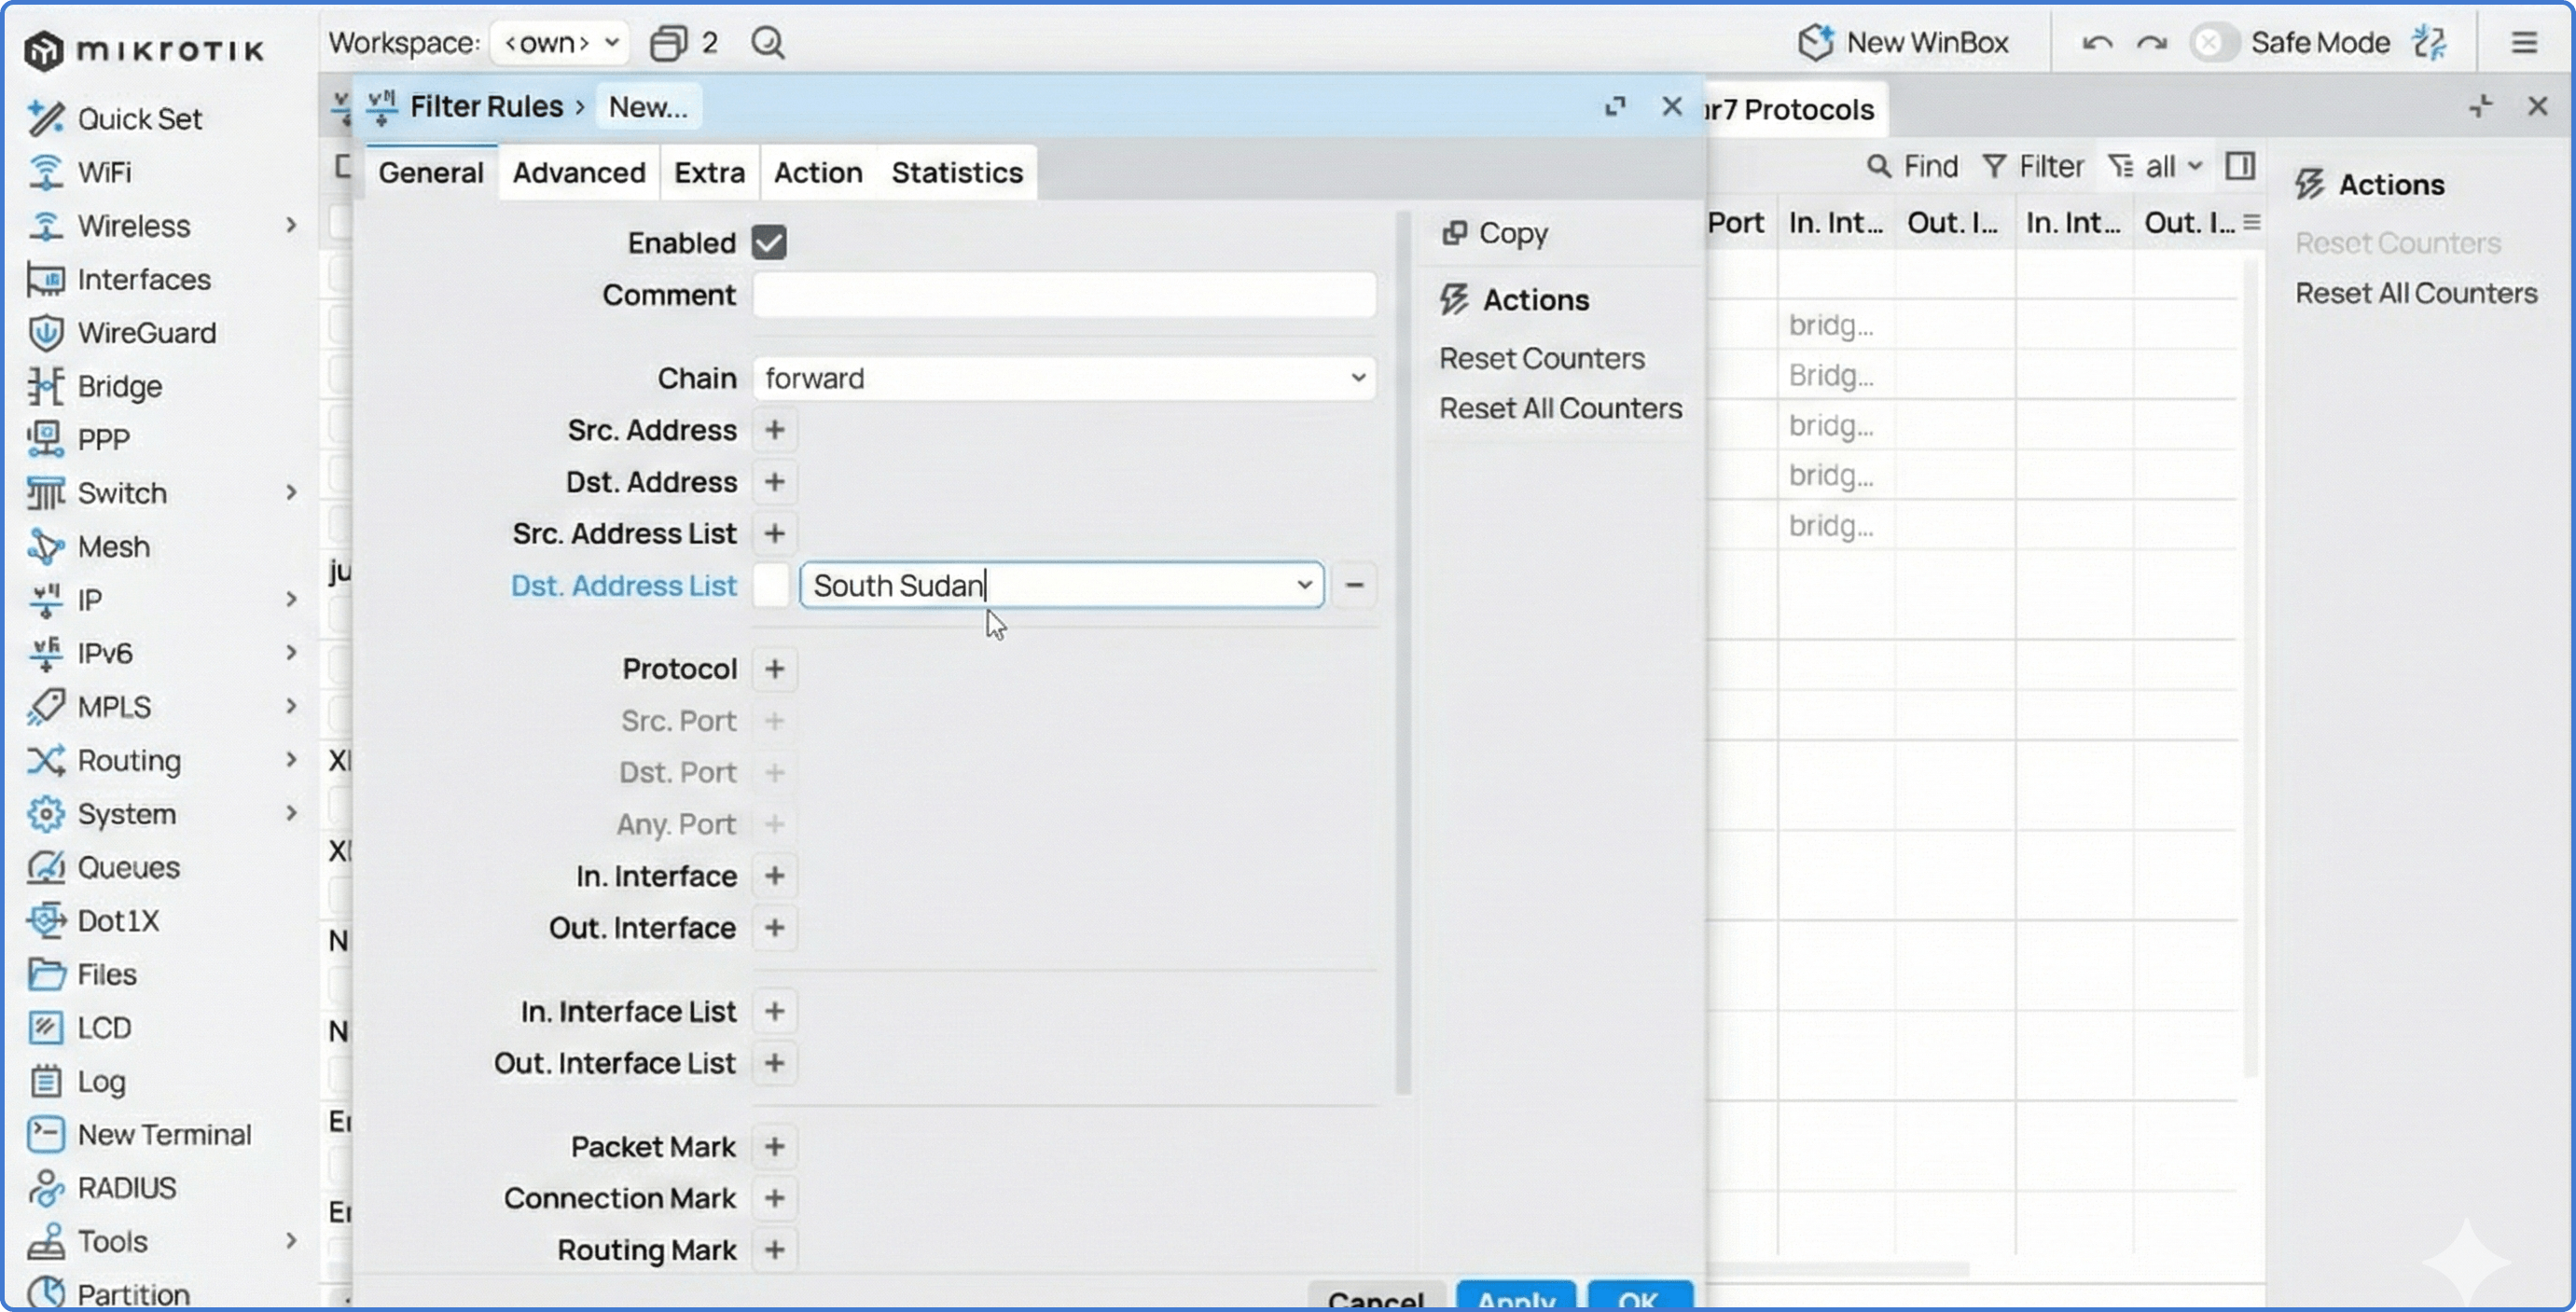
Advanced tab:
- Dst. Address List:
BlockedCountry
Action tab:
- Action:
drop
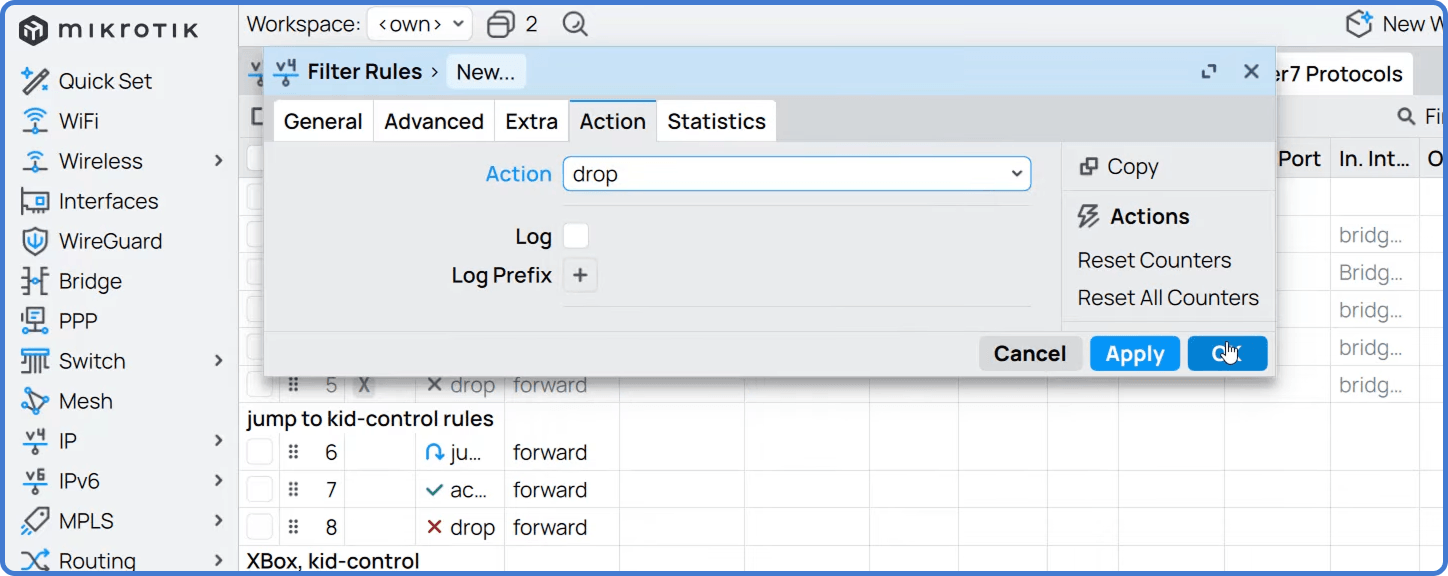
Click OK. Move the rule high in the firewall filter list — typically near the top of the forward chain — so it processes before any accept all rules that would otherwise short-circuit it.
To block traffic coming from that country as well, create a second rule with Chain: input (for traffic destined to the router itself) or Chain: forward (for traffic destined to your LAN) and set the Src. Address List to BlockedCountry. The two rules together give you fully bidirectional geographic blocking.
For complementary firewall and access controls, see our guides to MikroTik NAT configuration and MikroTik AdList DNS blocking.
Tips
- Use a different address-list name per country (
BlockedCountry_CN,BlockedCountry_RU) when blocking multiple regions. It makes auditing the rule set much easier later. - Schedule a quarterly script that re-downloads the zone files and refreshes the address list. Set-and-forget rule sets drift quickly as allocations change.
- Log dropped traffic in the firewall rule (under the Action tab, enable
logwith a prefix) for the first week. The volume tells you whether the policy is doing useful work or quietly blocking nothing.
Take the next step
Maintaining country blocklists on one MikroTik is feasible with a spreadsheet and a quarterly calendar reminder. Maintaining them across dozens or hundreds of routers — each potentially needing slightly different country policies for different customers — is where the manual approach falls apart.
MKController pushes the same address lists and firewall rules to every router in your inventory, refreshes the IPDeny data centrally, and surfaces drift between policy templates and what’s actually on each device. NATCloud handles the remote-access piece when CGNAT or strict customer firewalls would otherwise block direct management.