How to Configure DNS over HTTPS (DoH) on MikroTik RouterOS v7
Summary Protect your browsing privacy by implementing DNS over HTTPS (DoH) on MikroTik RouterOS v7. This comprehensive guide walks you through certificate installation, secure resolver configuration using Cloudflare, and verification steps to ensure all DNS queries remain encrypted and hidden from ISPs or local network attackers.
How to Configure DNS over HTTPS (DoH) on MikroTik RouterOS v7
Privacy is no longer a luxury in the modern digital landscape; it is a necessity. By default, most routers use standard DNS, which transmits your website requests in plain text. This means your Internet Service Provider (ISP), or even an attacker sitting on your local Wi-Fi, can monitor every domain you visit. To solve this, DNS over HTTPS (DoH) encrypts these requests using the same protocol as secure web browsing (HTTPS/TLS).
Implementing DoH on your MikroTik router ensures that the “phonebook” of the internet stays private. Instead of sending requests over vulnerable UDP port 53, they are wrapped in an encrypted tunnel via port 443.
Technical Prerequisites
Before diving into the configuration, there are critical elements you must verify to ensure the encrypted connection doesn’t fail.
1. Accurate System Clock
Since DoH relies on SSL/TLS certificates, your router’s time must be correct. If the clock is wrong, the certificate validation will fail, and your DNS will stop working entirely.
- Go to System > Clock and ensure the date and time are accurate.
- Recommendation: Use an NTP client to keep the time synchronized automatically.
2. RouterOS Version
This guide is specifically for RouterOS v7. While some DoH features existed in later v6 versions, v7 offers the stability and modern cipher support required for reliable DoH connections with providers like Cloudflare and Google.
Step 1: Downloading and Importing Certificates
To verify that the Cloudflare server is who it claims to be, your MikroTik needs a Root Certificate Authority (CA). Without this, the router cannot establish a secure “handshake” with the DNS server.
- Open the Terminal in WinBox.
- Use the
fetchcommand to download the Root CA:Terminal window /tool fetch url=[https://ssl.com/repo/certs/SSLcomRootCertificationAuthorityECC.pem](https://ssl.com/repo/certs/SSLcomRootCertificationAuthorityECC.pem) - Import the file into your router’s certificate store:
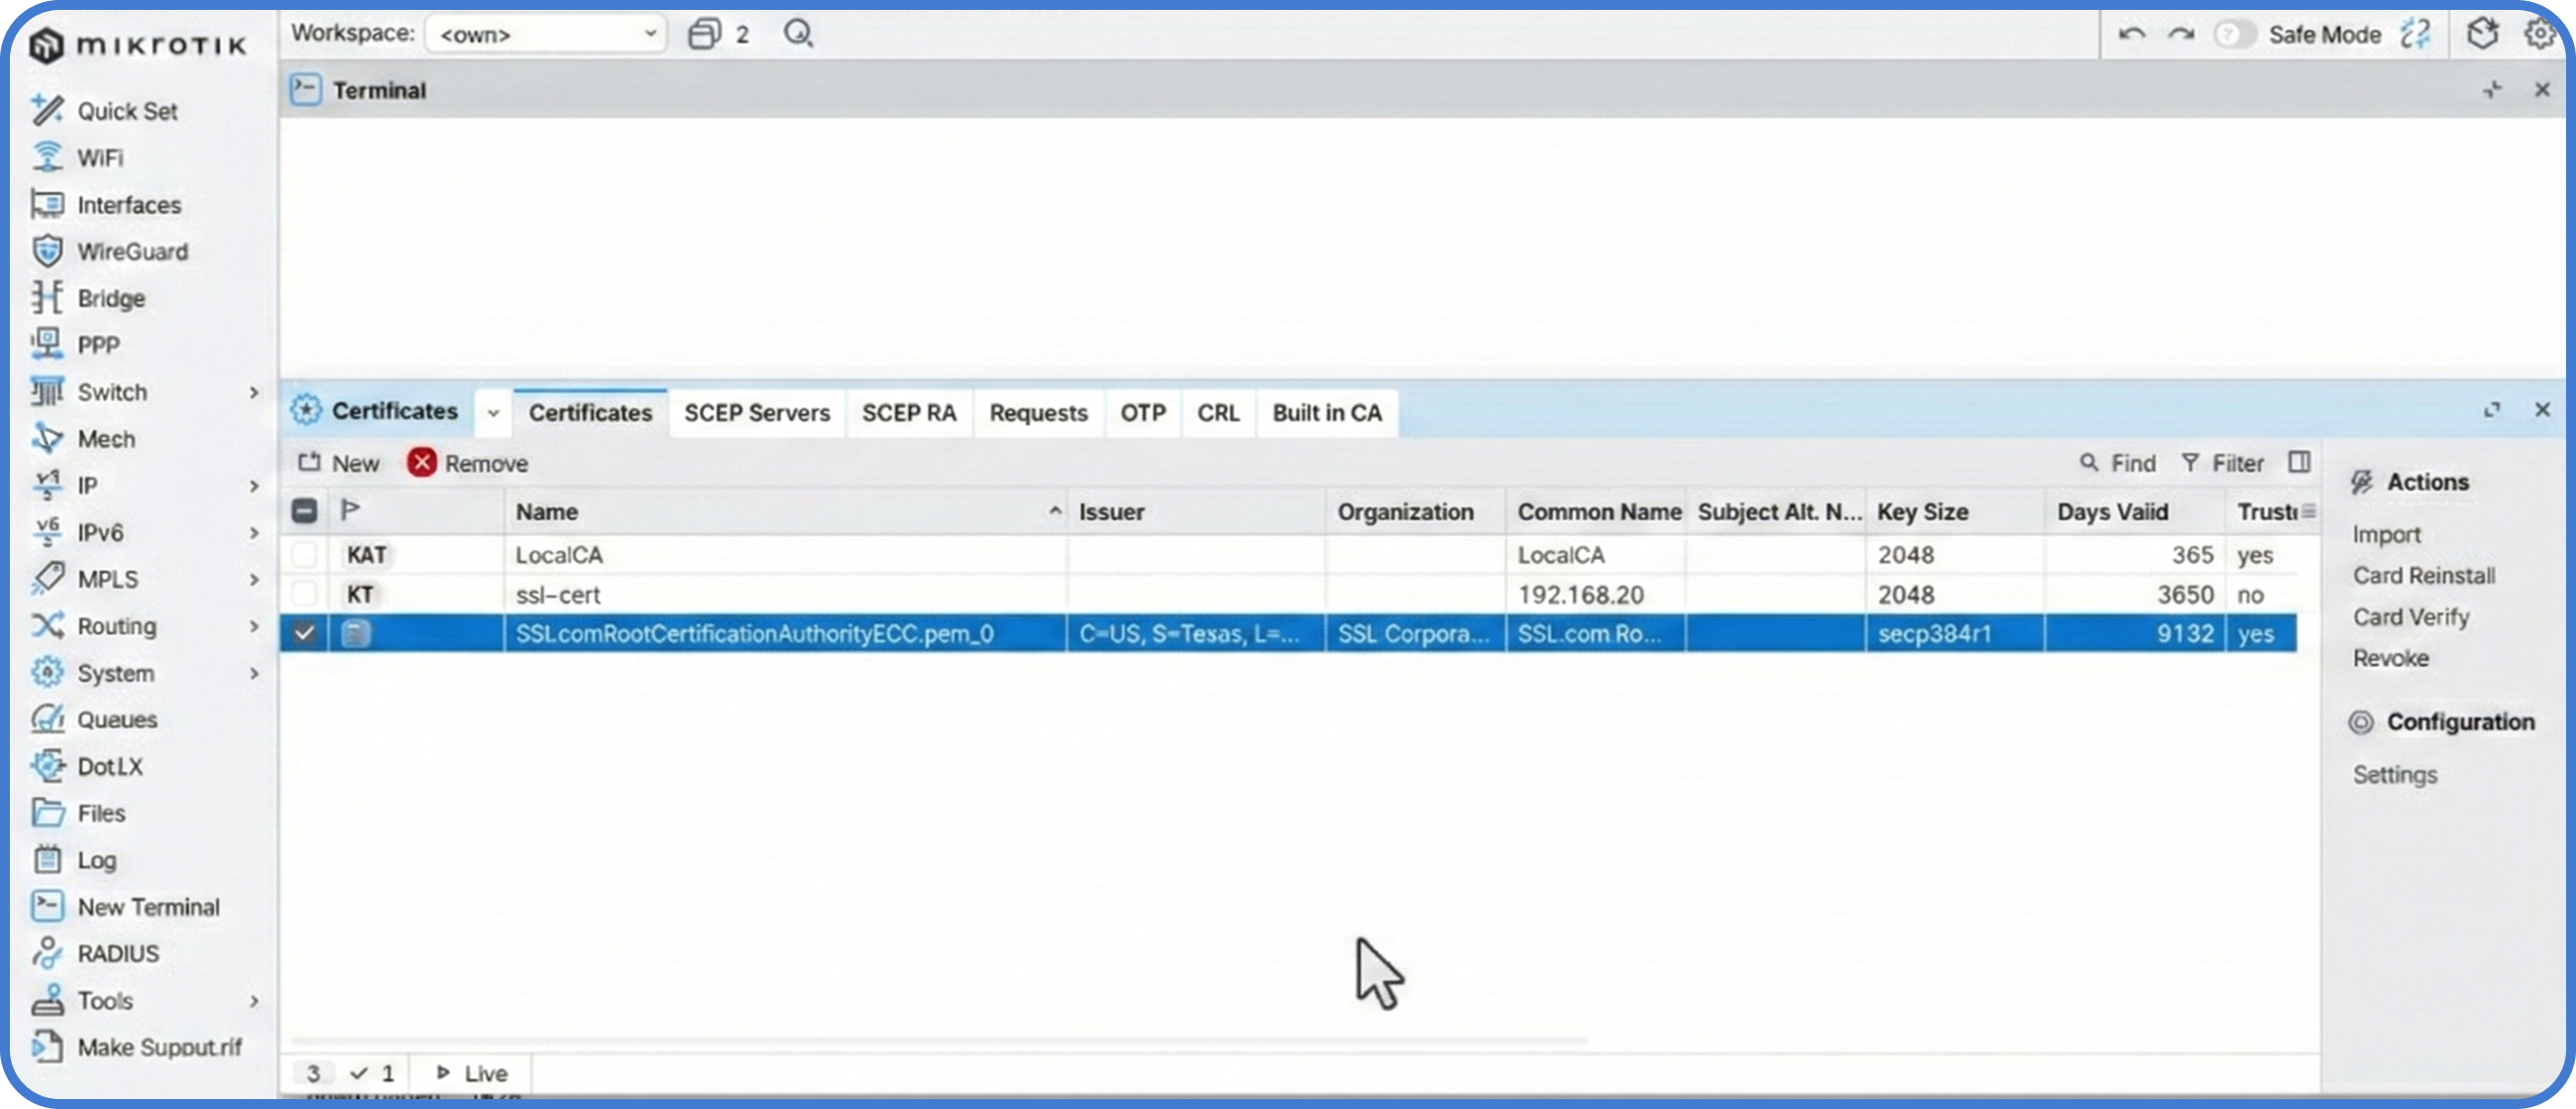
Terminal window /certificate import file-name=SSLcomRootCertificationAuthorityECC.pem passphrase="" - Confirm the import by going to System > Certificates. You should see the CA listed, confirming your router now trusts the endpoint.
Step 2: Configuring the DoH Resolver
With the certificate in place, we can now configure the DNS settings. We will use Cloudflare (1.1.1.1) as it is one of the fastest and most privacy-focused providers available.
- Navigate to IP > DNS.
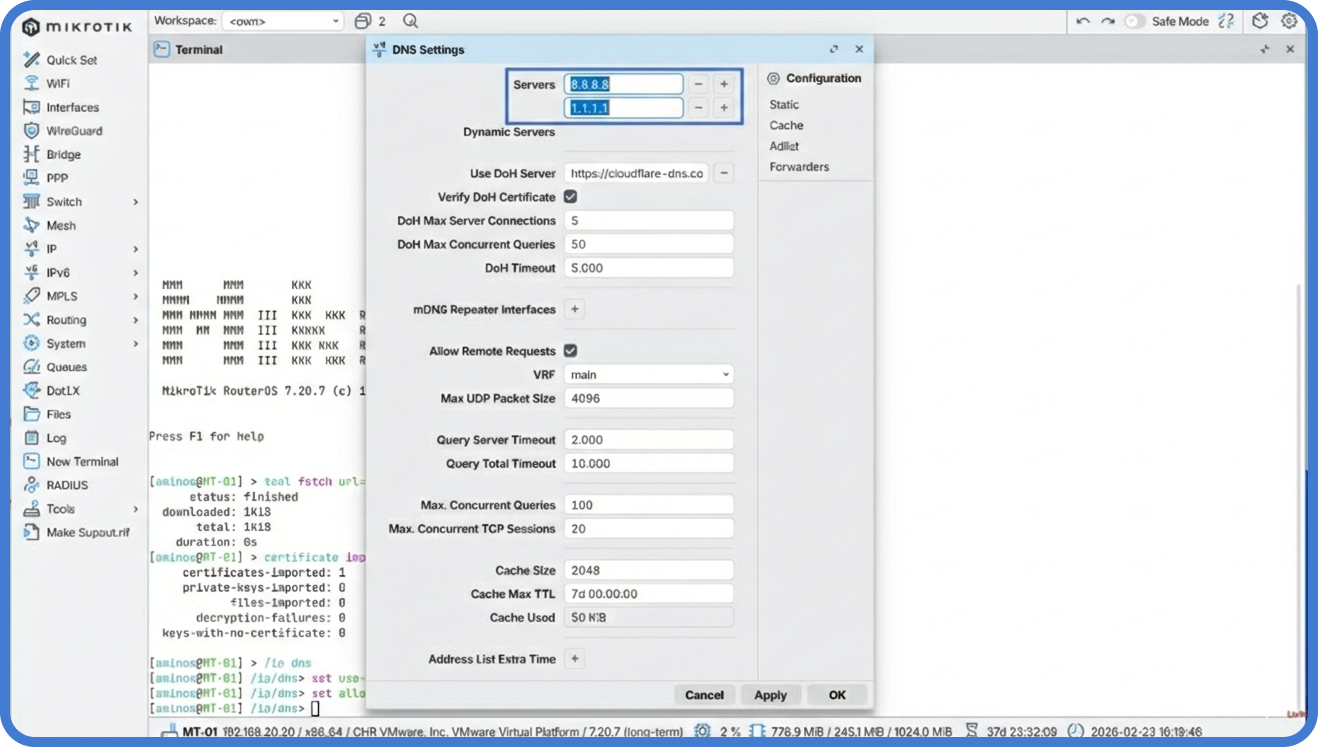
- In the Use DoH Server field, enter the following URL:
https://1.1.1.1/dns-query - Check the box Verify DoH Certificate. This ensures the router checks the certificate we just imported.
- Ensure Allow Remote Requests is checked. This allows devices on your network to use the MikroTik as their secure DNS gateway.
- Critical Cleanup: For maximum security, you should point your client devices to use the MikroTik’s IP as their DNS server rather than external IPs.
Step 3: Client Verification
Even if the router is configured, you must ensure your local devices are actually using the encrypted path.
- On your computer, ensure your DNS is set to the IP address of your MikroTik router.
- Open your browser and go to Cloudflare’s Help Page.
- Wait for the test to finish. Look for the line: “Using DNS over HTTPS (DoH)”. It should display a Yes.

Troubleshooting and Monitoring
If you run into issues where websites won’t load, you can monitor the DoH traffic through the MikroTik logs to identify handshake failures or connection timeouts.
- Log Check: Run the following command in the terminal to see DoH-specific events:
Terminal window /log print where message~"doh" - Common Error: If the logs show “SSL error,” double-check your System > Clock. A time difference of just a few minutes can cause the certificate to appear invalid.
Where MKController helps: Scaling these privacy settings across multiple branch offices or client sites is a major challenge. MKController allows you to push these specific DoH configurations and Root CA certificates to your entire inventory of routers at once. Furthermore, if a certificate expires or the clock drifts on a remote unit, our dashboard provides immediate alerts so you can fix the issue before the customer loses connectivity.
About MKController
Hope the insights above helped you navigate your Mikrotik and Internet universe a little better! 🚀
Whether you’re fine-tuning configs or just trying to bring some order to the network madness, MKController is here to make your life simpler.
With centralized cloud management, automated security updates, and a dashboard that anyone can master, we’ve got what it takes to upgrade your operation.
👉 Start your free 3-day trial now at mkcontroller.com — and see what effortless network control really looks like.