How to Install MikroTik RouterOS on VMware Workstation
Summary Learn how to install and configure MikroTik RouterOS (CHR) on VMware Workstation. This guide covers network interface planning, virtual machine creation using VMDX files, and initial access via WinBox for a complete virtual lab setup.
How to Install MikroTik RouterOS on VMware Workstation
Virtualizing MikroTik RouterOS is an excellent way to build a lab environment, test complex routing configurations, or even run a production-grade Cloud Hosted Router (CHR). By using VMware Workstation, you can simulate a realistic network topology directly on your PC.
Designing the Virtual Network
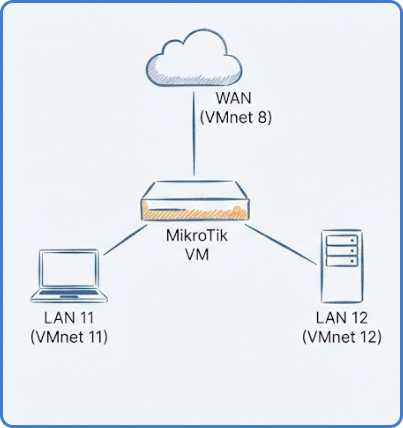
Before diving into the installation, it is crucial to plan your network interfaces. A standard lab setup usually involves at least three interfaces:
- Ethernet 1 (WAN): Assigned to VMnet 8 (NAT mode). This provides the router with internet access through your host machine.
- Ethernet 2 (LAN 11): Assigned to VMnet 11 (Host-only). This simulates your first internal local network.
- Ethernet 3 (LAN 12): Assigned to VMnet 12 (Host-only). This serves as a second subnet for testing inter-VLAN routing or segmentation.
Using separate VMnets allows you to isolate traffic and manage virtual machines as if they were connected to physical switches.
Prerequisites and Downloads
To get started, you will need two essential files from the official MikroTik download page:
- WinBox: The primary graphical utility for managing RouterOS.
- Cloud Hosted Router (CHR): Specifically, download the VMDX image for VMware. This format is pre-configured for virtual environments, making the setup much faster than a standard ISO install.
Tip: We recommend using the “Stable” release (e.g., version 7.x) to ensure the best balance between features and reliability during your tests.
Configuring VMware Virtual Networks
Open the Virtual Network Editor in VMware to prepare your subnets. You should ensure that VMnet 8 is set to NAT. For your LANs (VMnet 11 and 12), set them to Host-only.
It is a best practice to assign static IP ranges to these adapters on your host machine. For example, if VMnet 11 is your LAN, giving it a dedicated subnet helps identify the traffic flow when you later configure DHCP or static routing inside RouterOS.
Creating the MikroTik Virtual Machine
Follow these steps to build the VM container:
- Create a New VM: Select “Custom” configuration and choose “Other” for the Guest Operating System.
- Hardware Specs: Allocate at least 512 MB of RAM. While RouterOS is lightweight, extra memory helps with stability when running multiple services.
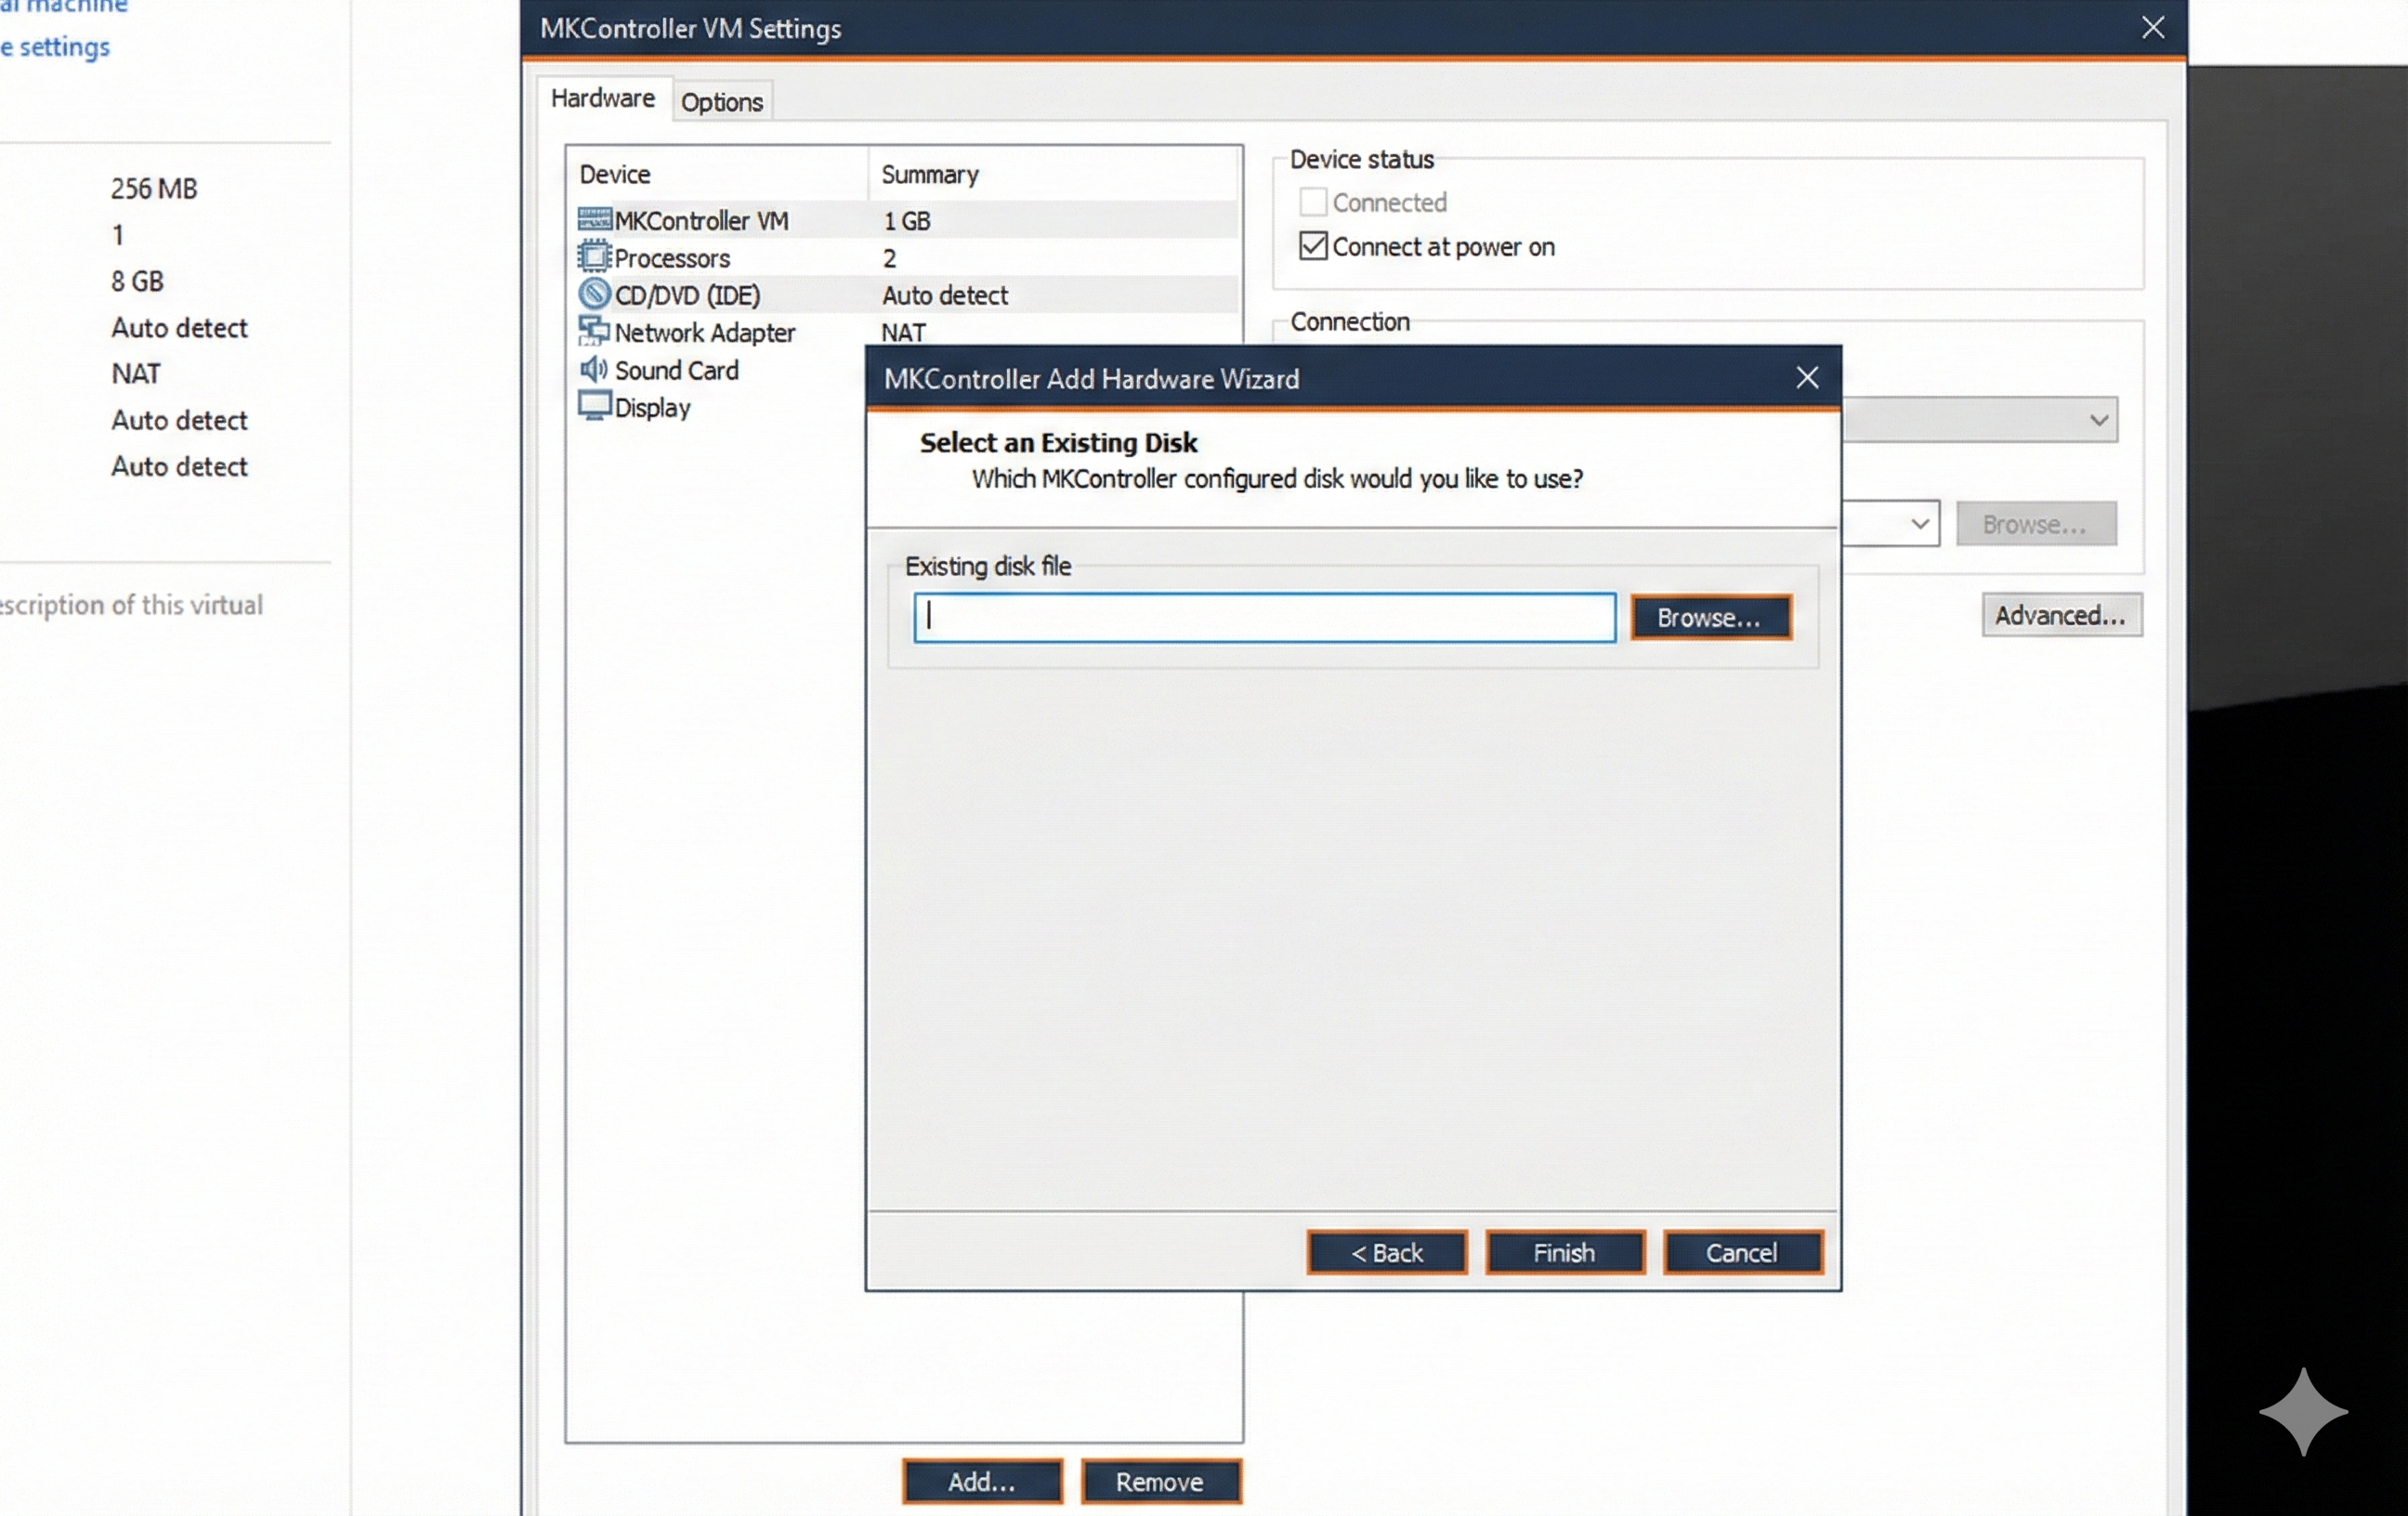
- Storage: Remove the default virtual disk created by VMware. Instead, add a new Hard Disk and select “Use an existing virtual disk”. Point it to the
.vmdxfile you downloaded earlier. - Network Adapters: Add three network adapters. Ensure the first is mapped to VMnet 8, the second to VMnet 11, and the third to VMnet 12.
Initial Setup and WinBox Connection
Power on the virtual machine. The default credentials are:
- User:
admin - Password: (Keep blank)
Upon first login, the system will ask if you want to view the software license; you can skip this by pressing n. Immediately after, RouterOS will prompt you to set a strong password. Do not skip this step, as security should be your priority even in a lab.
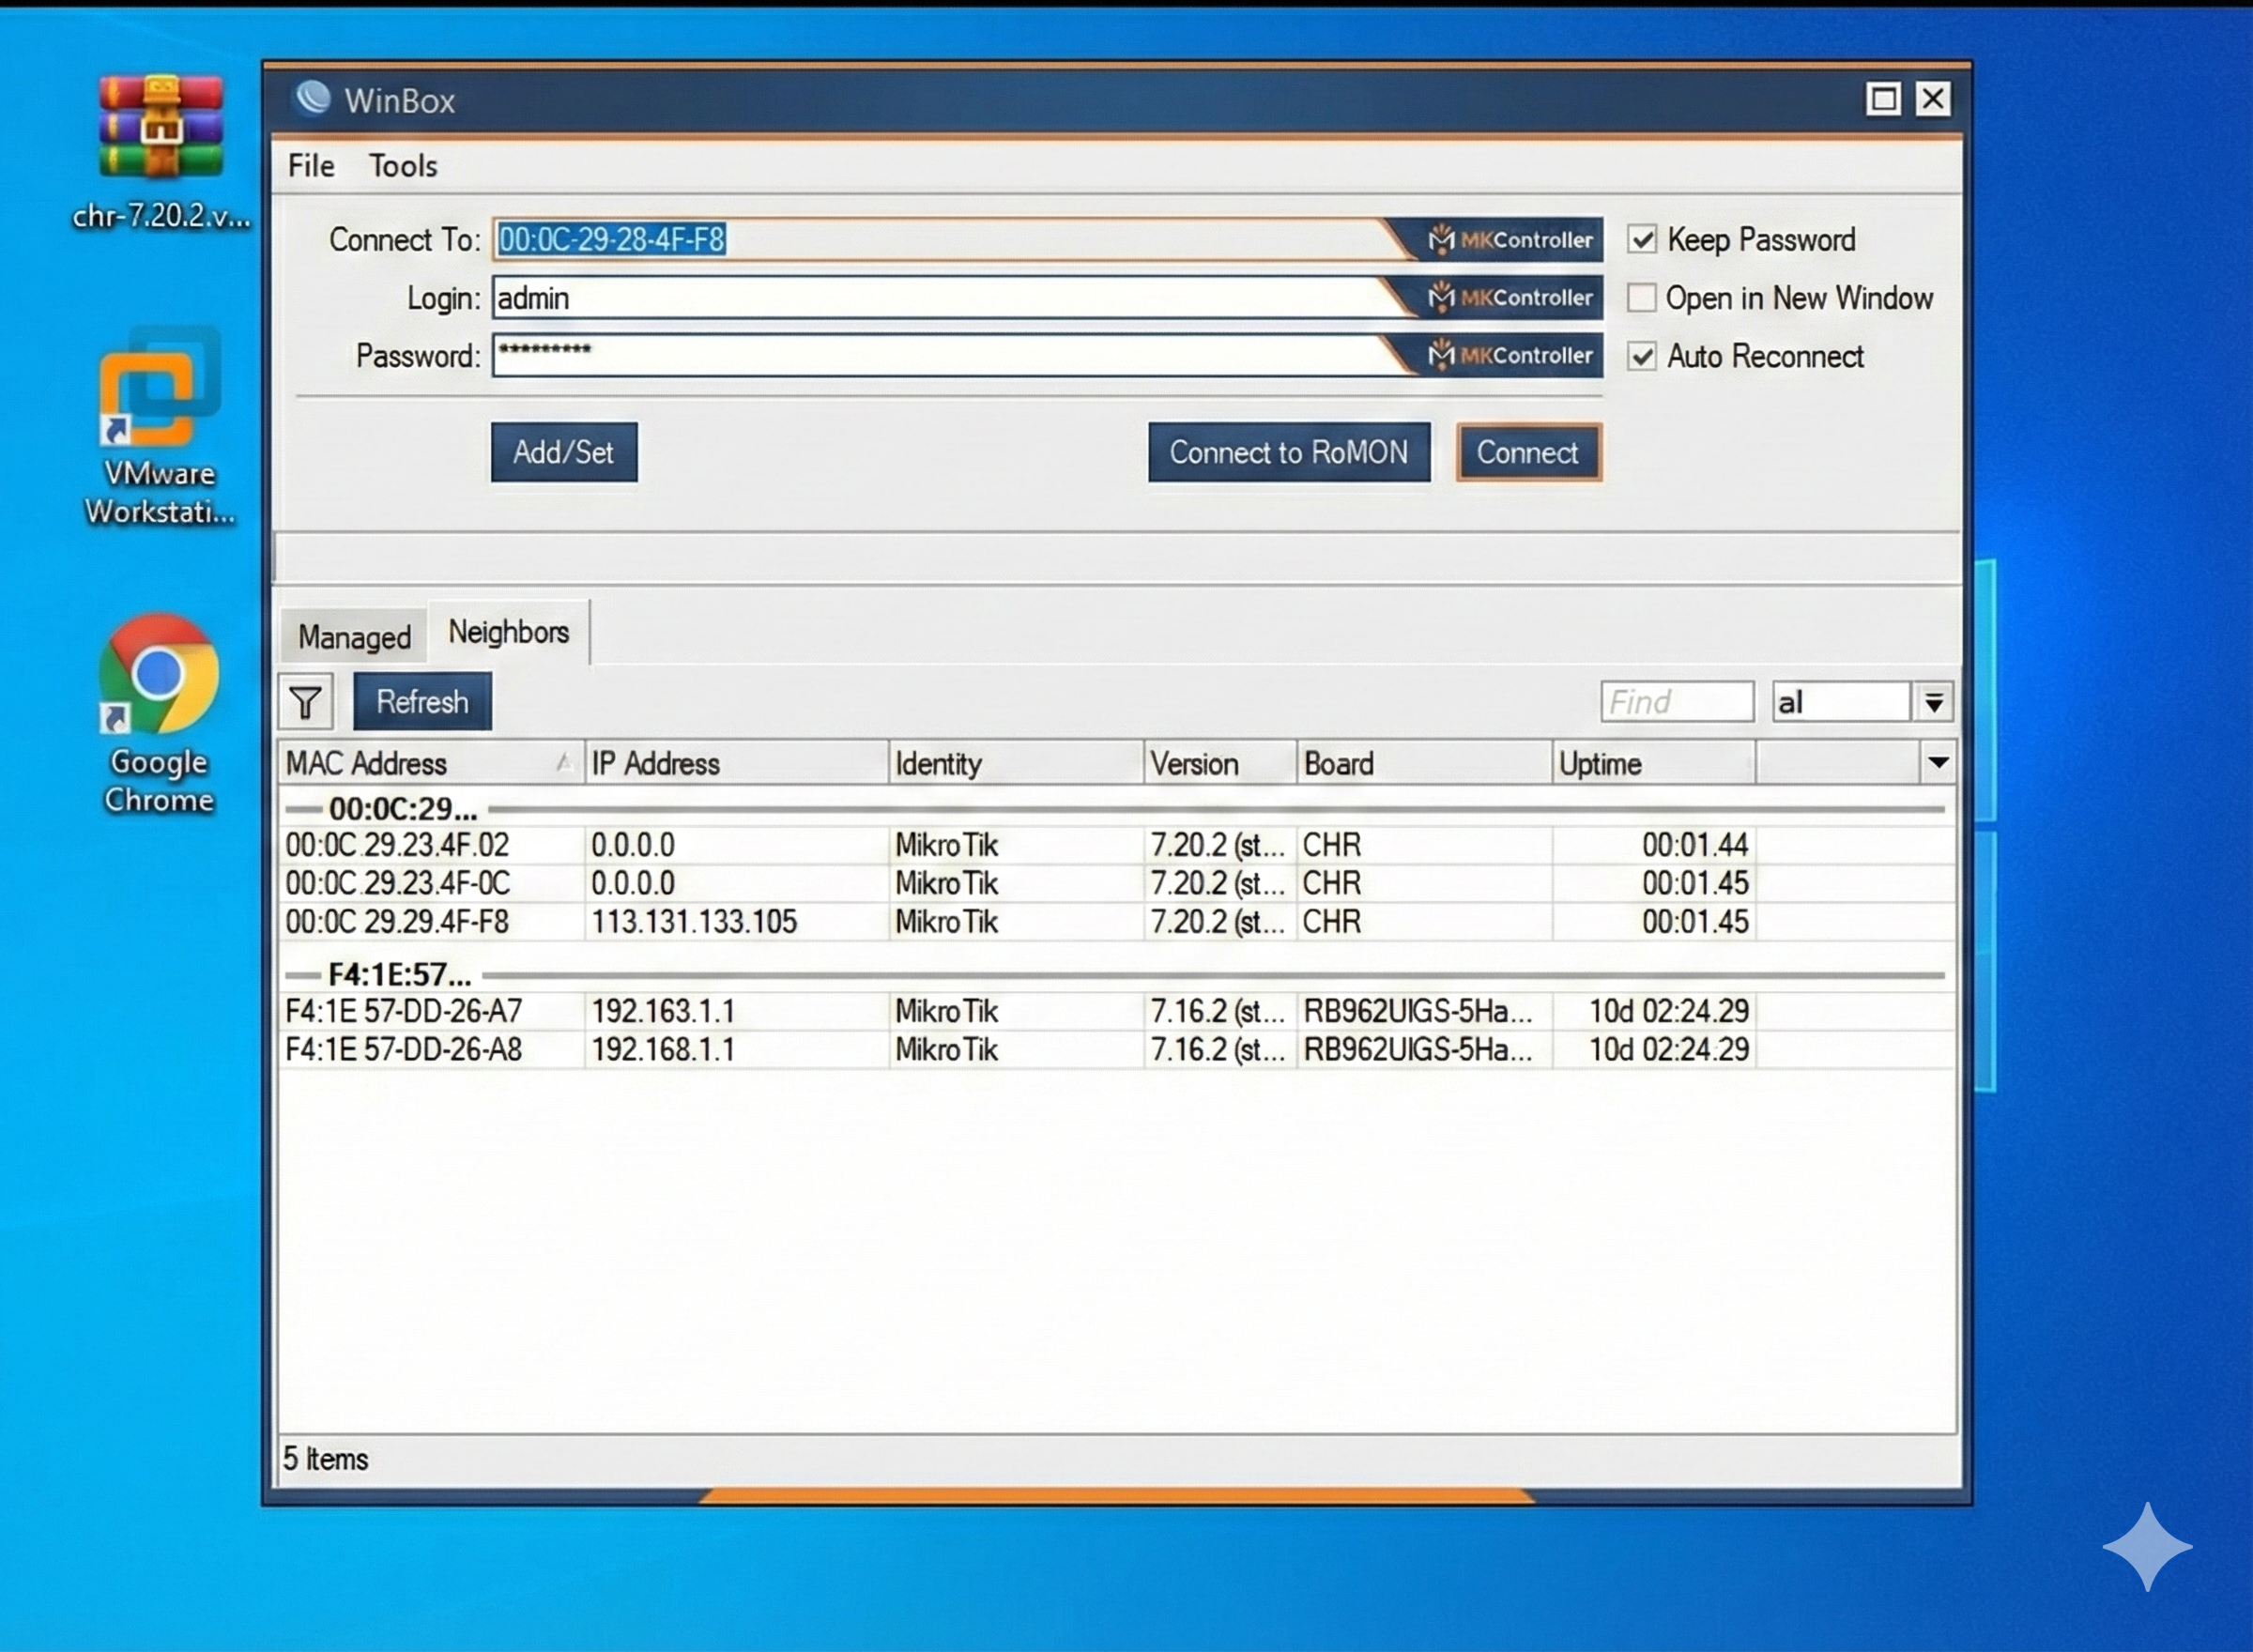
Finally, open WinBox on your host machine. It should automatically detect the virtual router via its MAC address in the “Neighbors” tab. Click the address, enter your new credentials, and you are ready to start configuring.
Where MKController helps: Managing virtualized routers can become complex as your lab grows. MKController provides a centralized cloud dashboard that allows you to monitor and access your VMware-based MikroTik instances from anywhere, just like physical hardware. Learn more at our /docs/ section.
About MKController
Hope the insights above helped you navigate your Mikrotik and Internet universe a little better! 🚀
Whether you’re fine-tuning configs or just trying to bring some order to the network madness, MKController is here to make your life simpler.
With centralized cloud management, automated security updates, and a dashboard that anyone can master, we’ve got what it takes to upgrade your operation.
👉 Start your free 7-day trial now at mkcontroller.com — and see what effortless network control really looks like.