Configuring NAT on MikroTik to Access the Internet
Summary
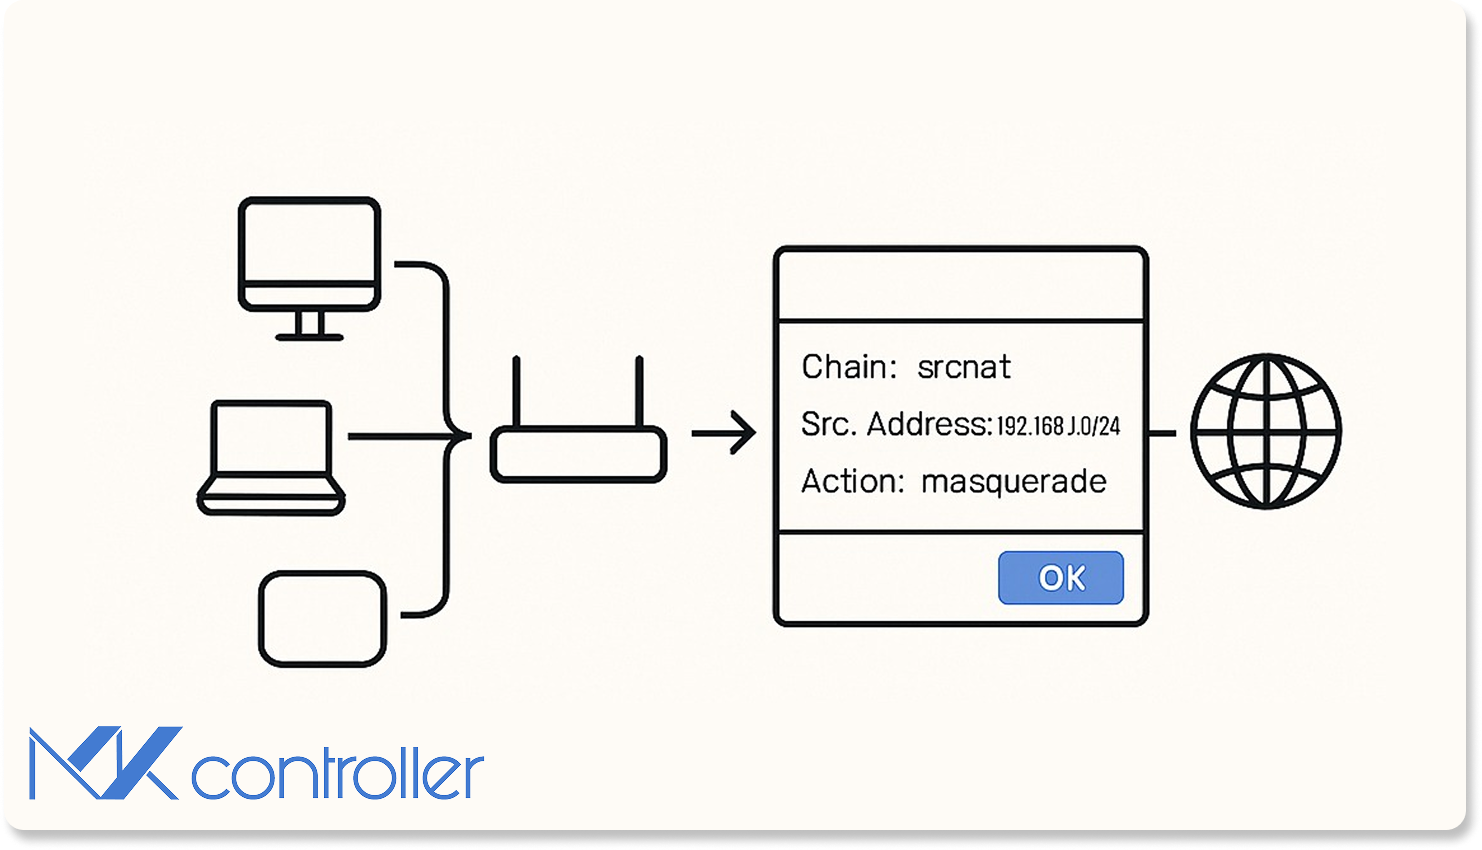
NAT lets multiple devices on your private LAN share a single public IP address. This guide explains the key NAT rule fields, compares masquerade and src‑nat modes and walks through creating a NAT rule in MikroTik’s firewall to enable internet access.
What Is NAT?
Network Address Translation (NAT) allows devices on a private network (LAN) to access the internet using one public IP address. It works by rewriting the source IP of outgoing packets to the router’s public IP. On MikroTik devices you configure NAT in IP → Firewall → NAT.
NAT Rule Fields
When creating a NAT rule in MikroTik you will encounter three essential fields:
- Chain – defines the traffic direction. Use
srcnatfor translating outgoing traffic anddstnatfor inbound translations. - Out. Interface – the outbound interface through which traffic will leave (for example the WAN port receiving your internet link).
- Action – what to do with matching packets. For NAT the relevant options are masquerade and src‑nat.
Masquerade vs src‑nat
Masquerade and src‑nat are the two NAT actions available on MikroTik. The table below highlights their key differences.
| Feature | Masquerade | Src‑nat |
|---|---|---|
| Internet link | Dynamic IP | Valid (static) IP |
| NAT mappings record | Not maintained | Maintained |
| Source IP after translation | Changes to router’s public IP | Changes to a specific IP you define |
Masquerade is simpler and well suited to connections with dynamic IPs. Src‑nat is used when you have a fixed public IP and need more control over how the translation is performed.
NAT mappings record
A NAT mappings record stores information about how IP addresses and ports are translated. It is useful for monitoring and auditing network traffic.
Configuring NAT on MikroTik
Follow these steps to create a NAT rule using Winbox:
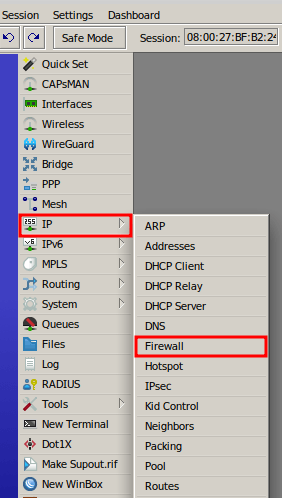
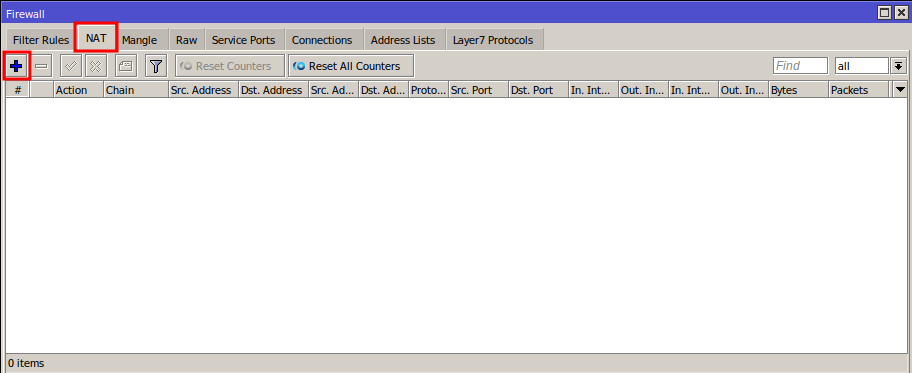
- Open the NAT menu – Connect to your RB MikroTik via Winbox, go to IP → Firewall and open the NAT tab.
- Add a new rule – Click the blue plus button to create a new NAT rule.
Configure the NAT Rule
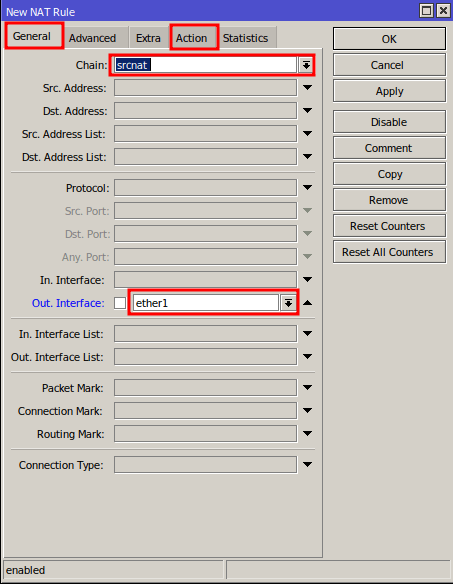
In the New NAT Rule window, fill in the following fields:
- Chain: choose srcnat to translate outgoing traffic.
- Out. Interface: select the interface connected to the internet (for example,
ether1). - Click the Action tab to specify how the translation will occur.
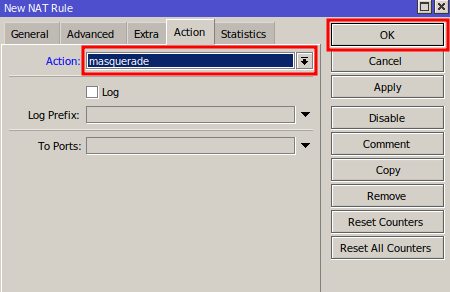
NAT for a Dynamic IP
If your internet link uses a dynamic IP address, set Action to masquerade. This automatically translates internal addresses to whatever public IP the router obtains. Click OK to save.
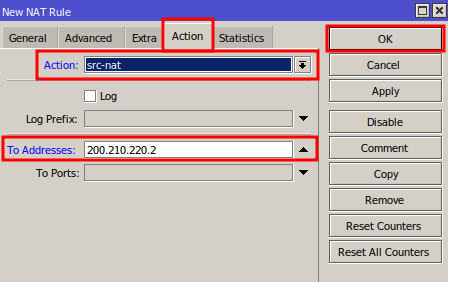
NAT for a Valid (Static) IP
When your internet link has a fixed public IP address, configure the rule as follows:
- In the Action drop‑down, select src‑nat.
- In To Address, enter the valid IP assigned to your MikroTik’s WAN interface.
- Click OK to save.
After creating the NAT rule your LAN devices will be able to browse the internet through the router.
Conclusion
NAT on MikroTik is straightforward once you understand the key fields and choose the appropriate action for your connection type. Use masquerade for dynamic links and src‑nat with a To Address for static IPs. Maintain NAT mapping records for auditing if needed. If you encounter any issues or have questions, our support team is here to help.
About MKController
Hope the insights above helped you navigate your Mikrotik and Internet universe a little better! 🚀
Whether you’re fine-tuning configs or just trying to bring some order to the network madness, MKController is here to make your life simpler.
With centralized cloud management, automated security updates, and a dashboard that anyone can master, we’ve got what it takes to upgrade your operation.
👉 Start your free 3-day trial now at mkcontroller.com — and see what effortless network control really looks like.