Tutorial
MikroTik Netinstall RouterOS Recovery
Reinstall MikroTik RouterOS using Netinstall to fix corrupted firmware, recover failed updates, or downgrade — step by step.
Summary Netinstall is MikroTik’s official recovery utility — it formats the router’s storage and writes a fresh RouterOS image over a direct Ethernet connection, recovering devices that won’t boot, have corrupted firmware, or got stuck after a failed update. This guide walks through backups, architecture detection, Netinstall setup, PC network configuration, the reset-and-detect handshake, and the final RouterOS install — plus how to use it for clean downgrades.
What is MikroTik Netinstall?
MikroTik Netinstall is a utility from MikroTik that reinstalls RouterOS on a device through a network boot (or, on supported models, a serial cable). It formats the router’s internal storage and writes a fresh RouterOS image, which is the right answer for four classes of problems: corrupted RouterOS firmware, system freezes or refusal to boot, devices that won’t start after an update, and full storage preventing upgrades or downgrades.
Netinstall does not remove your RouterOS license key — that survives the reflash. It offers no guarantee that existing configuration will survive, even when you tick “Keep old configuration,” so always back up before starting. For broader recovery context, see our 192.168.88.1 access troubleshooting guide — many issues that look like a Netinstall job turn out to be subnet mismatches that fix in five minutes.
Back up the device first
Two backup types complement each other:
- Binary backup — uneditable, tied to the specific device’s hardware identifiers. Restores only to the same unit.
- Configuration backup — editable, no hardware identifiers, exports as text. Replicates configuration to other RouterOS devices or restores the original unit later.
Run both before Netinstall. They cost nothing and save hours.
Determine the processor architecture
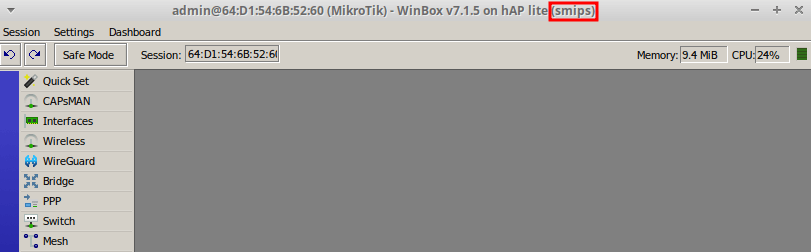
Before downloading any files, identify the router’s CPU architecture. Open the device in Winbox; the architecture string appears at the top of the window after the RouterOS version and model — for example, smips, mipsbe, arm, or arm64. You need this to download the correct .npk for the device.
Download Netinstall
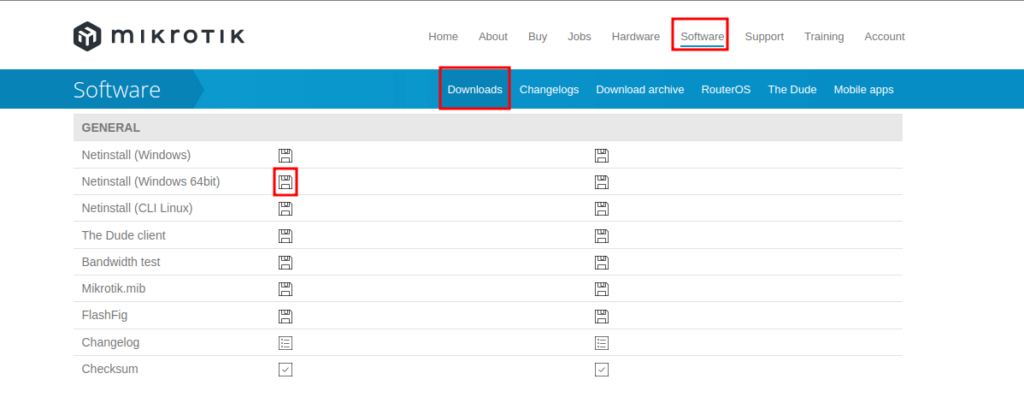
- Open mikrotik.com and go to Software → Downloads.
- Under the General column, click the floppy-disk icon matching your OS (Windows 64-bit for this guide).
Download the RouterOS package
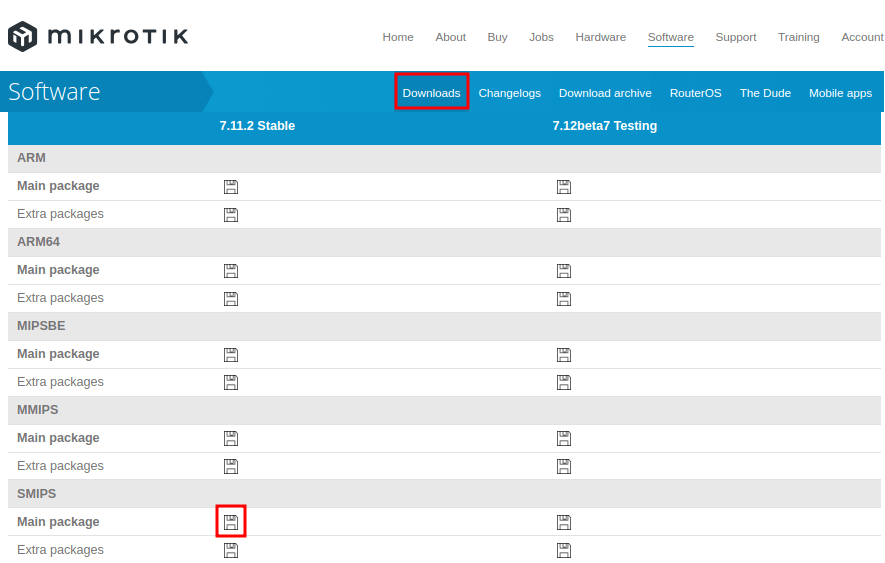
For the current version or upgrade, click the floppy-disk icon in the Main package column for your router’s architecture (e.g., smips). This downloads the .npk file you’ll install via Netinstall.
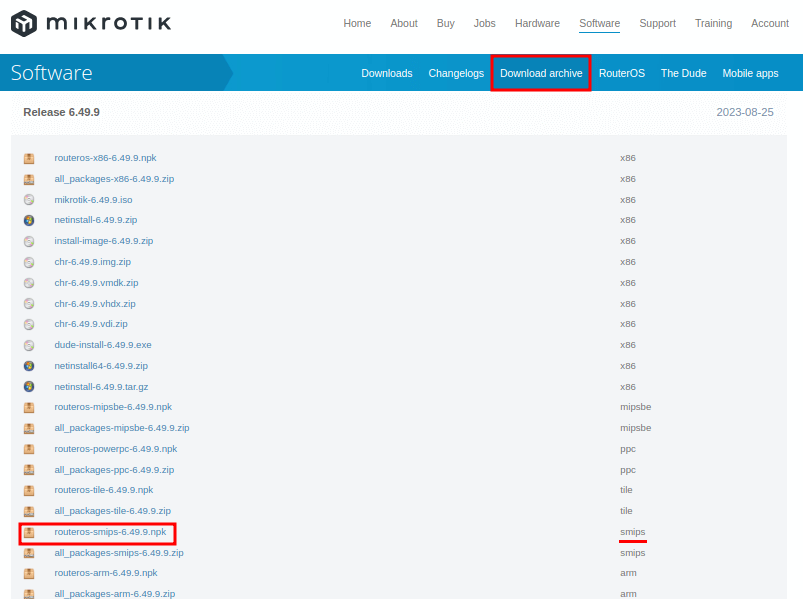
For a downgrade, open the Download archive section and grab the .npk for the desired version and architecture — for example, routeros-smips-6.49.9.npk to install RouterOS 6.49.9 on a smips device.
Configure the PC network
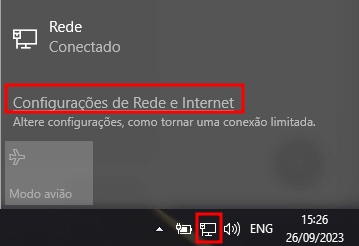
Netinstall expects the PC and the router to be in the same subnet during boot. Set the PC’s Ethernet adapter to 192.168.88.0/24:
-
Open Network and Internet settings from the taskbar.
-
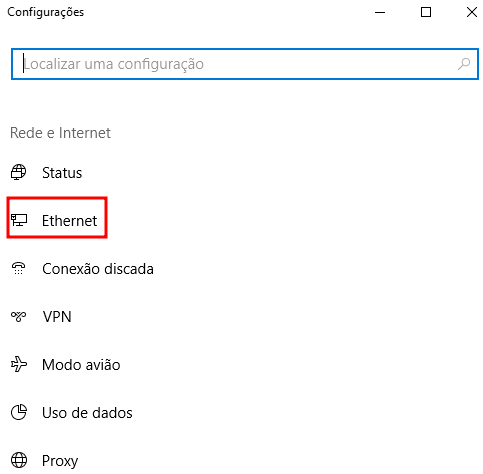
Choose Ethernet.
-
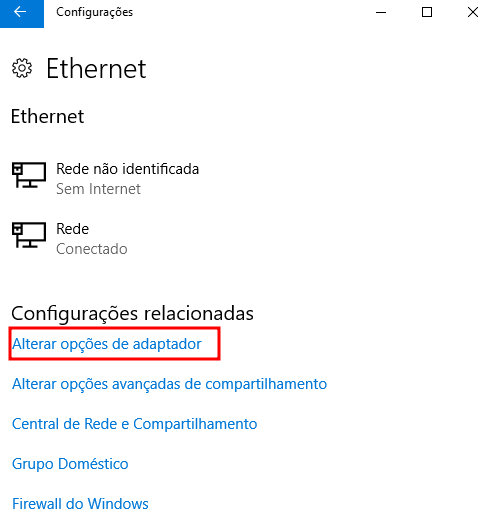
Select Change adapter options.
-
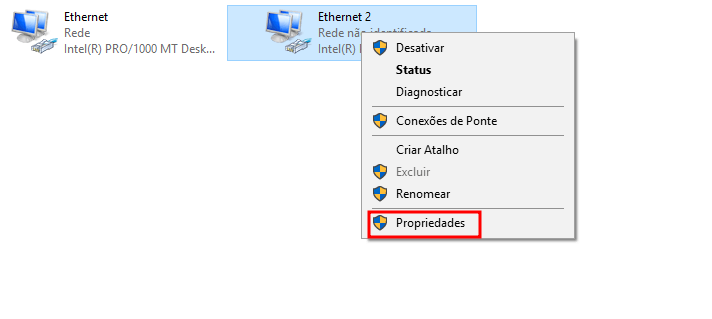
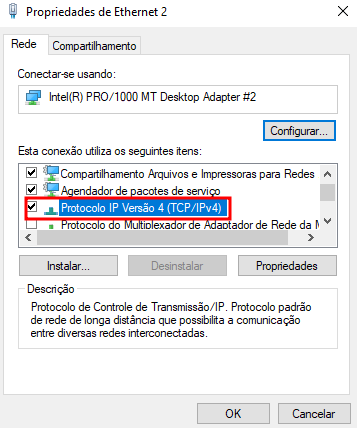
Right-click the Ethernet adapter and choose Properties.
-
Double-click Internet Protocol Version 4 (TCP/IPv4) and enter:
- IP address:
192.168.88.10 - Subnet mask:
255.255.255.0 - Default gateway:
192.168.88.1
Click OK.
- IP address:
-
Close the adapter properties with OK.
Run Netinstall
-
Extract the Netinstall archive.
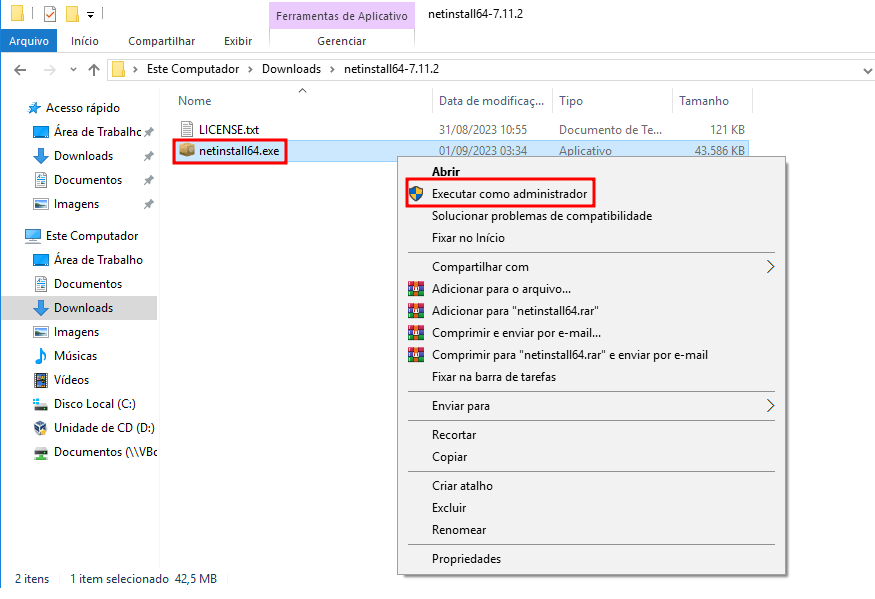
-
Right-click
netinstall64.exe(ornetinstall.exeon 32-bit) and choose Run as administrator.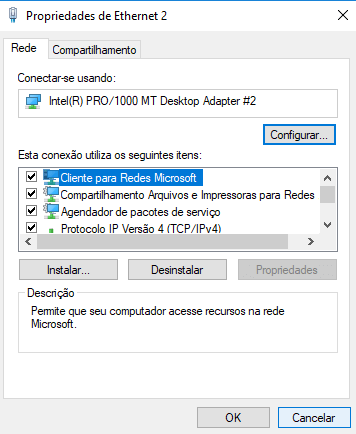
-
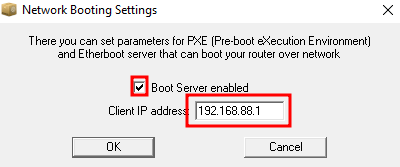
In the Netinstall window, click Net booting.
-
Tick Boot Server enable, type
192.168.88.1as the IP to give the router, and click OK.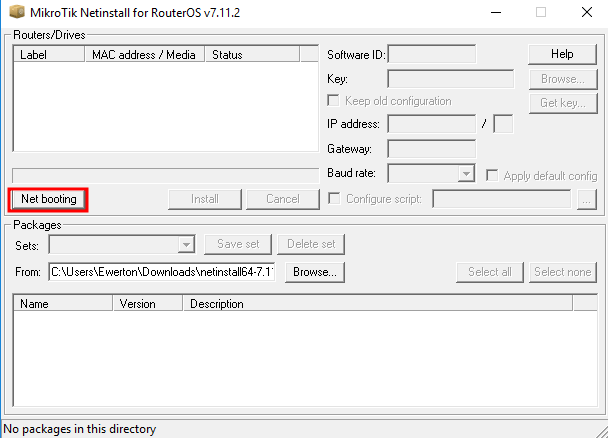
Reset the MikroTik into boot mode
Connect the PC’s Ethernet cable to the router’s ether1 port (sometimes labeled POE or BOOT depending on the model). Then:
- Press and hold the reset button.
- Plug in power while still holding the reset button.
- Keep the reset button held for approximately 30 seconds, until Netinstall detects the device.
Install RouterOS
-
Within 30 seconds of resetting, the router should appear in Netinstall’s Routers/Drivers list. If it doesn’t, repeat the reset procedure — timing is the most common failure cause.

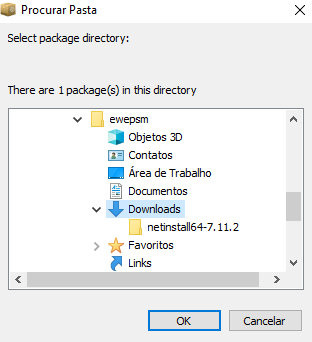
-
With the device highlighted, click Browse… and select the folder containing the
.npkfile. Confirm with OK.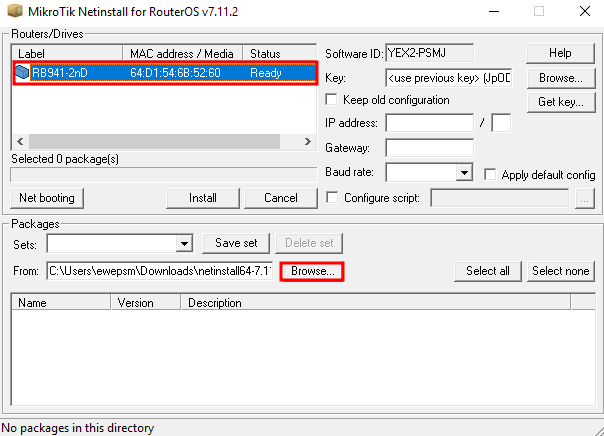
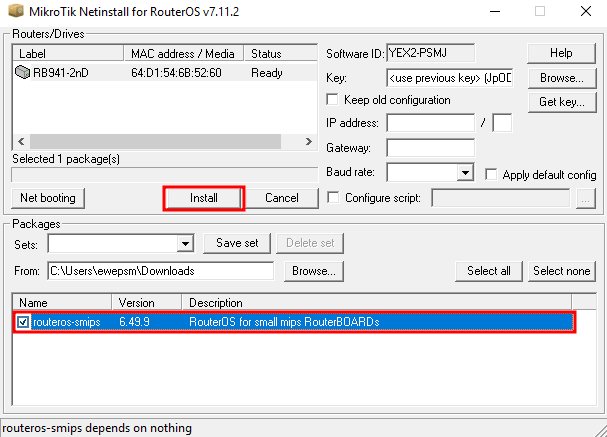
-
Select the RouterOS package and click Install.
-
Wait for Installation finished successfully.
-
Disconnect from the PC and power-cycle the router. When it boots, connect via Winbox to verify the desired RouterOS version is running.

Take the next step
Netinstall is the recovery tool of last resort — invaluable when a device won’t boot, irreplaceable when you need a clean downgrade. The cost is operational: every Netinstall requires direct Ethernet to the device, which means physical access. For a fleet spread across customer sites, that’s a service-truck dispatch per incident.
MKController prevents most Netinstall scenarios upstream. Automated firmware upgrades with rollback safety, configuration backups before every change, and device-mode policies set during provisioning together prevent the kind of bricked-state that Netinstall fixes after the fact. For broader recovery context, see our Winbox security best practices and device-mode security guide.