How to Configure WireGuard Client VPN on MikroTik
Summary > Learn how to configure a MikroTik router as a WireGuard client. This technical guide covers key generation, peer configuration, and advanced routing techniques like Mangle rules for specific device tunneling and implementing a ‘Kill Switch’ to prevent data leaks.
How to Configure WireGuard Client VPN on MikroTik
WireGuard has revolutionized how we think about VPNs on MikroTik routers. Since the release of RouterOS v7, users have access to a protocol that is significantly faster and easier to audit than legacy options like OpenVPN or L2TP/IPsec. In this guide, we will walk through the technical process of setting up your MikroTik as a WireGuard client, specifically focusing on granular control over your local traffic.
Getting Your WireGuard Credentials
Before touching WinBox, you need a configuration from your VPN provider (such as Proton VPN or NordVPN). WireGuard relies on a public/private key pair exchange. Ensure you have the following details ready:
- Private Key: For your MikroTik interface.
- Public Key: From the VPN server.
- Endpoint Address & Port: The server’s IP or URL.
- Allowed IPs: Usually
0.0.0.0/0for a full tunnel.
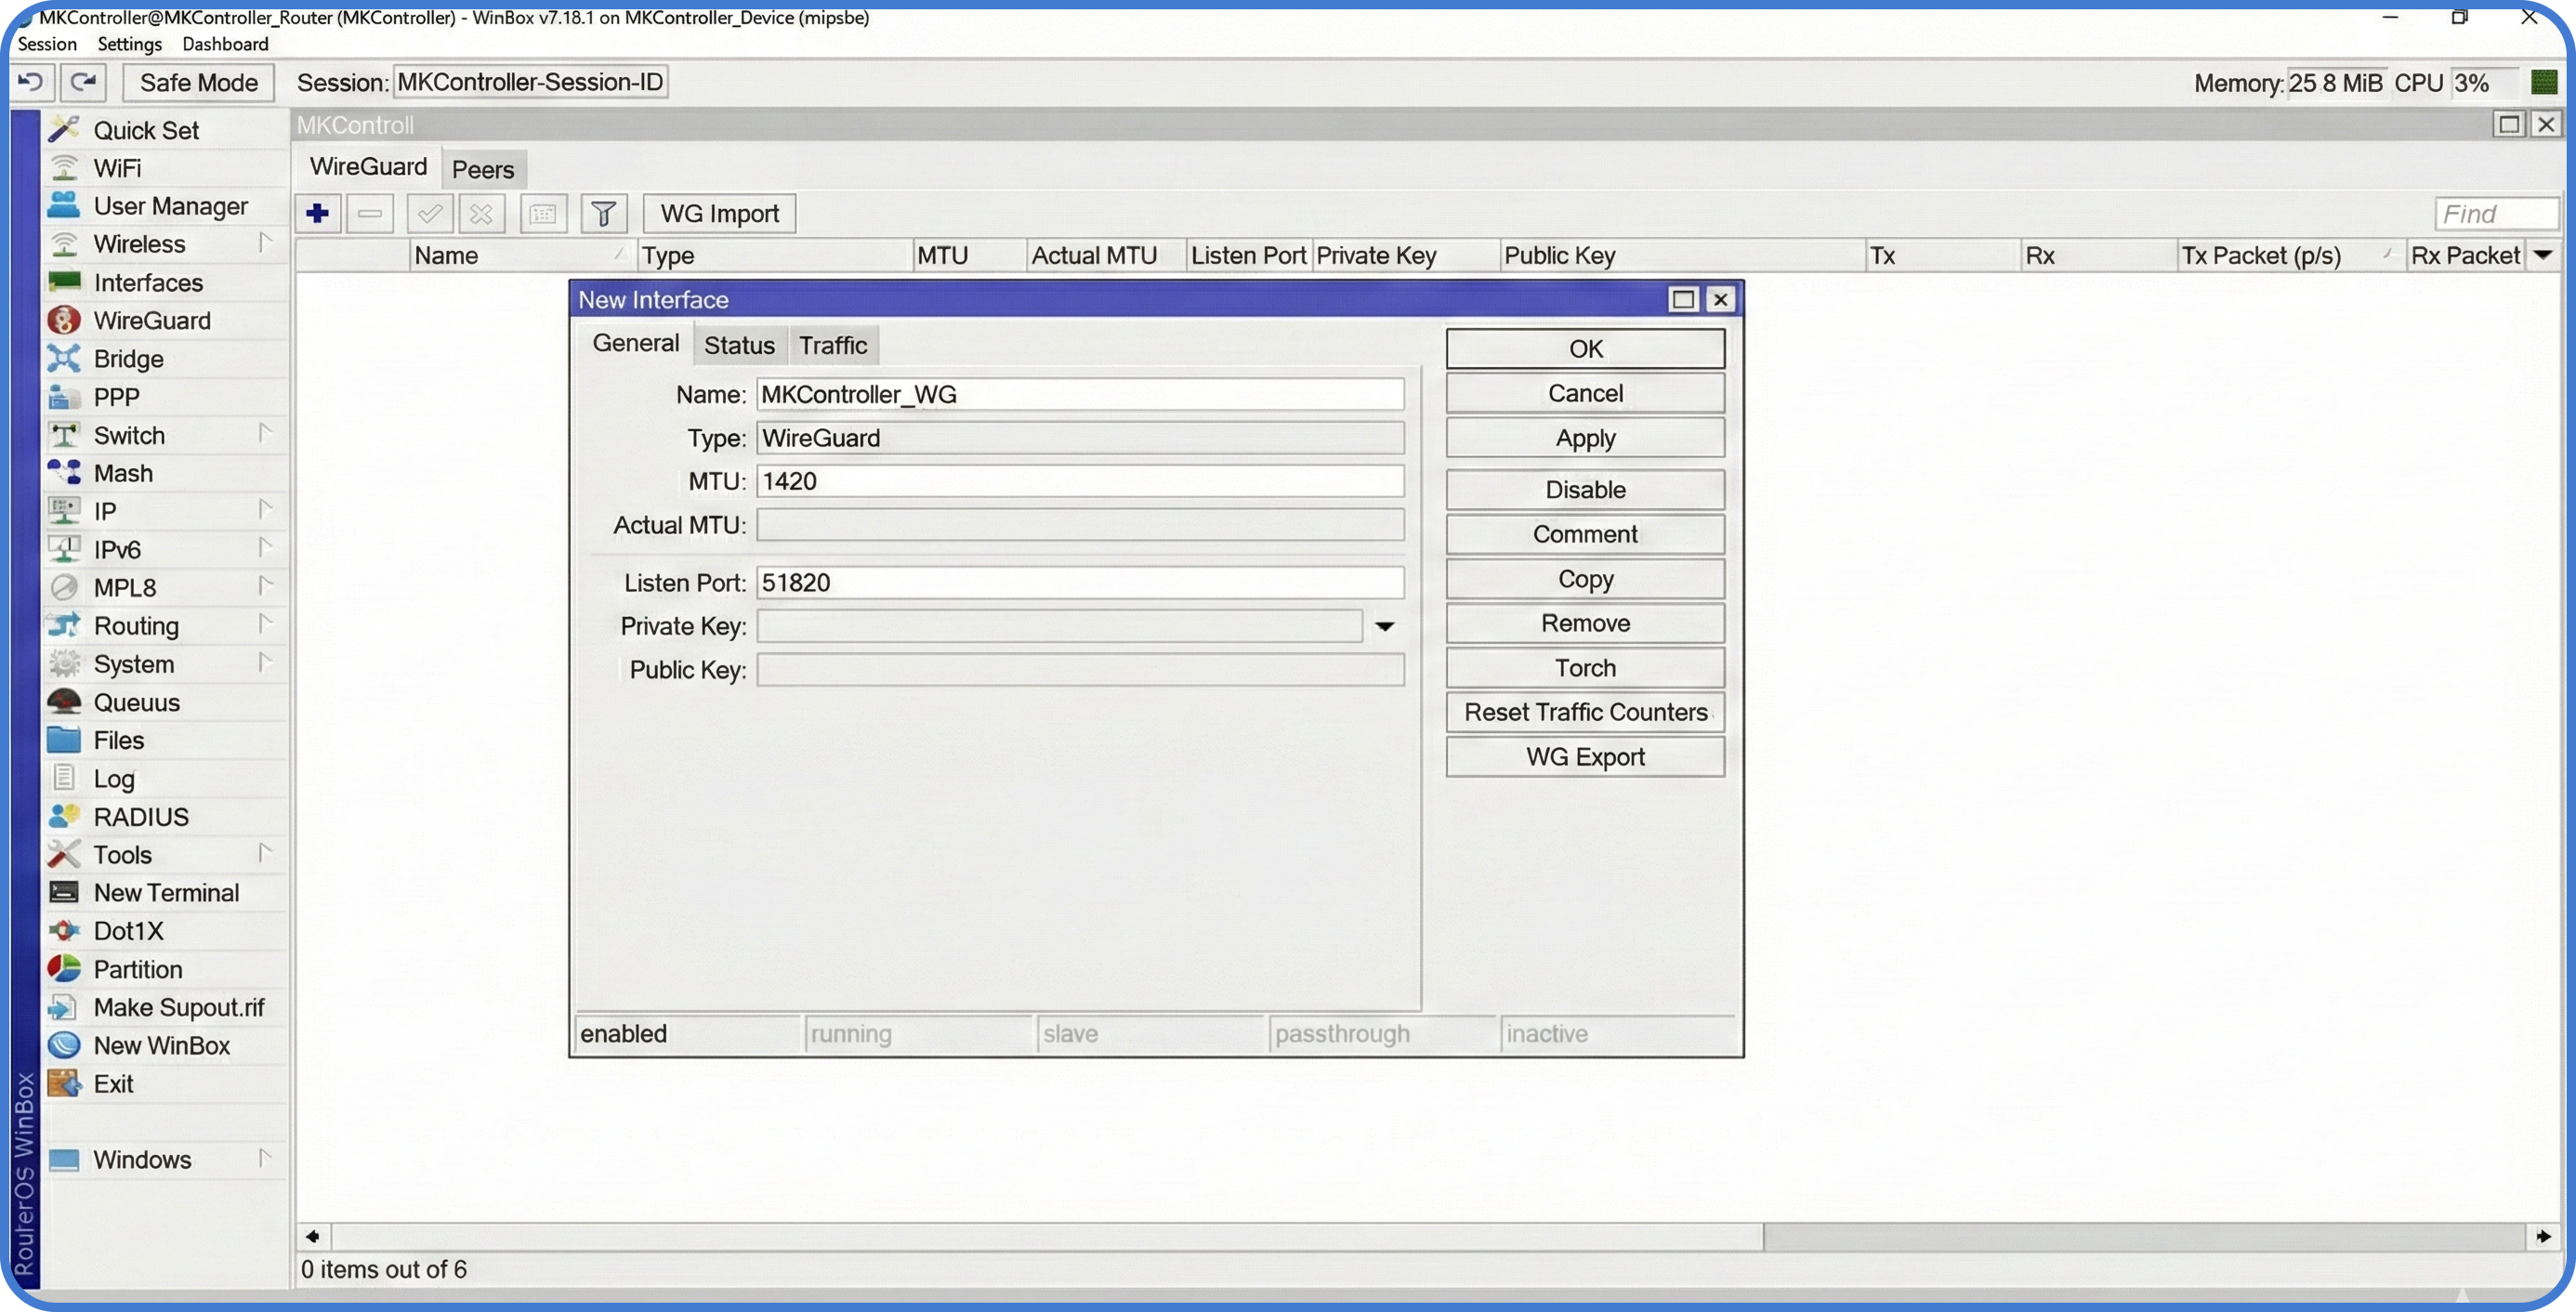
Step 1: Create the WireGuard Interface
First, we must define the tunnel interface on the MikroTik router.
- Open WinBox and navigate to the WireGuard menu.
- Click the + button to add a new interface.
- Name it
WG-Client. - Paste your Private Key. MikroTik will automatically generate the corresponding Public Key.
- Click OK.
Next, assign the IP address provided by your VPN service to this new interface under IP > Addresses.
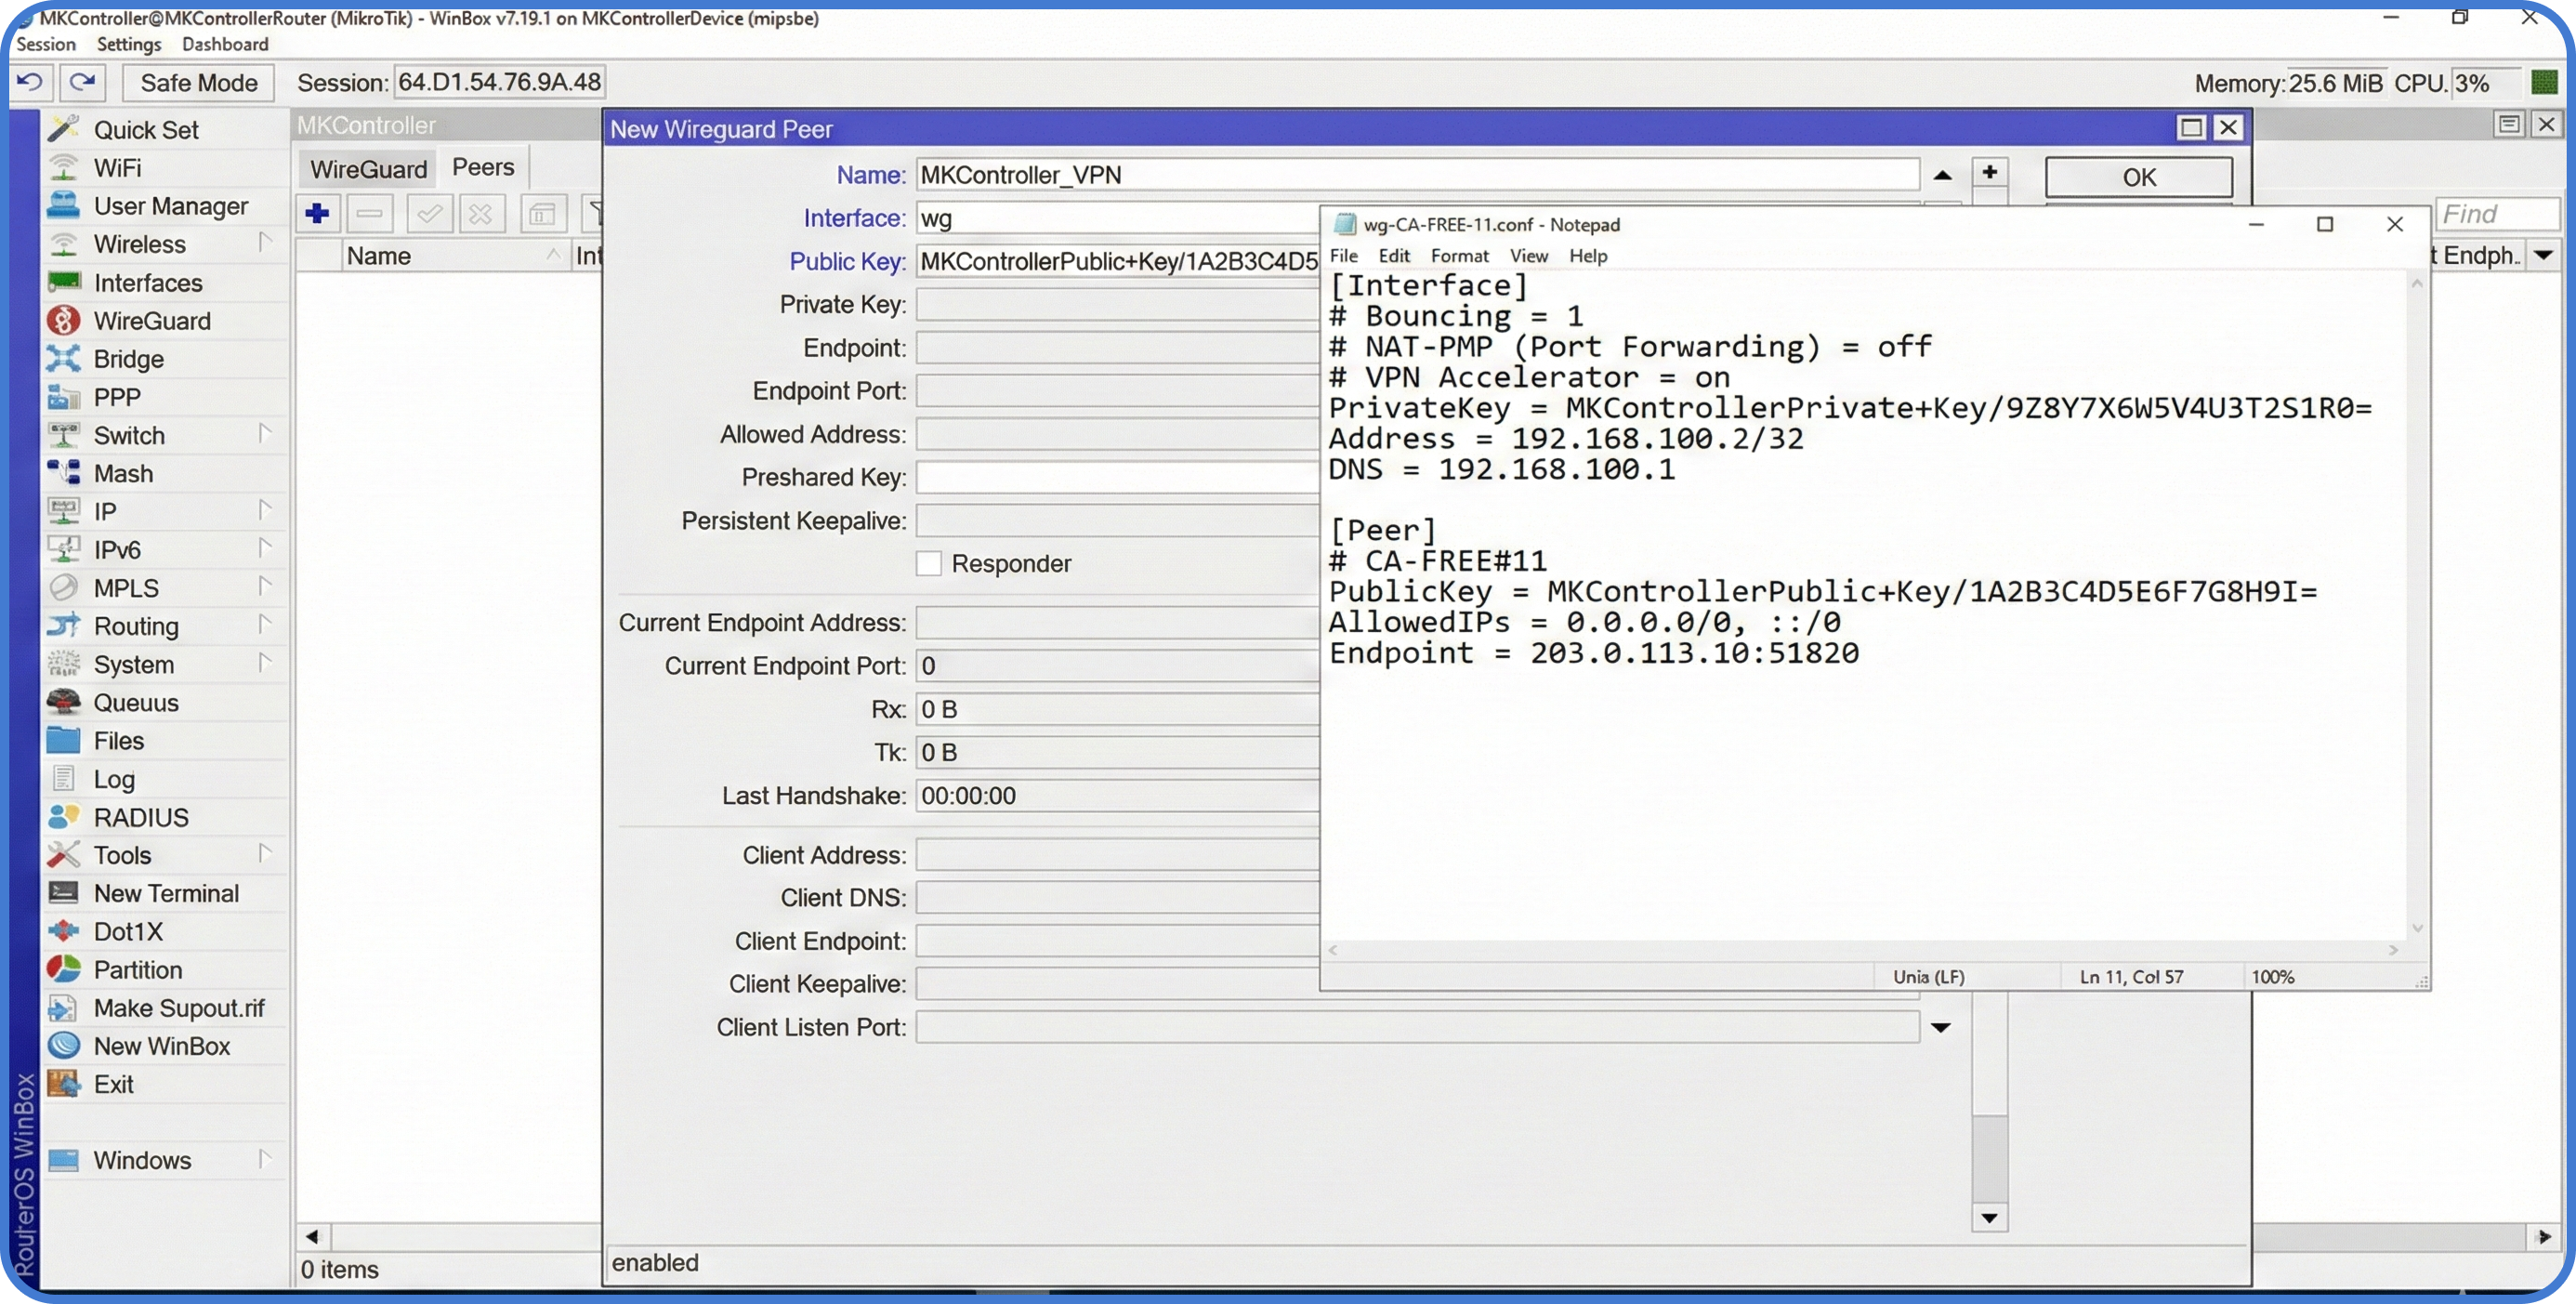
Step 2: Configure the Peer
The “Peer” is the remote server you are connecting to.
- In the WireGuard window, go to the Peers tab.
- Select your
WG-Clientinterface. - Enter the Public Key of the remote server.
- Set the Endpoint and Endpoint Port.
- In Allowed IPs, enter
0.0.0.0/0(this allows traffic to pass, but won’t automatically route everything yet).
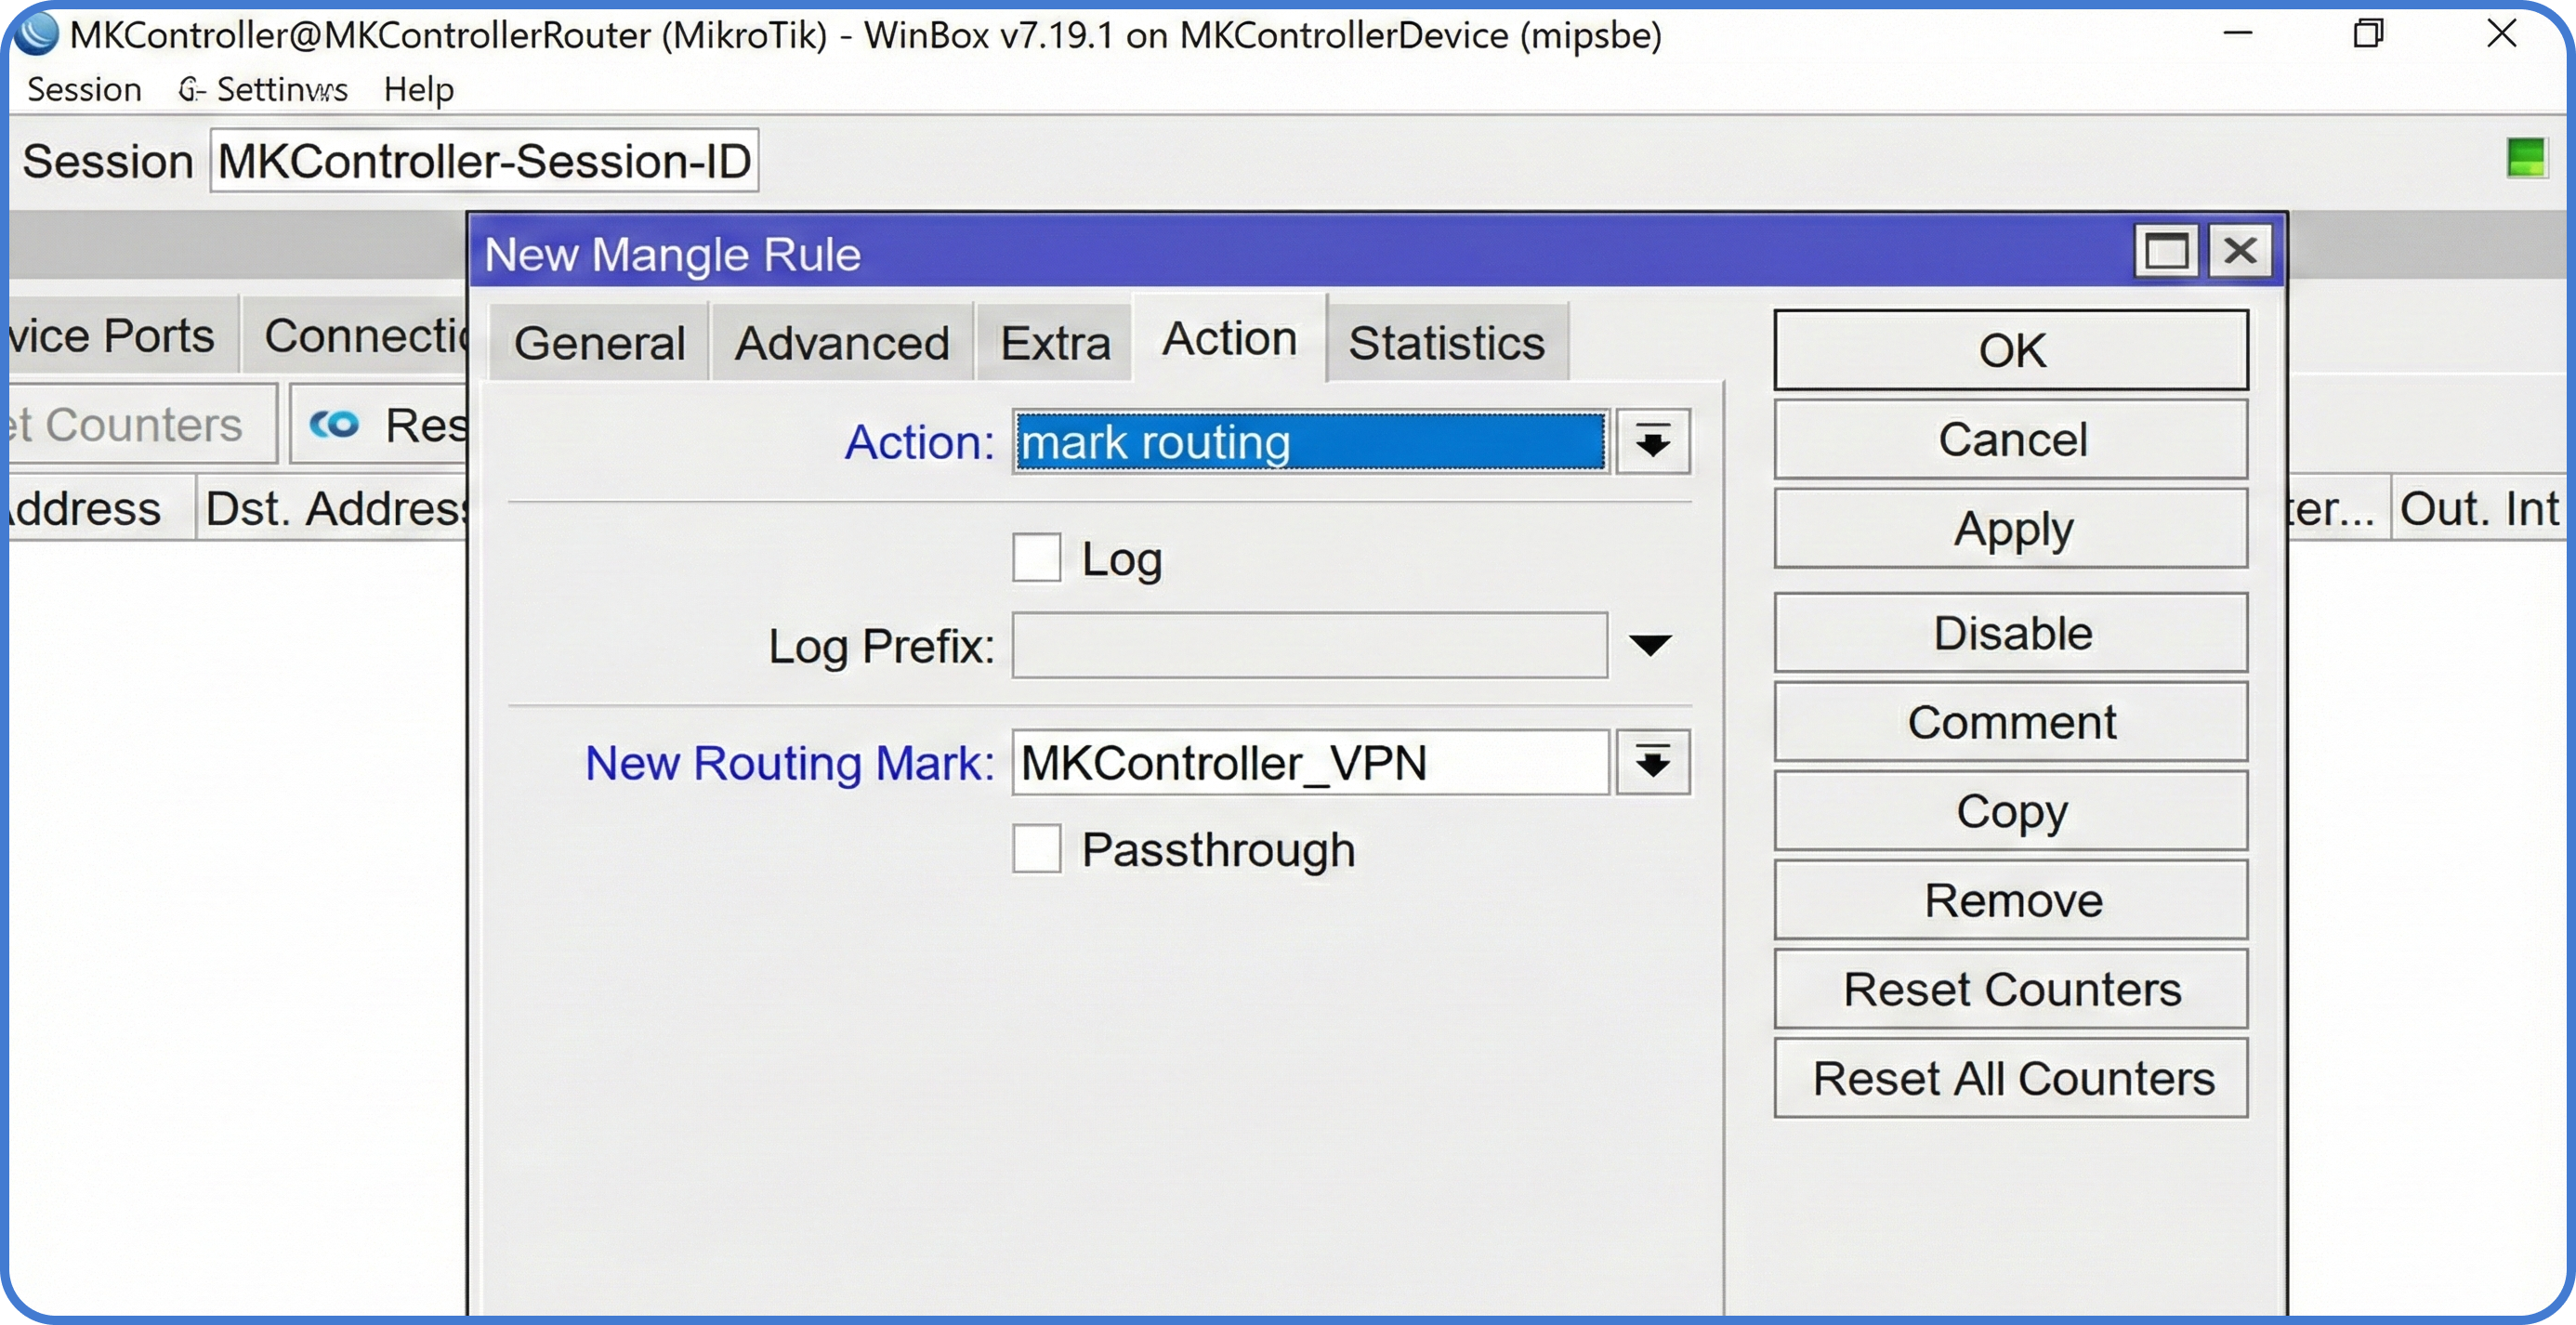
Step 3: Policy-Based Routing (PBR)
Usually, you don’t want your entire network on the VPN. You might only want a specific server or PC to use the tunnel. We achieve this using Mangle rules.
- Go to
IP > Firewall > Mangle. - Create a new rule:
Chain: prerouting. - Src. Address: Enter the local IP of the device you want to tunnel (e.g.,
192.168.88.50). - Action:
mark routing. - New Routing Mark: Name it
via-wireguard. - Uncheck “Pass Through”.
Step 4: Routing and the “Kill Switch”
Now, tell the router that any traffic marked via-wireguard must go through the tunnel.
- Go to
IP > Routes. - Add a new route:
Gateway: WG-Client,Routing Table: via-wireguard. - The Kill Switch: Add a second route with the same Routing Table (
via-wireguard), but set the Type toblackholeand a higher distance.
Note: The blackhole route ensures that if the WireGuard tunnel goes down, the device’s traffic is simply dropped instead of “leaking” out through your standard ISP connection.

About MKController
Hope the insights above helped you navigate your MikroTik and Internet universe a little better! 🚀
Whether you’re fine-tuning configs or just trying to bring some order to the network madness, MKController is here to make your life simpler.
With centralized cloud management, automated security updates, and a dashboard that anyone can master, we’ve got what it takes to upgrade your operation.
👉 Start your free 3-day trial now at mkcontroller.com — and see what effortless network control really looks like.