Як заблокувати трафік до конкретних країн на MikroTik
Коротко Цей посібник показує, як заблокувати мережевий трафік до певних країн за допомогою MikroTik RouterOS. Ви навчитеся отримувати IP-блоки з IPDeny, форматувати їх у CLI-команди через таблиці та налаштовувати правило firewall для обмеження доступу.
Як заблокувати трафік до конкретних країн на MikroTik
Керування напрямком мережевого трафіку — важливий аспект сучасної безпеки мережі. Чи дотримуєтеся корпоративних політик, чи просто хочете заборонити користувачам доступ до серверів у регіонах із підвищеним ризиком, блокування трафіку за країною — ефективний контроль.
Хоча MikroTik RouterOS не має кнопки “Заблокувати країну X”, це можна зробити за допомогою Adress Lists і стандартних Firewall Filters. У цьому посібнику ми пройдемо ручний збір діапазонів IP та їх застосування на роутері.
Крок 1: Отримання IP-блоків
Щоб заблокувати країну, потрібно мати список усіх IP-адрес, призначених цьому регіону. Один із найнадійніших і безкоштовних ресурсів — IPDeny. Вони регулярно оновлюють агреговані файли зон.
- Перейдіть на IPDeny.com (або безпосередньо в розділ “IP Country Blocks”).
- Знайдіть потрібну країну у списку.
- Завантажте файл з зоною (зазвичай
.txt) для цієї країни.
Примітка: IP-адреси змінюються з часом. Важливо оновлювати списки періодично, щоб не блокувати нові легітимні IP або не пропускати переназначені.

Крок 2: Форматування даних для RouterOS
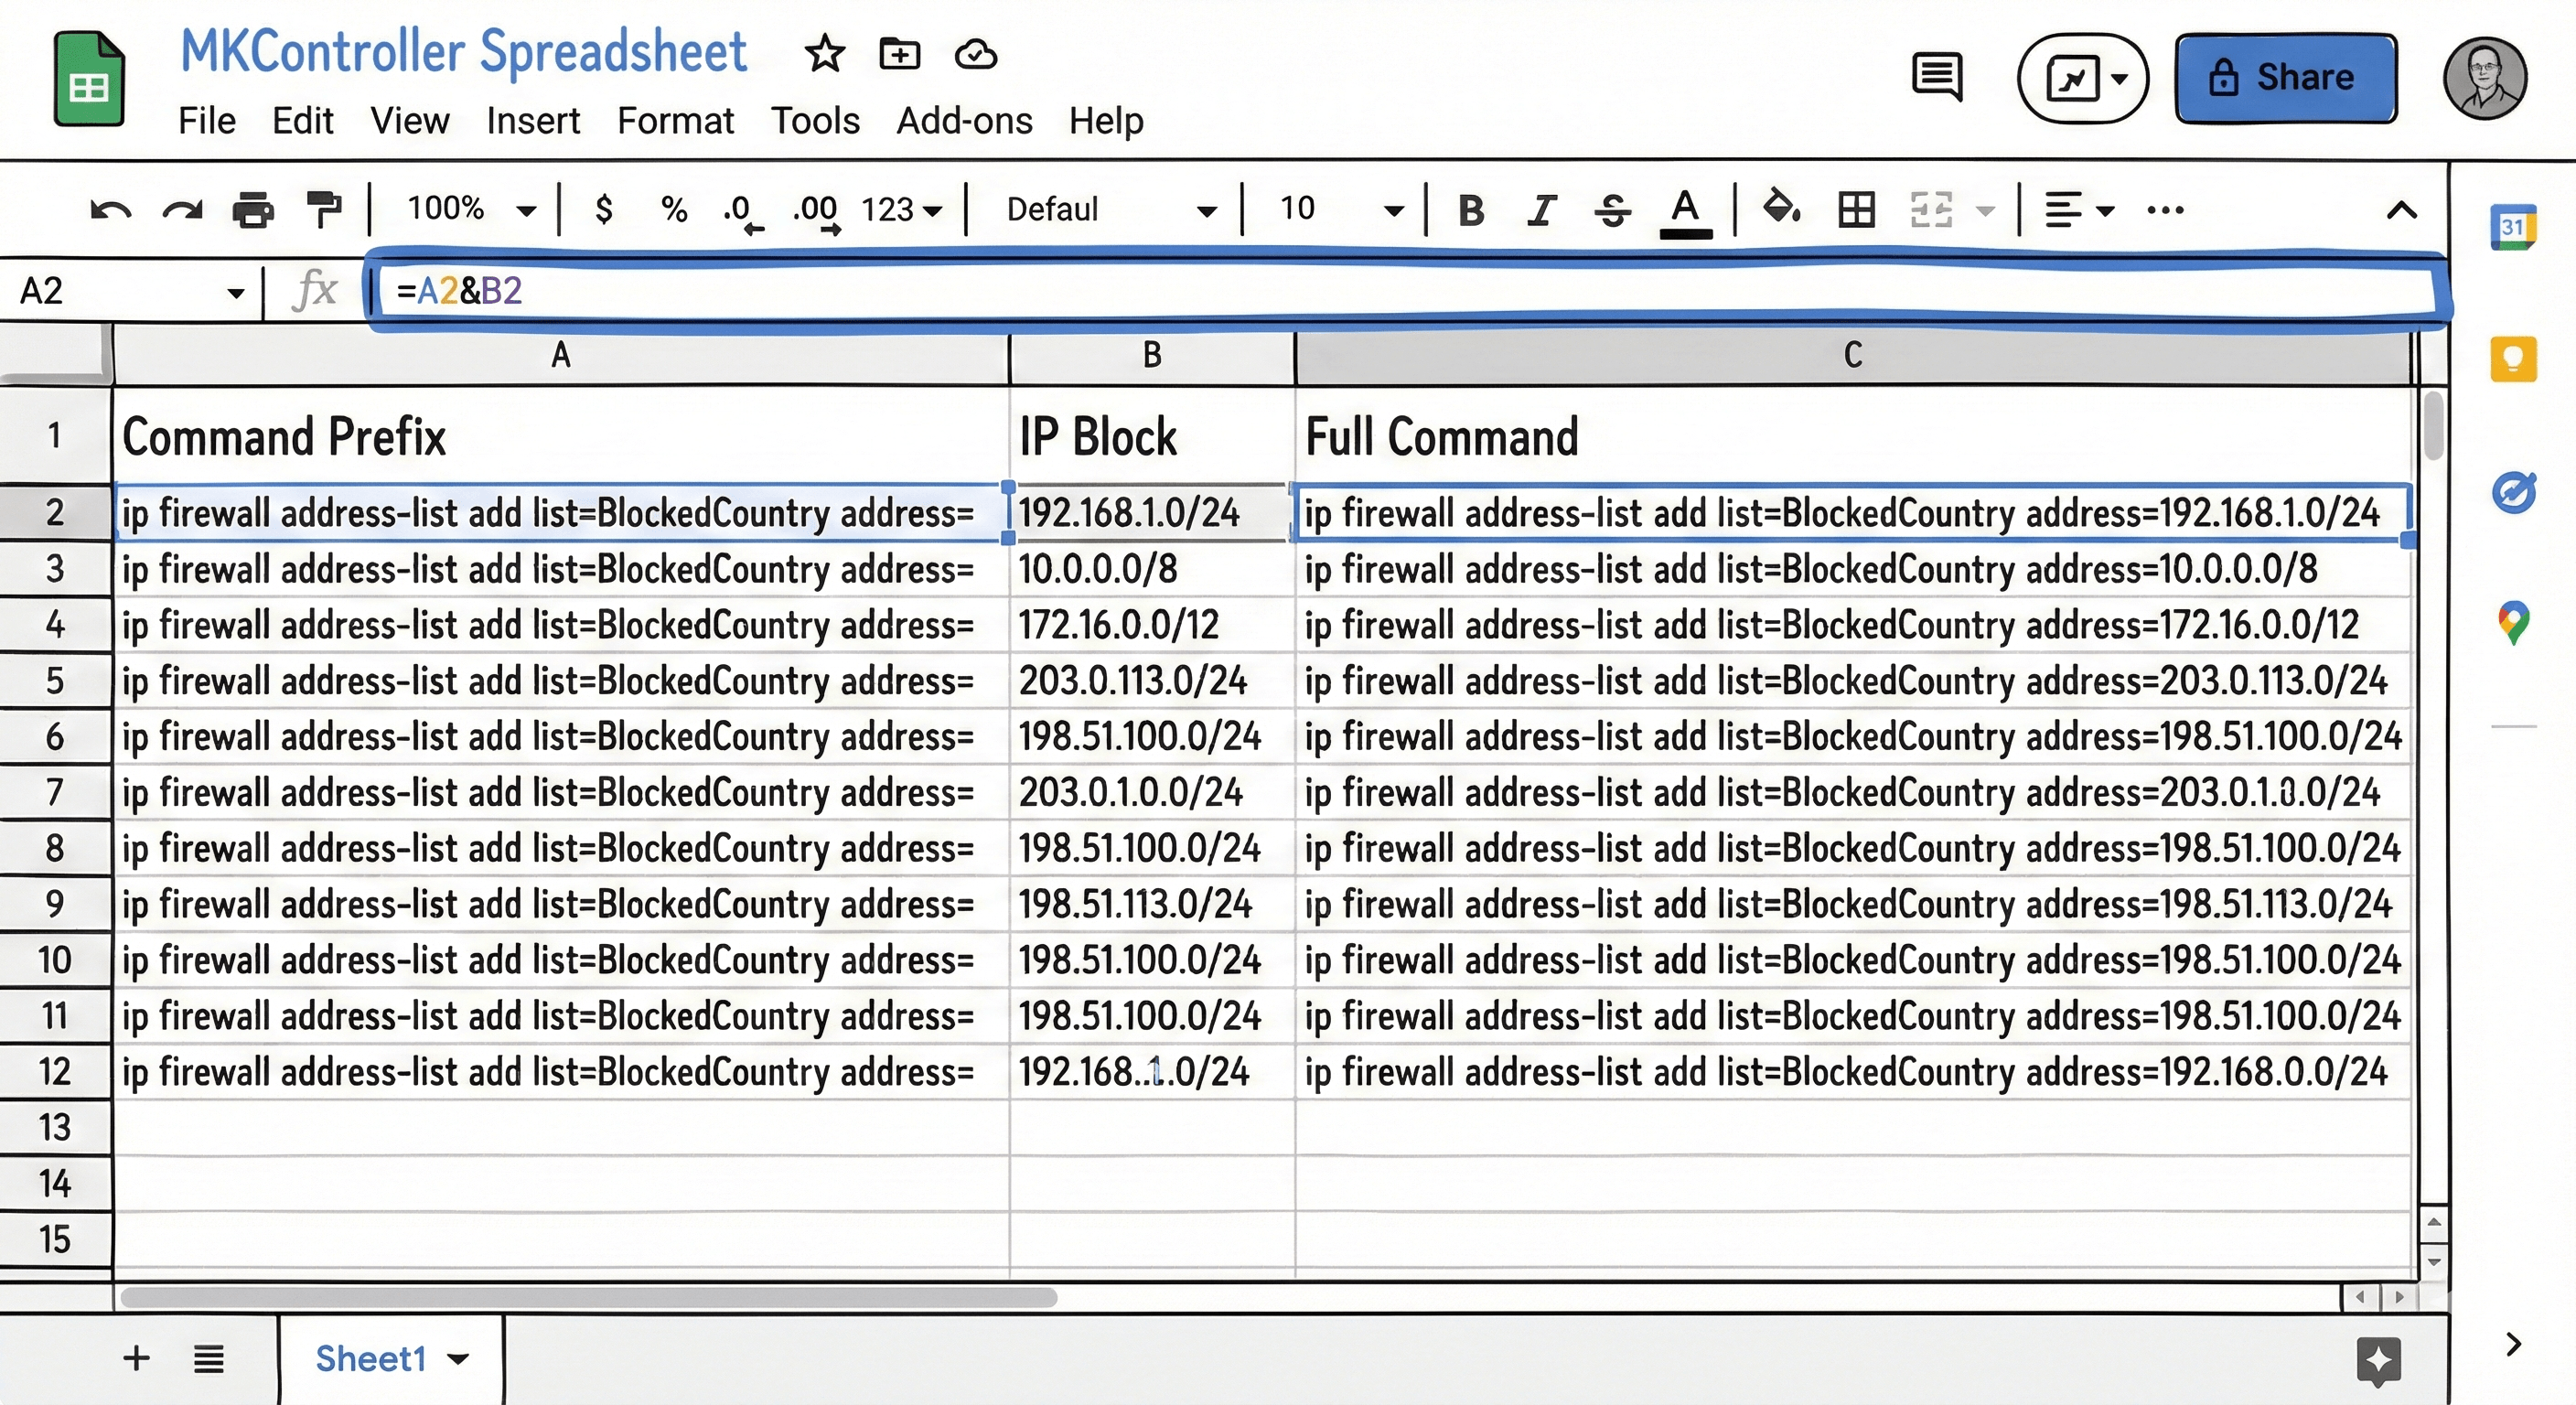
Завантажений файл містить список IP-підмереж (наприклад, 1.2.3.0/24), але роутер MikroTik очікує певний формат команд для імпорту. Для цього ми використаємо таблицю, як-от Excel, щоб автоматизувати форматування.
- Відкрийте програму таблиць.
- У стовпці B вставте список IP-адрес з IPDeny.
- У стовпці A введіть префікс команди:
ip firewall address-list add list=BlockedCountry address= - У третьому стовпці застосуйте формулу для об’єднання, наприклад:
=A1 & B1 - Протягніть формулу до кінця списку.
Тепер у вас повний список CLI-команд, готових для роутера.
Крок 3: Імпорт адресного списку
Команди сформовані, час завантажити їх у роутер. Це створить групу IP (Address List), яку можна застосовувати у правилах.
- Скопіюйте команди зі свого таблиці.
- Відкрийте Winbox та зайдіть на MikroTik роутер.
- Відкрийте вікно New Terminal.
- Вставте команди напряму у термінал.
Якщо список великий, вставка займе деякий час. Після завершення можна перевірити імпорт у IP > Firewall > Address Lists. Там має бути тисячі записів із заданим ім’ям (наприклад, BlockedCountry).
Крок 4: Створення правила drop
Тепер, коли роутер знає, які IP належать цій країні, слід вказати, що робити з трафіком туди. Створимо правило firewall, що відкидає цей трафік.
- Перейдіть у IP > Firewall > Filter Rules.
- Натисніть Add (+), щоб додати нове правило.
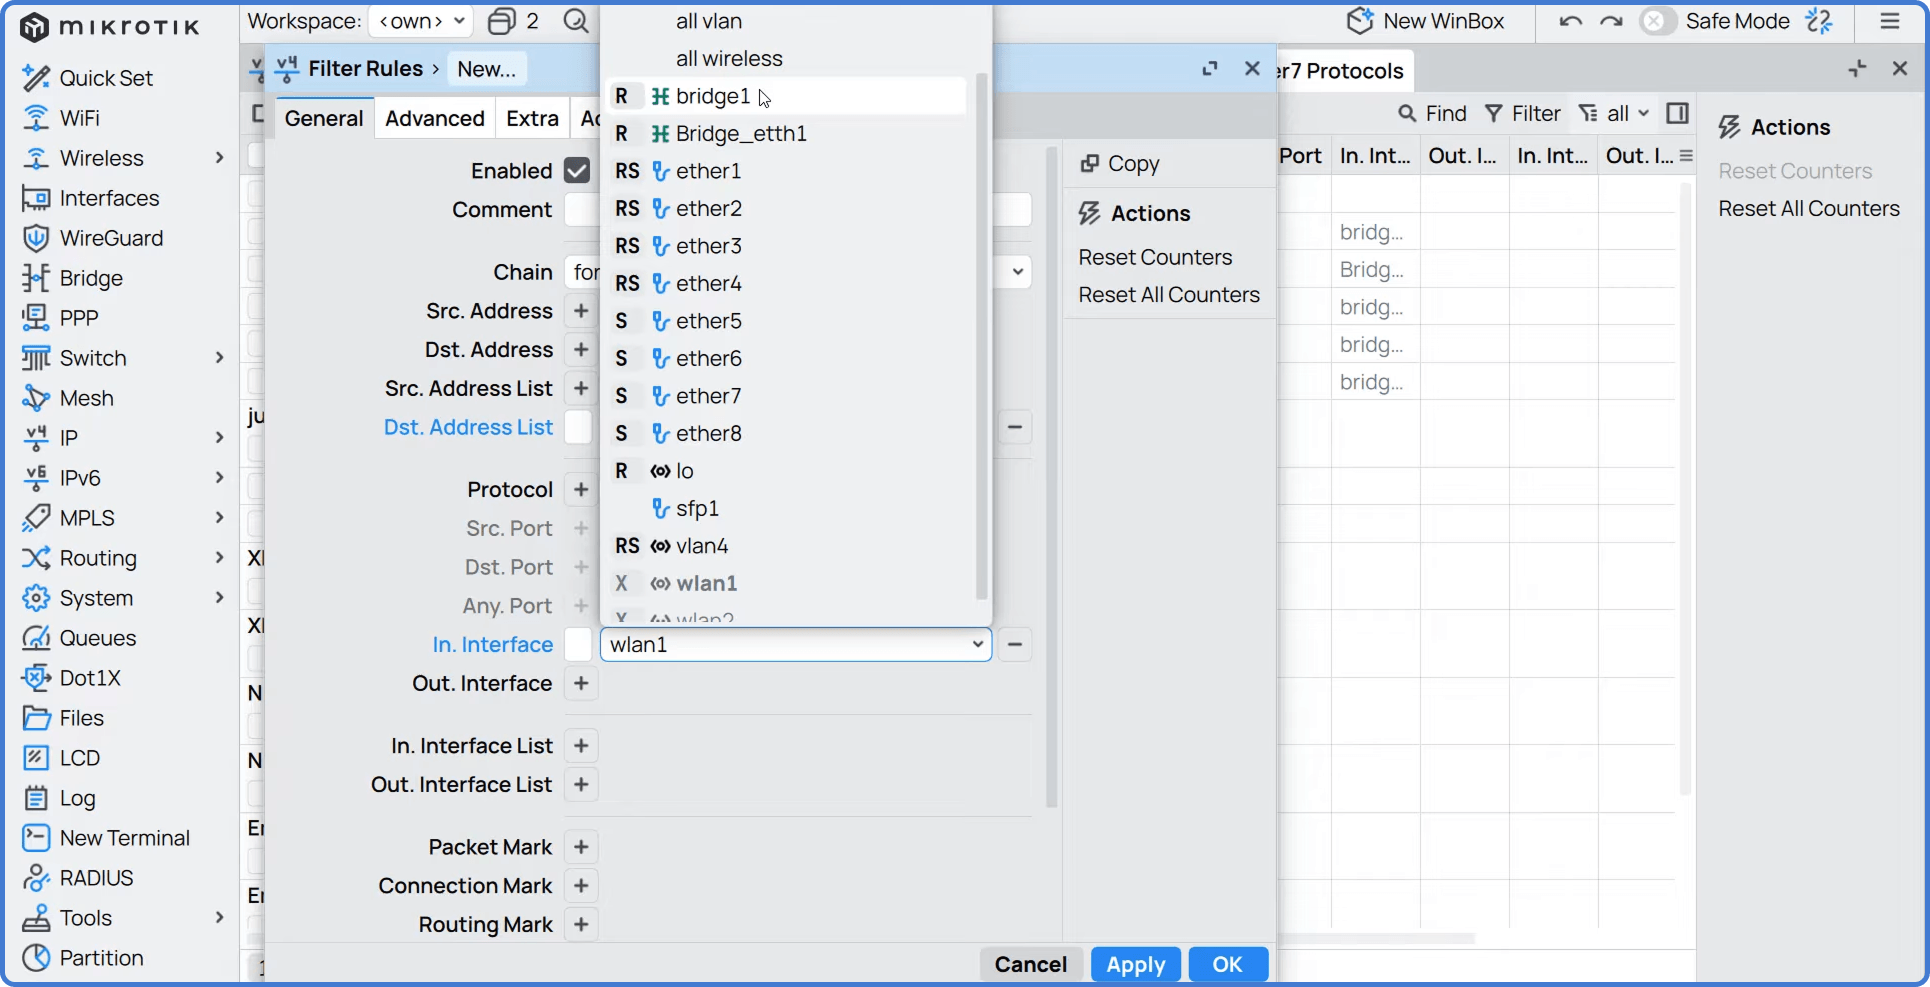
- Налаштування на вкладці General:
- Chain:
forward(для трафіку, що проходить через роутер, із LAN до Інтернету). - In. Interface: Виберіть ваш LAN бридж або інтерфейс.
- Chain:
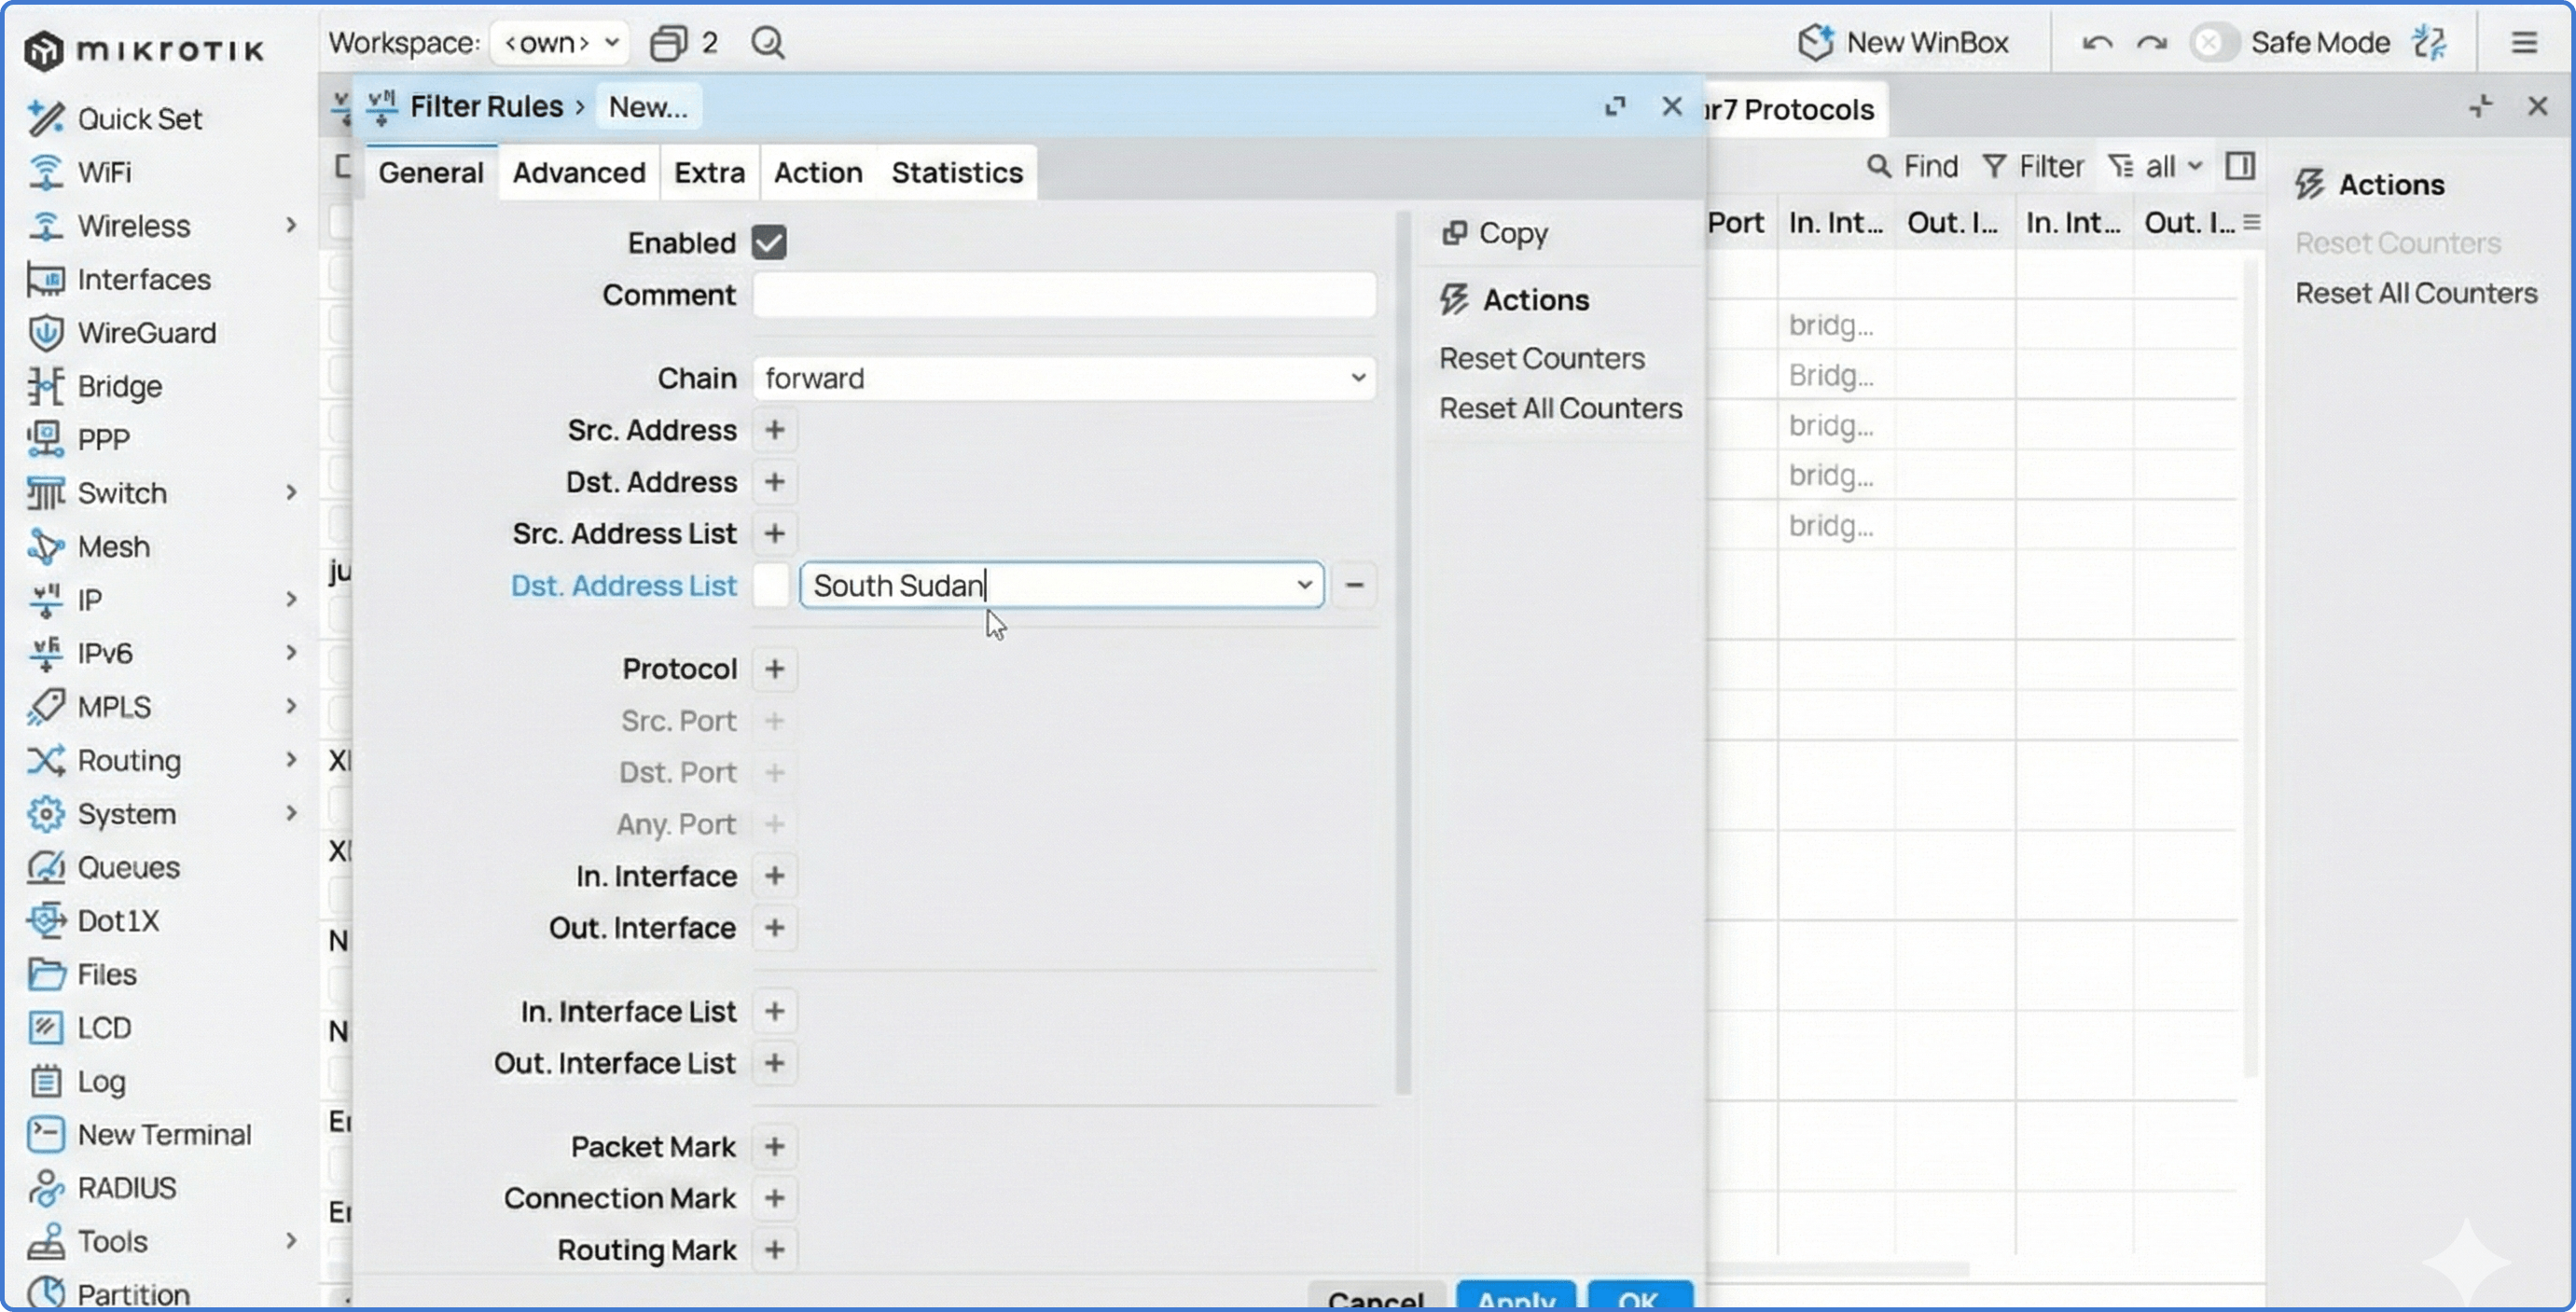
- Налаштування на вкладці Advanced:
- Dst. Address List: Виберіть створений адресний список (наприклад,
BlockedCountry).
- Dst. Address List: Виберіть створений адресний список (наприклад,
- Налаштування на вкладці Action:
- Action:
drop.
- Action:
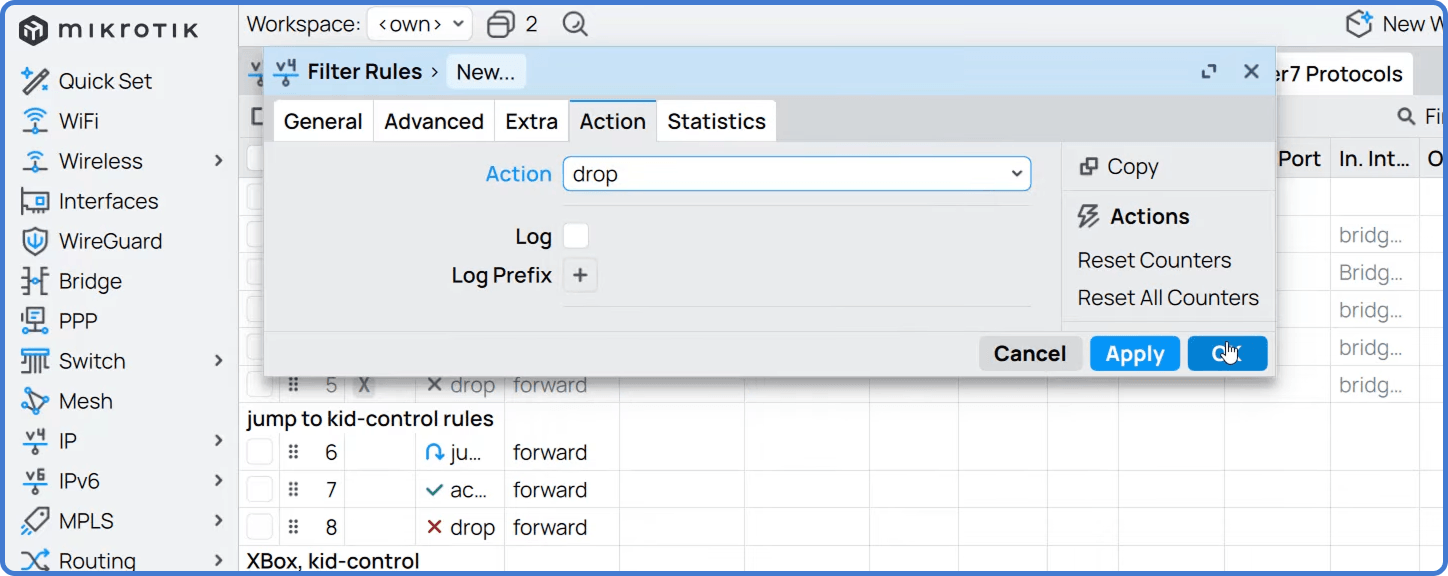
Натисніть OK для збереження. Перемістіть це правило угору у списку, щоб воно оброблялося перед правилом “accept all”.
Підказка: Якщо хочете блокувати також трафік з цієї країни, створіть окреме правило з Chain
input(для трафіку до роутера) абоforward(для LAN) та встановіть Src. Address List у ваш список країни.
Спрощення керування за допомогою NatCloud
Керувати списками вручну на одному роутері можливо, але підтримувати оновлення на десятках або сотнях пристроїв — виклик.
NatCloud від MKController дозволяє дистанційно керувати MikroTik, навіть за CGNAT. Цей посібник про ручне налаштування, але централізована платформа спрощує надсилання скриптів та оновлень на багато роутерів воднораз, забезпечуючи завжди актуальні політики без рутини зі спредшитами.
Про MKController
Сподіваємося, ця інформація допомогла краще орієнтуватися у вашому світі MikroTik та Інтернету! 🚀
Чи тонко налаштовуєте, чи просто наводите лад у мережевому хаосі, MKController зробить ваше життя простішим.
Централізоване хмарне управління, автоматичні оновлення безпеки і панель, зрозуміла кожному — ось що допоможе модернізувати вашу інфраструктуру.
👉 Почніть безкоштовно 3-дневне тестування на mkcontroller.com — і подивіться, як виглядає справжній простий контроль мережі.