
Create Your First ISP Manager Operation (8-Step Setup)
An operation is one city or POP: its routers, plans, subscribers and collection steps. You create one with an 8-step setup. Finishing the last step, Review, creates the operation right away, with no approval step. The new operation is a draft: nothing is billed and no collection step runs until you click Activate this operation on its Automation tab.
▶ Create your first operation in ISP Manager · step by step — video in English, with captions.
Before you start
Section titled “Before you start”- At least one adopted MikroTik that serves your subscribers over PPPoE.
- Your prices for each plan.
- About ten minutes. Nothing is sent to subscribers and nothing changes on the router during the setup.
Open the setup
Section titled “Open the setup”Go to ISP Manager and click New operation.

The setup opens with the eight steps across the top: Management type → Devices → Plans → Customer base → Getting paid → Sending → Automation → Review.
Step 1 · Management type
Section titled “Step 1 · Management type”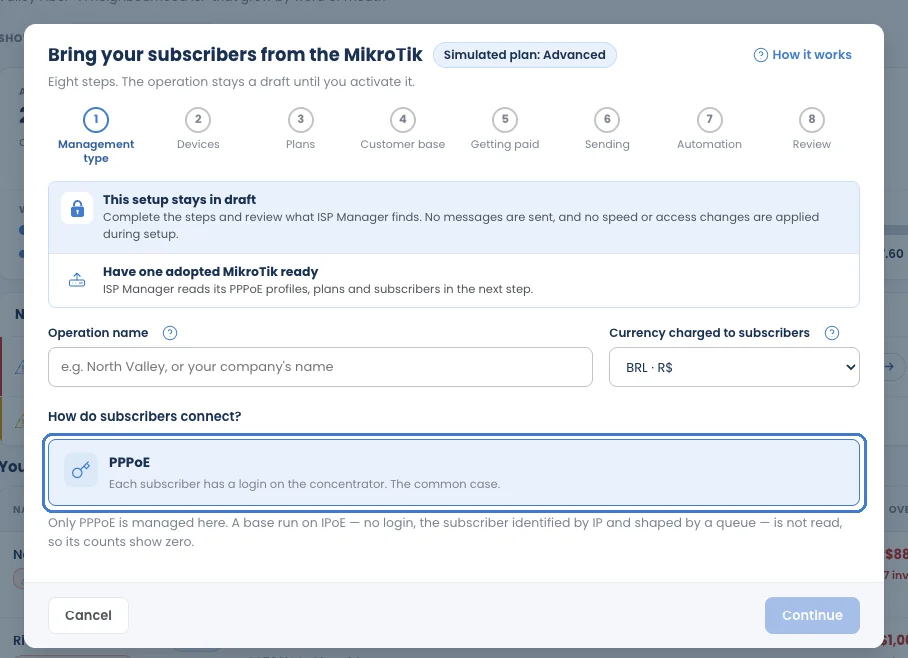
- Type the Operation name (for example, the city or the POP).
- Pick the Currency charged to subscribers. Each operation has its own currency.
- Under How do subscribers connect?, PPPoE is selected. Only PPPoE is managed: a base run on IPoE is not read, so its counts show zero.
- Click Continue.
Step 2 · Devices
Section titled “Step 2 · Devices”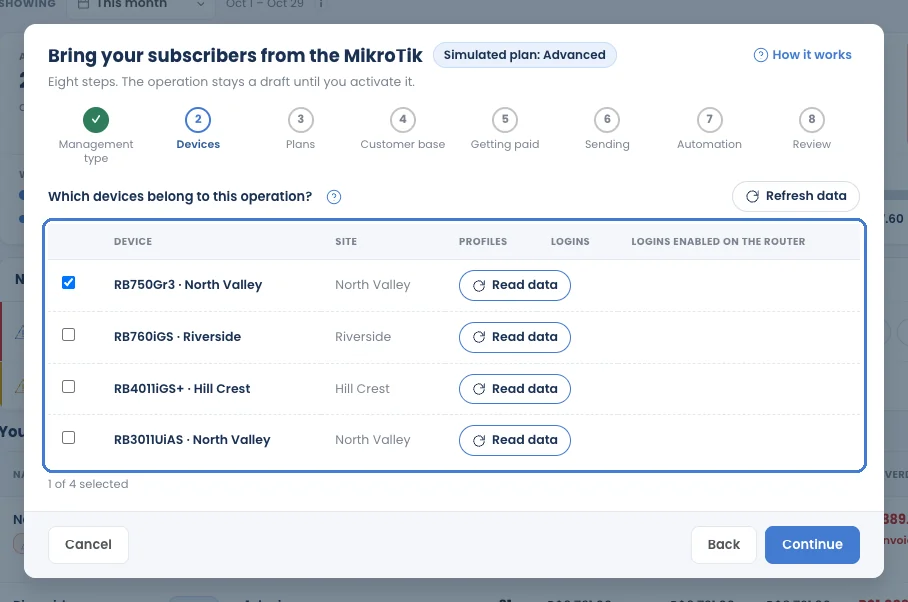
Under Which devices belong to this operation?, tick the routers your subscribers connect through. The columns show how many logins each one carries: pick the one with your base. ISP Manager reads their PPPoE profiles, plans and subscribers; nothing is changed on the router.
- A router already used by another operation is marked Already in another operation.
- If a router’s data looks old, click Refresh data to re-read its latest configuration.
- No router listed? Adopt a MikroTik first.
Step 3 · Plans
Section titled “Step 3 · Plans”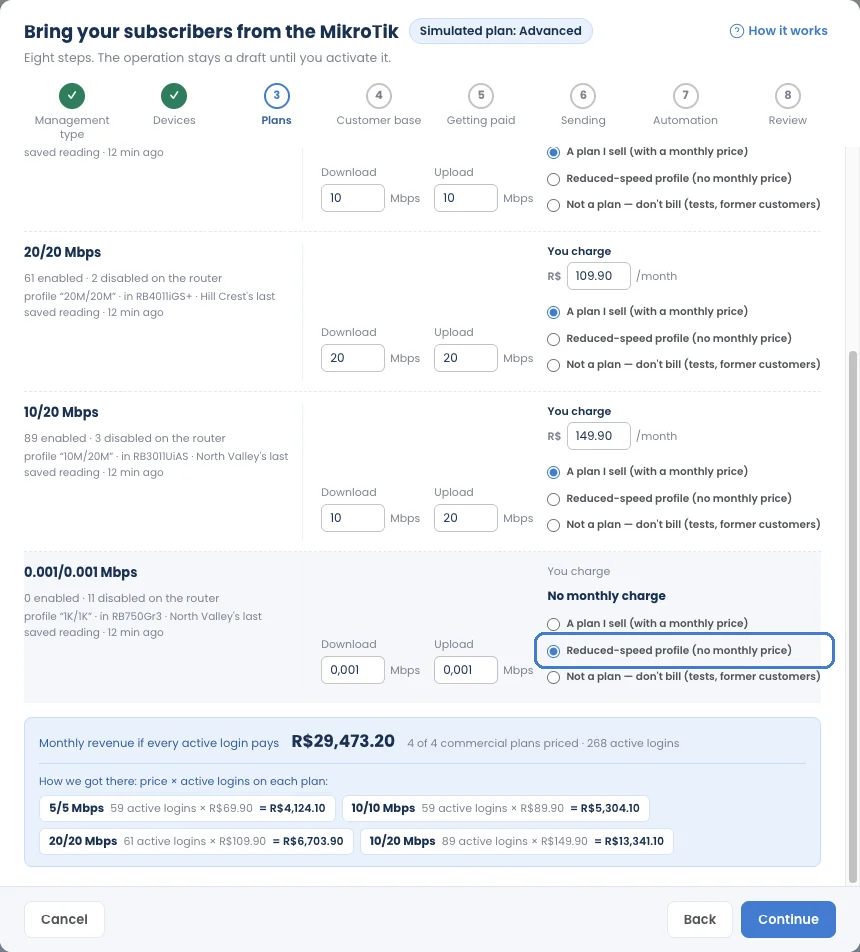
ISP Manager lists the PPPoE profiles it found on your routers, with how many logins use each one and the Download and Upload speeds in Mbps. For each profile, choose one:
- A plan I sell (with a monthly price): type the price in You charge … /month.
- Reduced-speed profile (no monthly price): the profile the Reduce speed step moves overdue subscribers to. Mark one if you want to use that step.
- Not a plan — don’t bill (tests, former customers).
Step 4 · Customer base
Section titled “Step 4 · Customer base”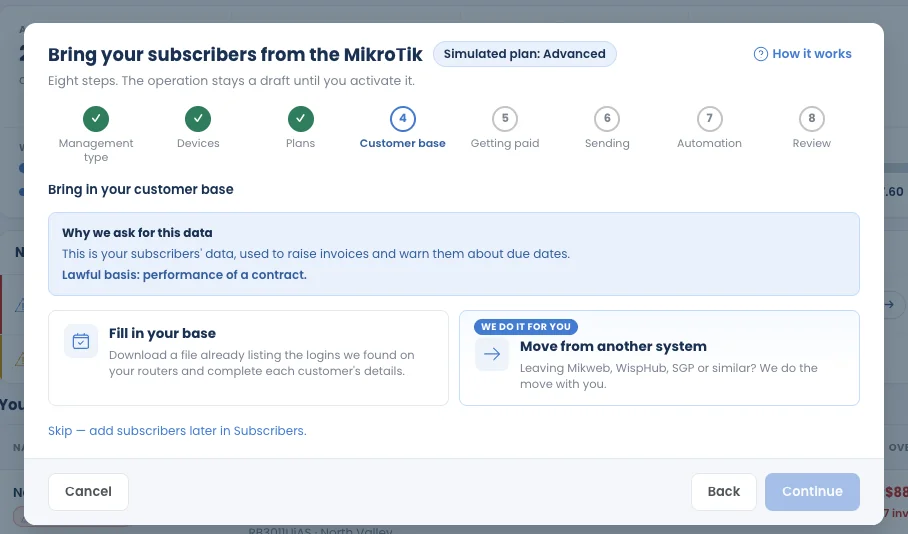
Bring in who your subscribers are, so invoices go to the right person:
- Fill in your base: download a file that already lists the logins found on your routers, and complete each customer’s details.
- Move from another system: our team does the move with you.
- Skip — add subscribers later in Subscribers.
The screen explains why this data is needed: it is used to issue invoices and warn subscribers about due dates.
Step 5 · Getting paid
Section titled “Step 5 · Getting paid”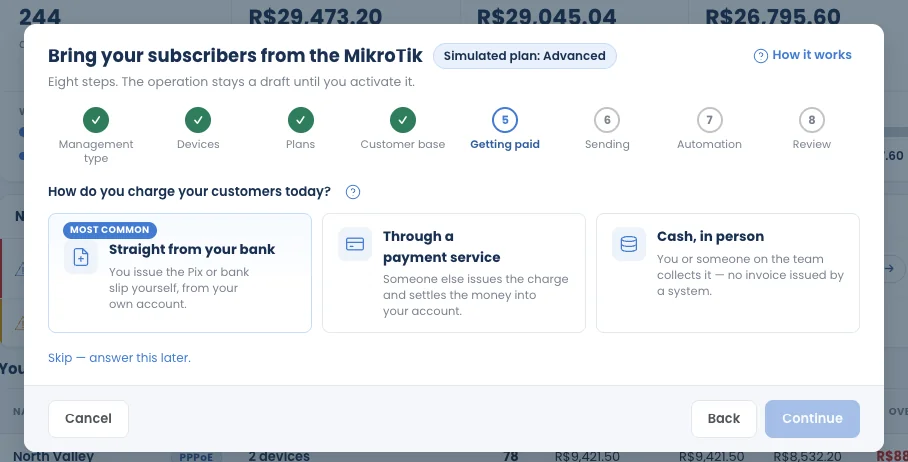
Tell ISP Manager how you charge customers today: Straight from your bank, Through a payment service, or Cash, in person. You can Skip and answer later. Payment gateways themselves are connected in Integrations › Payments (see Payment methods).
Step 6 · Sending
Section titled “Step 6 · Sending”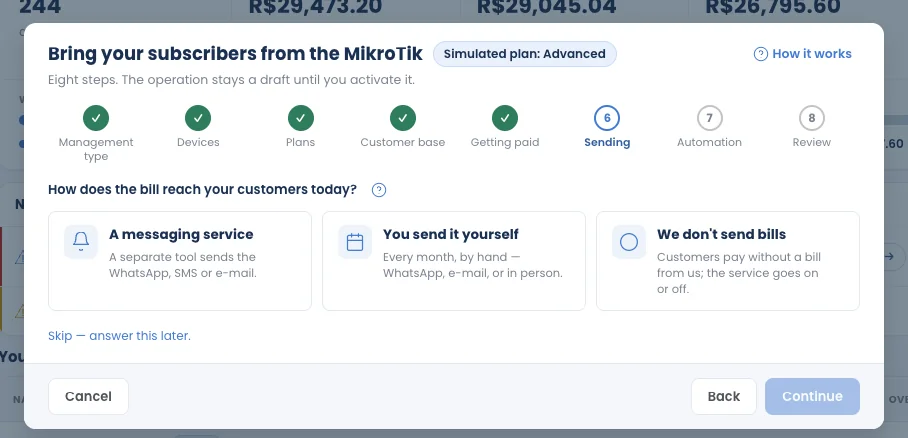
Tell ISP Manager how the bill reaches your customers today: A messaging service, You send it yourself, or We don’t send bills. You can Skip and answer later.
Step 7 · Automation
Section titled “Step 7 · Automation”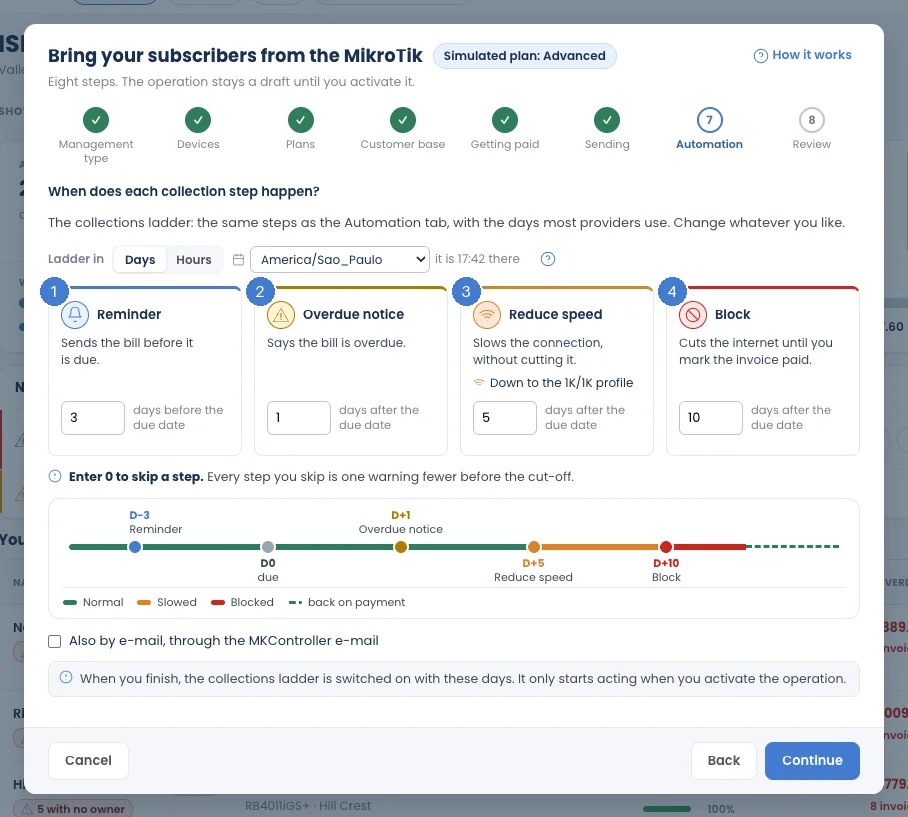
Set when each collection step happens. The setup suggests the days most providers use; change any of them.
| Step | You set |
|---|---|
| Reminder | days before the due date |
| Overdue notice | days after the due date |
| Reduce speed | days after the due date |
| Block | days after the due date |
- Enter 0 to skip a step (in hours, use the step’s switch). Every step you skip is one warning fewer before the cut-off.
- Reduce speed needs a reduced-speed profile marked in step 3. If none is marked, mark one or enter 0.
- Choose Days or Hours, and the operation’s time zone. See Collection steps.
- Also by e-mail, through the MKController e-mail: tick it to send the messages by e-mail too.
Step 8 · Review
Section titled “Step 8 · Review”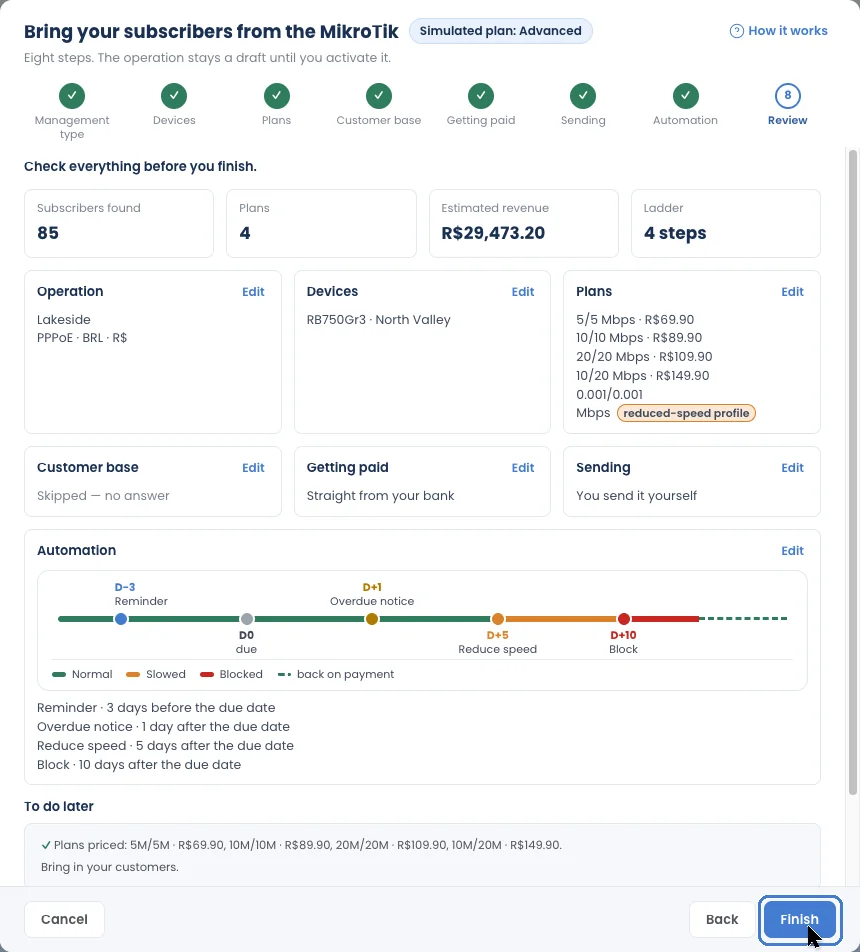
Check everything before you finish. The summary shows the operation, the subscribers found, the estimated revenue (each plan’s price × its active logins), the collection steps, and anything left To do later (for example, connecting your e-mail). Click Edit on any part to go back to it.
Click Finish. The operation is created at once (Operation created) as a draft: the collection steps are saved, but they only start acting when you activate the operation.
After the setup: activate
Section titled “After the setup: activate”- Open the operation and go to the Automation tab.
- Click Activate this operation.
From then on, invoices are issued and the collection steps run on the days you set. To stop billing later, see Deactivate or delete.