Vouchers - A complete Guide
Summary
In this guide, you will learn how to configure and deploy MKController Vouchers with confidence. First, verify that your target device is fully adopted within MKController to guarantee seamless communication. Next, create a Hotspot Captive Portal to serve as the voucher redemption interface. You can customize the portal’s layout, branding, and authentication parameters to meet your requirements. Finally, generate the voucher codes in the Vouchers module. With the device adopted and portal configured, each voucher will function correctly upon issuance.
What are MKController Vouchers?
MKController Vouchers are essentially prepaid tickets that grant users access to your Wi-Fi network for a specified duration and/or data limit. They provide a controlled and secure method for offering internet access, whether it’s a free service for your customers or a paid offering to generate additional income. This system is particularly beneficial for businesses such as cafes, hotels, co-working spaces, and event venues that need to manage internet access efficiently and securely.
Benefits of Using MKController Vouchers:
For Businesses:
- Total Control: Customize plans with varying prices, access times, and data limits to meet specific business needs.
- Simplified Management: Easily issue, monitor, and manage vouchers through an intuitive online system.
- Enhanced Security: Control who accesses your network and for how long, protecting your data and devices.
- New Revenue Streams: Generate additional profits by selling vouchers, fostering customer loyalty, and attracting new audiences.
- Strategic Analysis: Obtain detailed reports on network usage to make informed decisions and optimize your business operations.
For Customers:
- Unparalleled Convenience: Quick and easy internet connection without complex login procedures.
- Tailored Flexibility: Diverse plan options to suit different needs and budgets.
- Guaranteed Security: Password-protected internet access ensures data confidentiality.
- Enhanced Experience: Increased customer satisfaction due to convenient and easy internet access.
How to Configure MKController Voucher
MKController significantly simplifies the configuration and management of voucher-based hotspots on MikroTik routers. It provides an intuitive interface and powerful features that streamline the entire process, from voucher creation to login page customization.
Key Features:
- Quick Voucher Creation: Generate batches of vouchers with various values and expiration dates in minutes.
- Login Screen Customization: Create a personalized login screen featuring your logo, service information, and terms of use.
Step 1: Configuring Hotspot on the MKController Platform
To begin configuring your hotspot, access MKController through the link https://app.mkcontroller.com and log in with your credentials.
Step 1.1: Creating the Hotspot
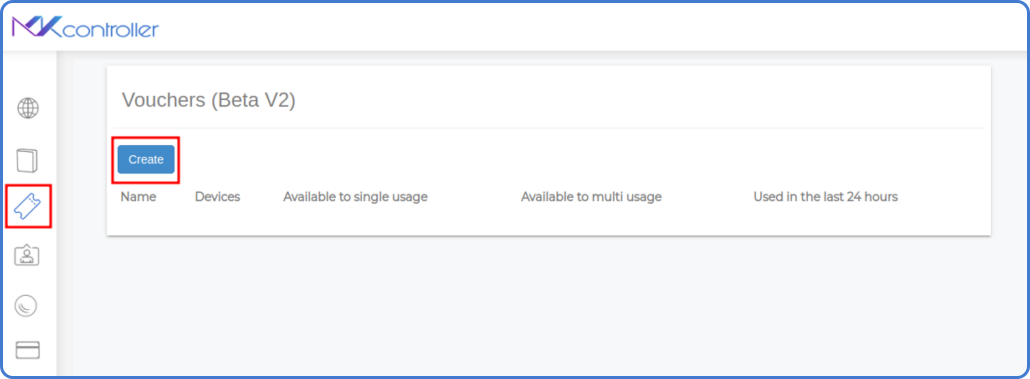
- On the main menu, navigate to the “Voucher WiFi” section.
- Click the “Create” button to start configuring a new hotspot.
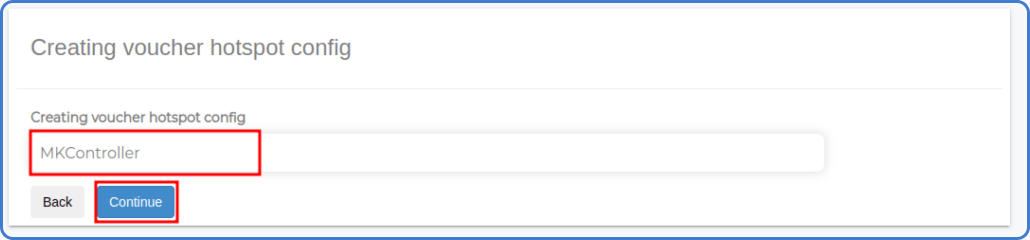
- Assign an identifier name to your hotspot (e.g., “MKController”, “Store Hotspot”, “Wi-Fi for Customers”). Click Continue.
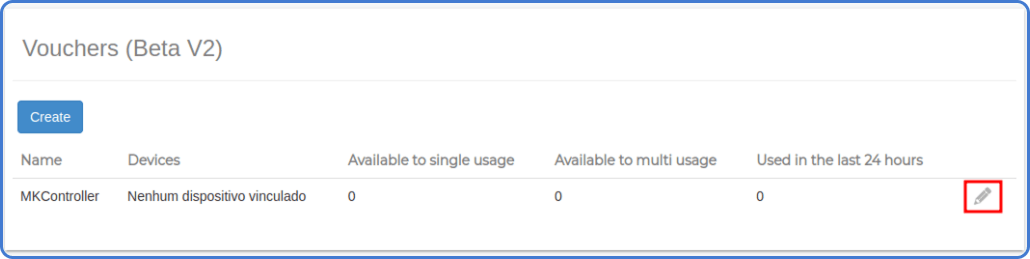
- In the hotspot identifier name, on the right side of the screen, click the pencil symbol (settings).
Step 1.2: Hotspot Information
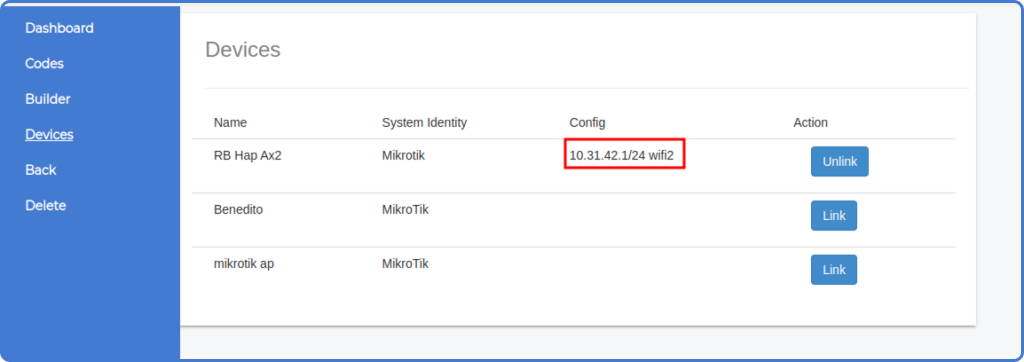
- Select the Devices option.
- Click the “Link” button to connect the hotspot to a specific MikroTik device.
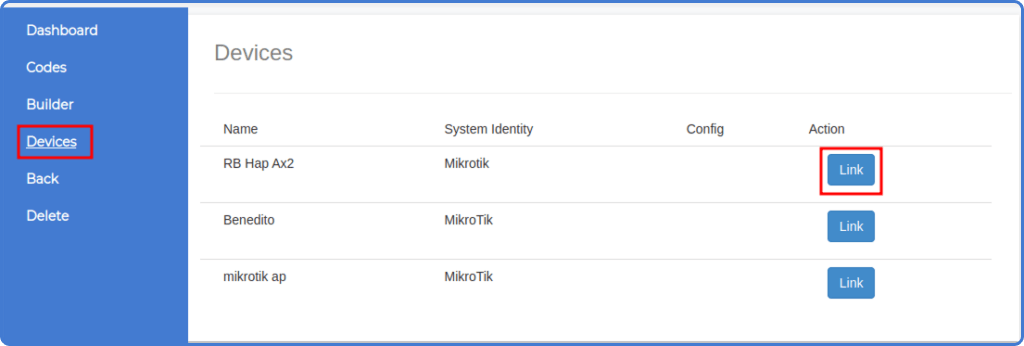
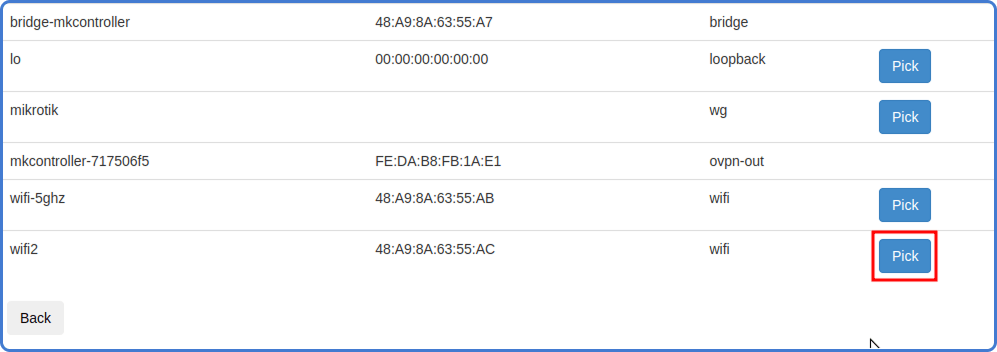
- Select the desired device interface for hotspot connection from the list presented.
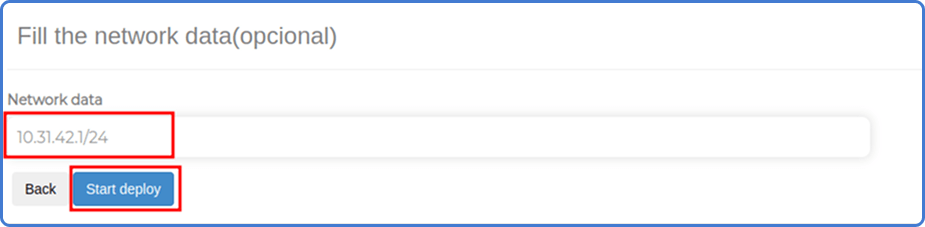
Step 1.3: IP Pool Configuration:
Enter a specific IP and network mask to create a custom pool, or keep the default settings to use the IP pool suggested by the system.
Click “Start settings” to initiate the automatic configuration process on the MikroTik device.
Step 1.4: Configuration Completion:
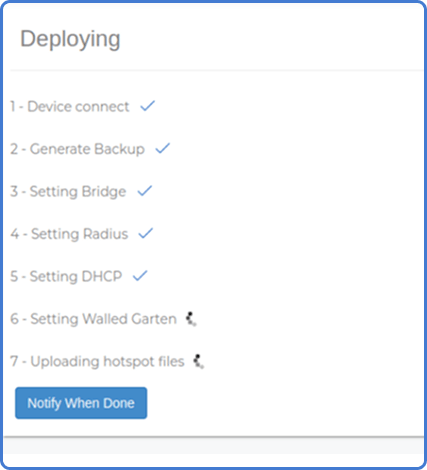
Wait for the process to complete. The system will display the information of the configured IP pool and the MikroTik interface linked to the hotspot.
Step 2: Creating a Customized Wi-Fi Login Page on the MKController Portal
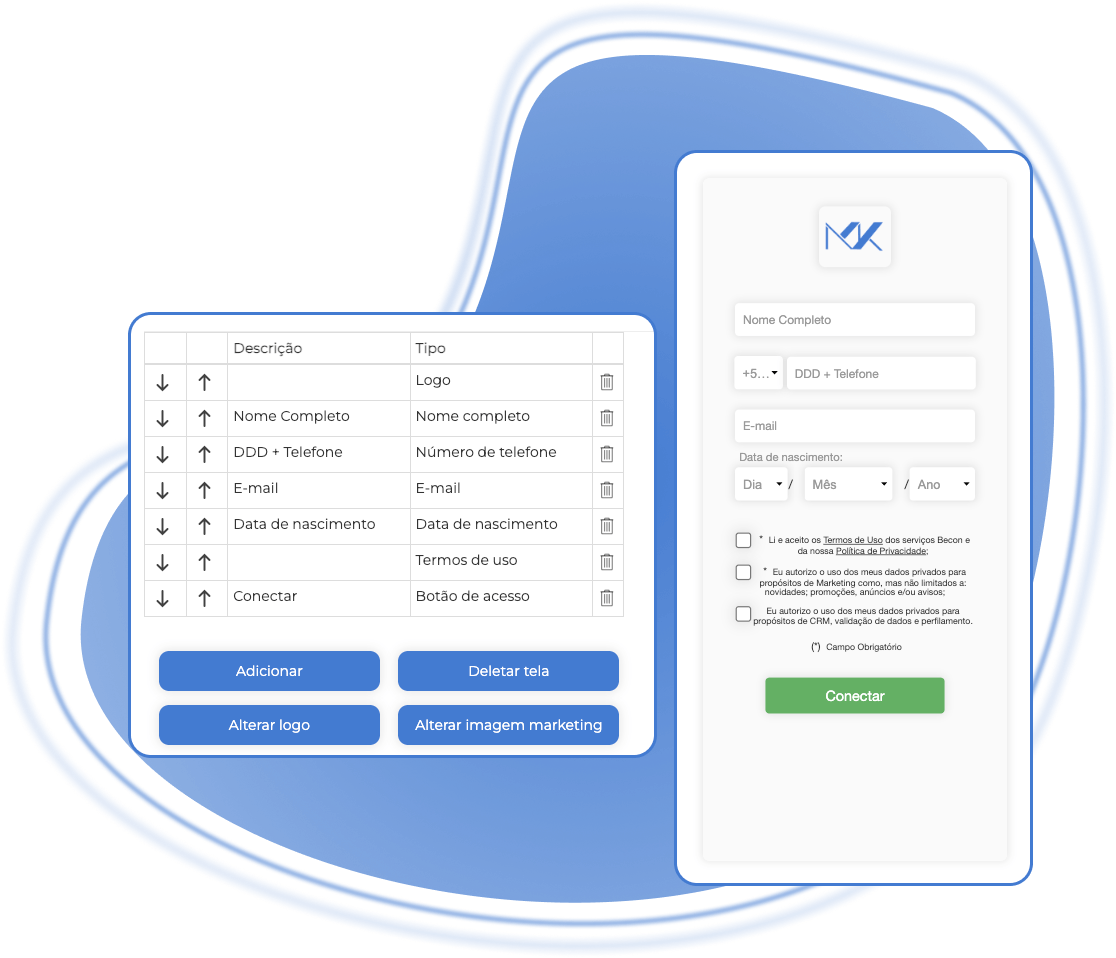
Personalizing your Wi-Fi login page enhances the user experience and strengthens your brand. With MKController, you can create a unique and professional login page. Before proceeding, ensure your Hotspot is already configured.
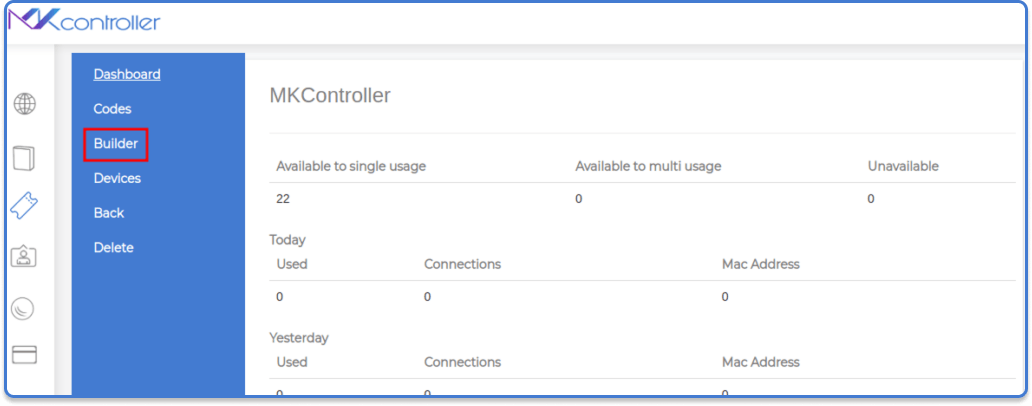
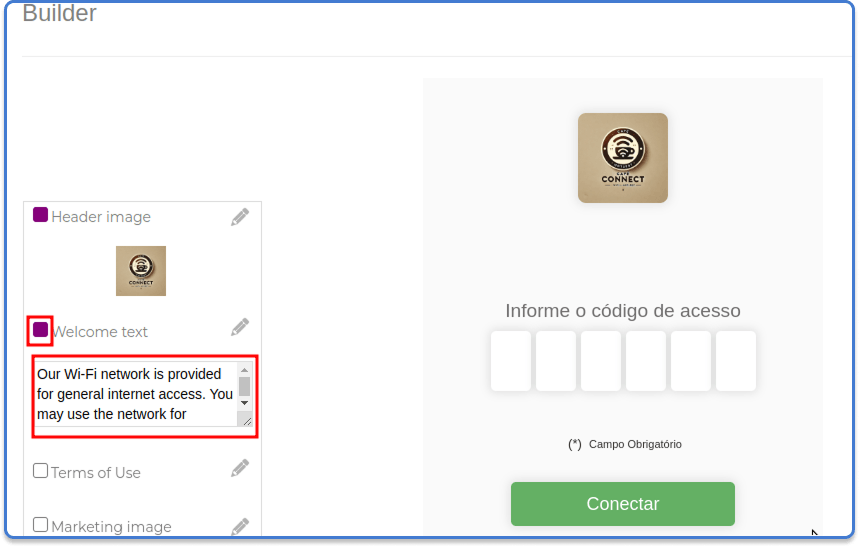
Step 2.1: Access the Builder
Select the Builder option within the MKController portal.
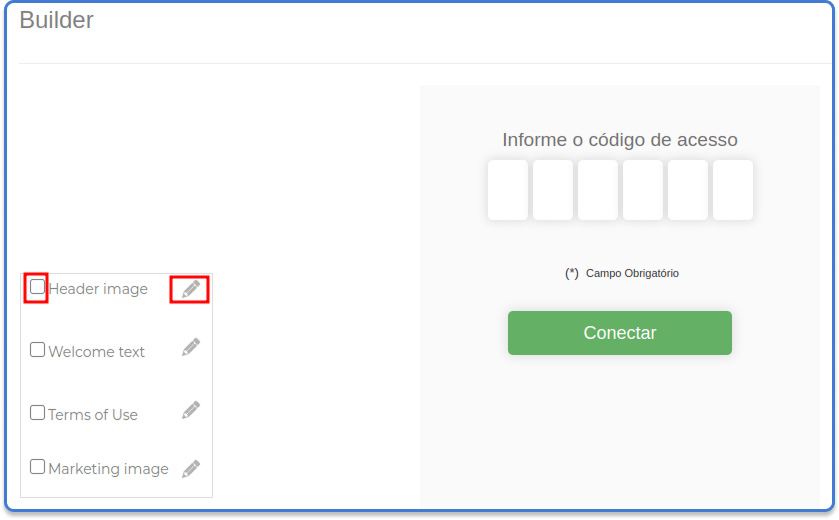
Step 2.2: Create a Striking Logo
Activate the “Header image” option, then select the pencil symbol to choose a logo that best represents your brand.
Step 2.3: Create a Welcoming Welcome Message
Activate the “Welcome Message” option and type a personalized message to greet your customers.
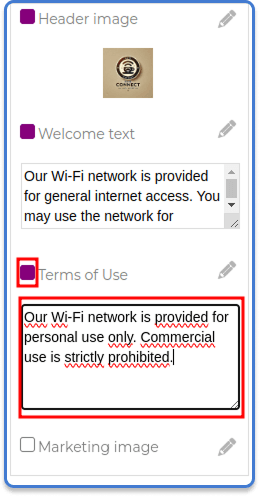
Step 2.4: Provide Clear and Objective Terms of Use
Activate the “Terms of Use” option and develop terms of use that comply with the laws of your country and the specificities of your business.
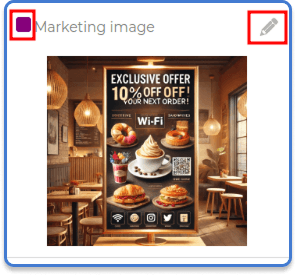
Step 2.5: Display Your Masterpiece with a Marketing Image
Activate the “Marketing Image” option, then select the pencil symbol to choose an image that complements your message and captures the attention of your customers. This is an opportunity to showcase your products, services, or promotions creatively.
Step 3: Generating MikroTik Vouchers
With MKController, you can generate customized MikroTik vouchers in just a few minutes. Our intuitive platform allows you to create unique codes, define usage rules, and print your vouchers conveniently. Before generating vouchers, ensure your Hotspot is configured and your login page is customized.
Step 3.1: Access the Voucher Generator
On the MKController website, navigate to the voucher creation section, typically labeled “Create Batch.”
Step 3.2: Fill in the Data
Provide the following information:
- Batch Name: An identifier for your vouchers.
- Number of Codes: The quantity of vouchers to be created by the system.
- Code Usage Mode: Choose between “One connection per voucher” or “Simultaneous use on multiple devices.”
- Session Duration: Define the access duration after login (in minutes, hours, or days).
- Notes: Optional notes for internal reference.
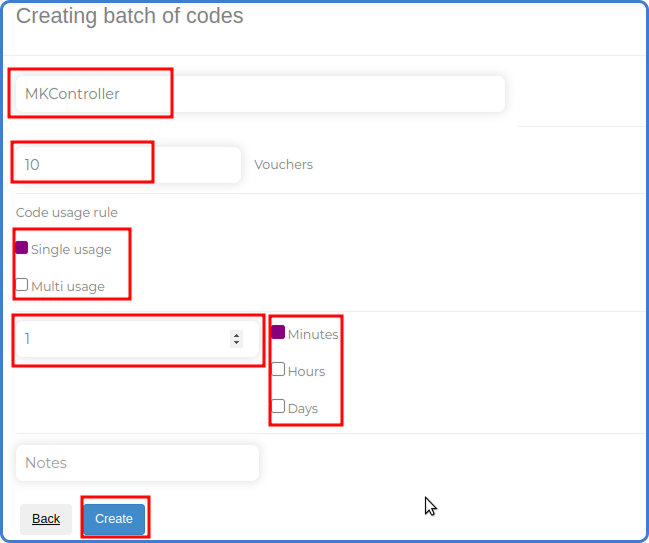
Then click “Create” to generate your vouchers.
Important Note
(Optional) Print Your MikroTik Vouchers Simply:
- Select the “Print Batch” option.
- Click “Print.”
- Choose between printing the vouchers directly or generating a PDF file for later printing or distribution.
Data Limit in MikroTik Vouchers
Managing data consumption in vouchers is essential to optimize your network’s resource usage. With MKController, you can configure personalized data limits in MikroTik vouchers, ensuring efficiency, cost savings, and a balanced experience for users.
This functionality is especially advantageous for internet providers, businesses, or public places like cafes, hotels, and coworking spaces, that offer temporary internet access. Check out the main benefits below:
Why set data limits on MikroTik vouchers?
- Prevention of excessive use: Control bandwidth usage and prevent a single user from negatively impacting the experience of others.
- Cost reduction: Maximize infrastructure efficiency by using resources in a balanced way.
- Fair user experience: Ensure everyone has access to a proportional share of the available bandwidth.
- Simple and efficient management: Monitor data consumption in real-time with detailed and accurate reports.
- Ancillary revenue: Allows your partners to sell system access in locations with low signal coverage.
Data consumption also enables satellite projects where costs are tied to consumption, such as Viasat, Starlink, Globalstar, Hughes, and others.
Next, we will show you how to configure data limits in MikroTik Vouchers on the MKController platform, optimizing your network management simply and practically.
Before proceeding with the configurations, make sure to meet the following prerequisites:
MikroTik integrated with MKController: Ensure your MikroTik is already integrated with the MKController platform.
Hotspot configuration and voucher generation: Verify that the Hotspot has been properly configured and vouchers have been generated.
How to Configure Data Limit in MikroTik Vouchers on MKController
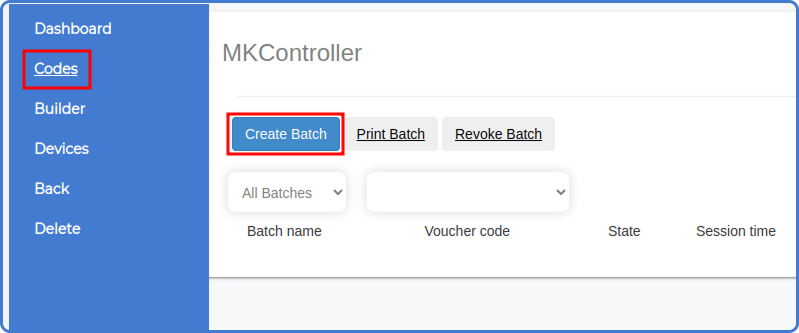
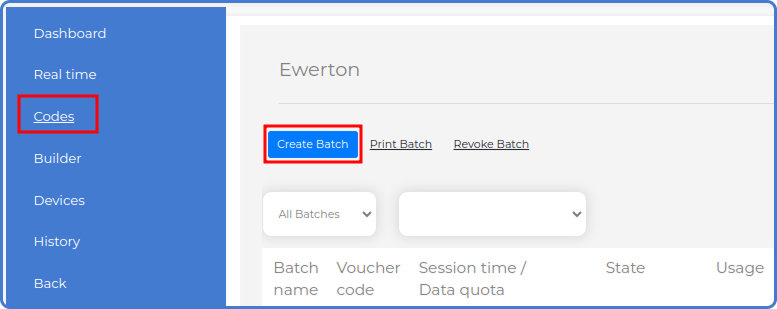
Step 1: Creating
Access the “Codes” option and click the Create Batches button.
Step 2: Information
Fill in the basic information:

- Batch name: Clearly identify your vouchers (e.g., “Batch 1 GB”).
- Quantity of codes: Enter the number of vouchers you want to create.
- Code usage mode: Choose between “One connection per voucher” or “Simultaneous use on multiple devices.”
Step 3: Parameters
Configure the voucher parameters:
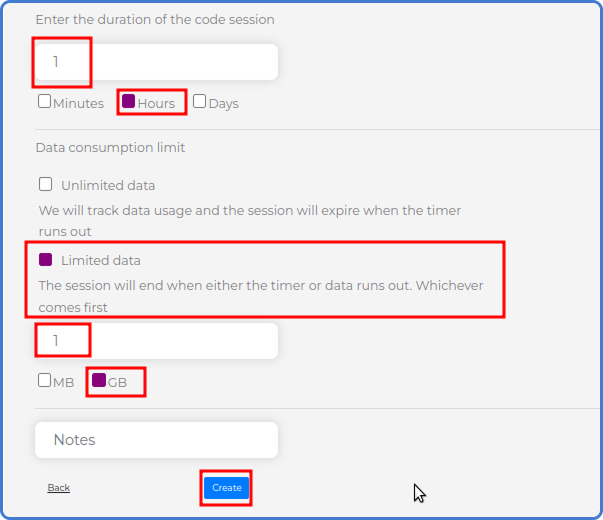
- Session duration: Define the access time after login (minutes, hours, or days).
- Data consumption limit: If you choose to limit data, enter the desired value (e.g., 1) and select the unit of measurement (MB or GB).
Click Create to finalize the configuration.
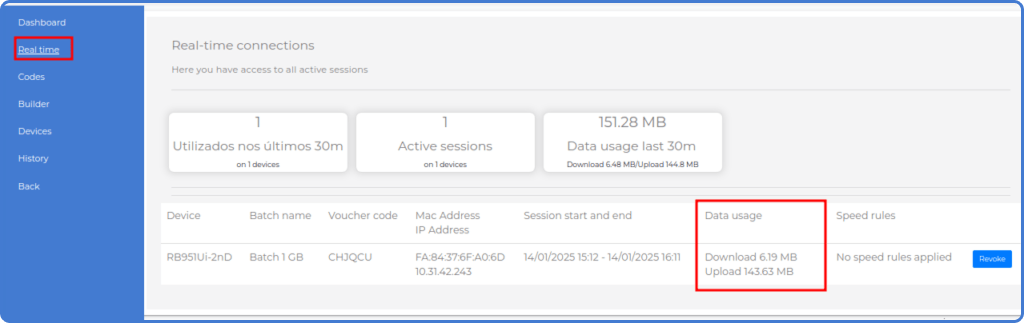
Monitor consumption in real-time:
In the Real-time menu, you can monitor the usage of each voucher in the Data Usage column, which displays the total volume of data consumed (upload and download) by each connection.