Configurar Vouchers de Hotspot MikroTik
Resumo Configurar Wi-Fi baseado em vouchers MikroTik no MKController leva dois passos: configure um hotspot vinculado a um dispositivo MikroTik e, em seguida, gere um lote de vouchers com as regras que você escolher. Este guia cobre o processo completo — desde a criação do hotspot e a configuração do pool de IPs até a geração e impressão de lotes de vouchers. Ele inclui a observação crítica para ambientes com múltiplos APs usando o modo bridge.
O Que É o Wi-Fi com Vouchers MikroTik no MKController?
Section titled “O Que É o Wi-Fi com Vouchers MikroTik no MKController?”O Wi-Fi com Vouchers MikroTik no MKController é um sistema de hotspot gerenciado na nuvem que permite aos operadores criar, distribuir e acompanhar códigos de acesso Wi-Fi pré-pagos para hotspots MikroTik RouterOS. Em vez de configurar o hotspot manualmente no RouterOS, o MKController cuida da configuração através de uma interface guiada e armazena todos os dados dos vouchers de forma centralizada — dando aos operadores visibilidade em tempo real do uso e da receita.
Os vouchers do MKController oferecem suporte ao uso simultâneo em dispositivo único e em múltiplos dispositivos, durações de sessão personalizadas, limites de dados configuráveis e impressão em PDF para distribuição física. A página de login do portal cativo é totalmente personalizável com seu logotipo, mensagem de boas-vindas e termos de uso.
Para ISPs e WISPs, o sistema de vouchers transforma um CPE MikroTik padrão em um hotspot gerador de receita sem hardware adicional. Para operadores de estabelecimentos (hotéis, cafés, espaços de coworking, parques públicos, escolas), ele substitui o compartilhamento manual de senhas por códigos de acesso pré-pagos escaláveis e rastreáveis.
Passo 1: Configure o Hotspot no MKController
Section titled “Passo 1: Configure o Hotspot no MKController”Passo 1.1: Crie o Hotspot
Section titled “Passo 1.1: Crie o Hotspot”-
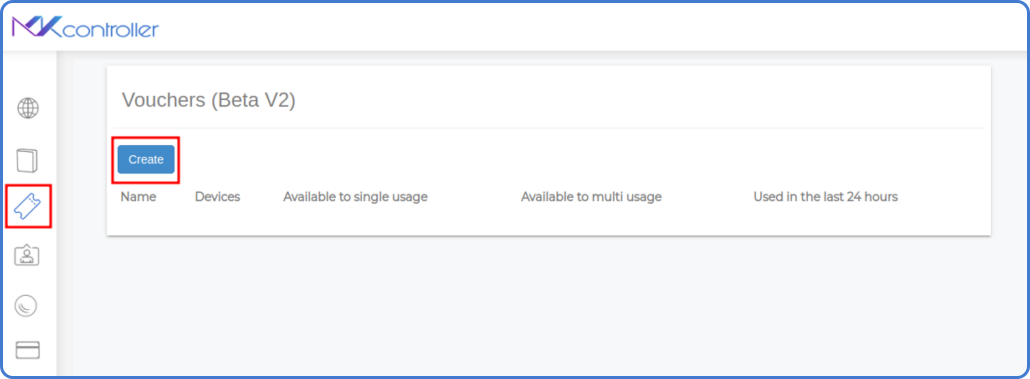
Faça login em app.mkcontroller.com e abra a seção Voucher WiFi no menu principal.
-
Clique em Criar para começar a configurar um novo hotspot.
-
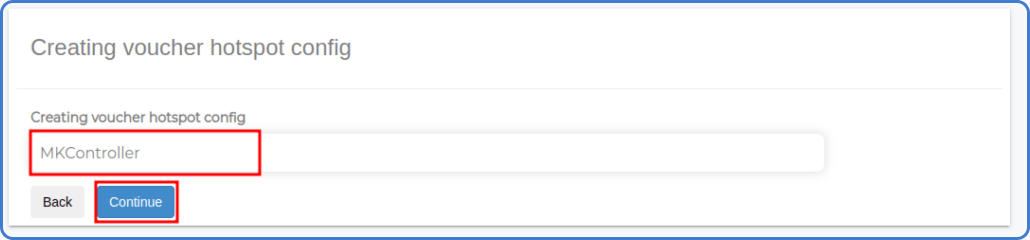
Atribua um nome ao seu hotspot (por exemplo: “Hotspot da Loja”, “Wi-Fi para Visitantes” ou o nome da sua marca). Clique em Continuar.
-
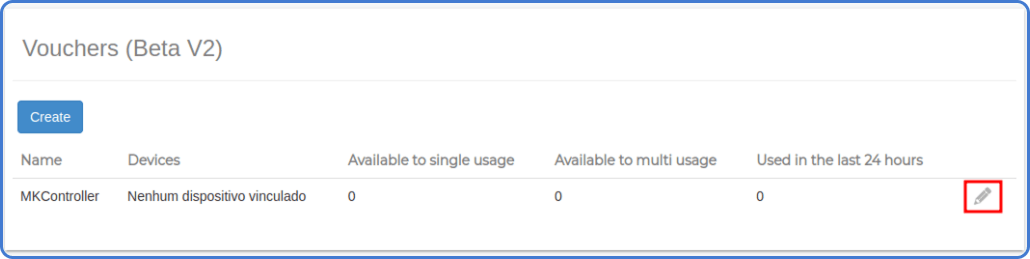
Clique no ícone de lápis (configurações) ao lado do nome do hotspot para abrir o painel de configuração.
Passo 1.2: Vincule o Hotspot a um Dispositivo MikroTik
Section titled “Passo 1.2: Vincule o Hotspot a um Dispositivo MikroTik”-
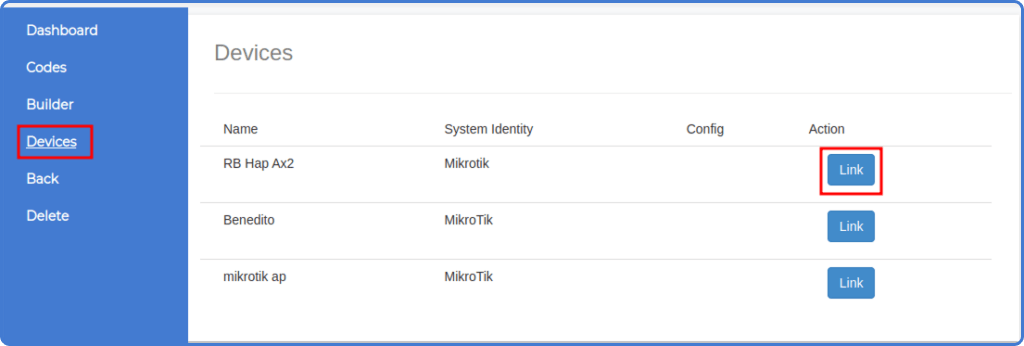
Selecione a opção Dispositivos nas configurações do hotspot.
-
Clique em Vincular para conectar este hotspot a um dispositivo MikroTik específico.
-
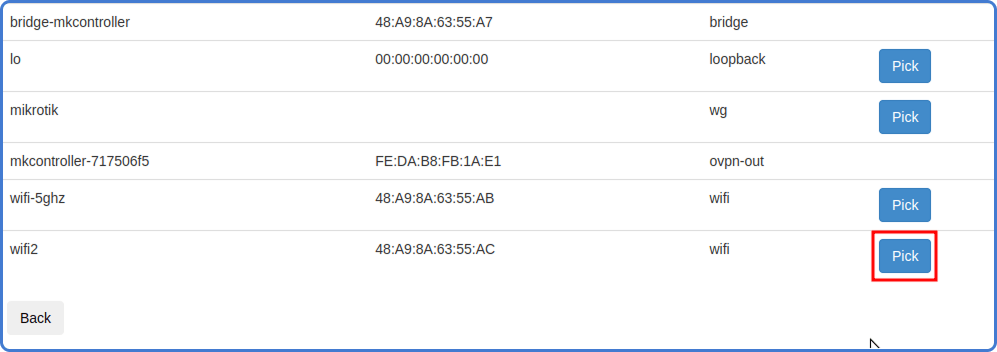
Selecione a interface no dispositivo MikroTik que os clientes do hotspot usarão.
Passo 1.3: Configure o Pool de IPs
Section titled “Passo 1.3: Configure o Pool de IPs”-
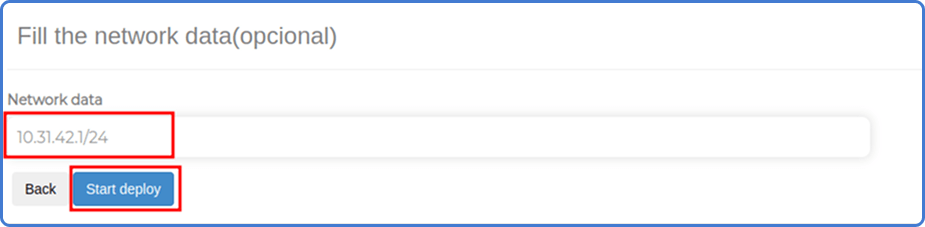
Insira um endereço IP e uma máscara de sub-rede para criar um pool personalizado, ou mantenha os padrões para usar o pool sugerido pelo sistema.
-
Clique em Iniciar Configuração para enviar a configuração do hotspot ao dispositivo MikroTik automaticamente.
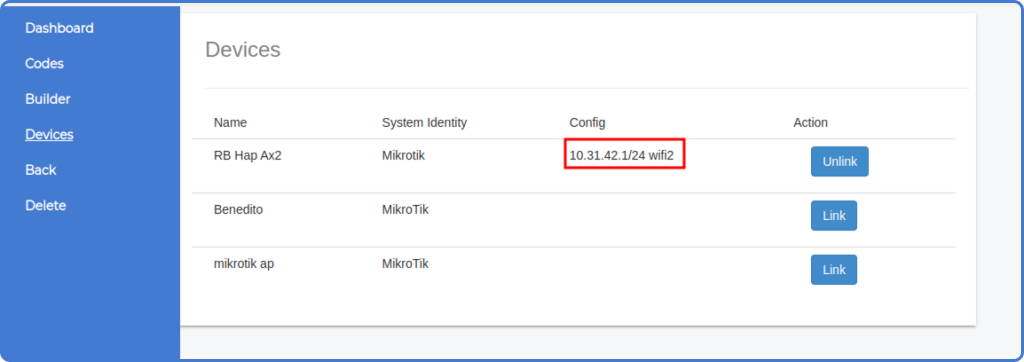
Passo 1.4: Confirme que a Configuração Está Concluída
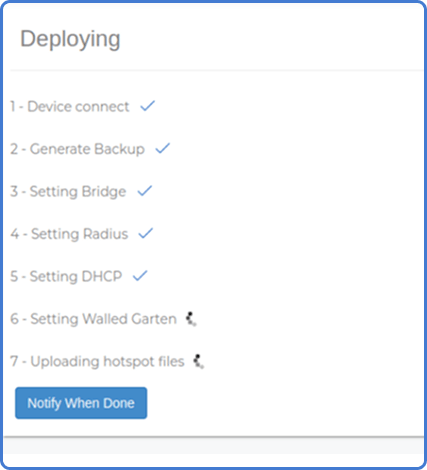
Section titled “Passo 1.4: Confirme que a Configuração Está Concluída”Aguarde o MKController terminar de configurar o dispositivo. A tela confirmará o pool de IPs e a interface vinculada ao hotspot.
Passo 2: Gere Lotes de Vouchers MikroTik
Section titled “Passo 2: Gere Lotes de Vouchers MikroTik”Com o hotspot configurado, você pode criar lotes de vouchers. Cada lote é um conjunto de códigos de acesso que compartilham as mesmas regras.
Passo 2.1: Abra o Gerador de Vouchers
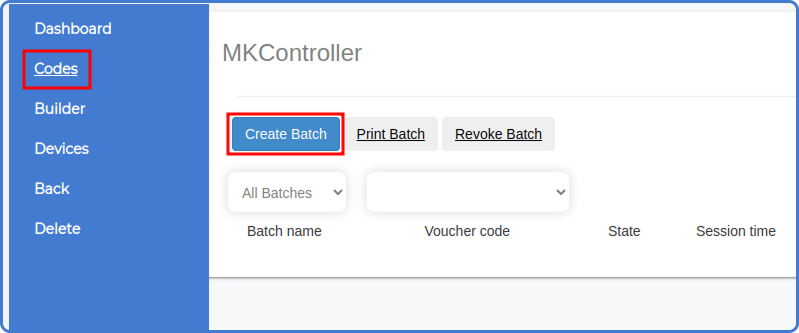
Section titled “Passo 2.1: Abra o Gerador de Vouchers”Na seção Voucher WiFi, navegue até a área de criação de vouchers e clique em Criar Lote.
Passo 2.2: Defina os Parâmetros do Voucher
Section titled “Passo 2.2: Defina os Parâmetros do Voucher”Preencha os seguintes campos:
- Nome do Lote: Um identificador para este conjunto de vouchers (por exemplo: “Semana 23 – Café” ou “Passe de Evento – Junho”).
- Número de Códigos: Quantos códigos de voucher gerar.
- Modo de Uso do Código: Escolha entre “Uma conexão por voucher” (uso único) ou “Uso simultâneo em vários dispositivos” (acesso compartilhado).
- Duração da Sessão: A quantidade de tempo de acesso à internet por voucher, definida em minutos, horas ou dias.
- Preço: Defina um preço por voucher para habilitar o acompanhamento de receita no painel.
- Observações: Referência interna opcional.
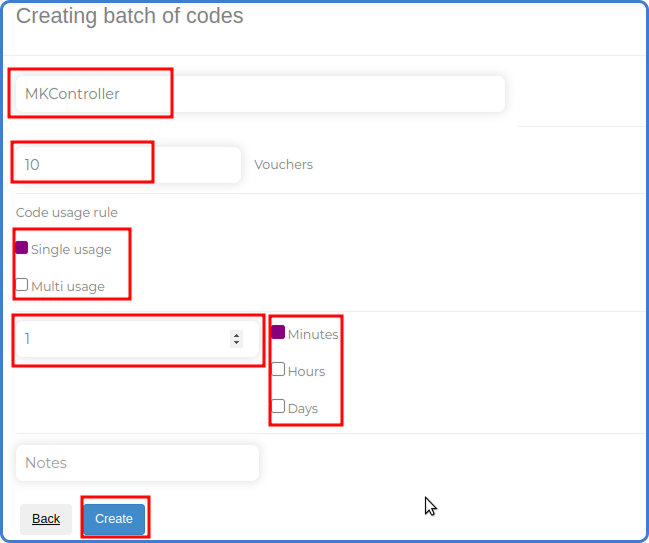
Clique em Criar para gerar o lote.
Ambientes com Múltiplos APs: Use o Modo Bridge
Section titled “Ambientes com Múltiplos APs: Use o Modo Bridge”Imprimir ou Exportar Vouchers
Section titled “Imprimir ou Exportar Vouchers”Para distribuir vouchers fisicamente:
- Selecione Imprimir Lote no lote que você deseja imprimir.
- Clique em Imprimir.
- Escolha Imprimir Diretamente para impressão imediata ou Salvar como PDF para distribuição posterior.
Pronto para começar a vender Wi-Fi pré-pago? Configure sua conta MKController ou fale com nossa equipe no WhatsApp para obter ajuda com a configuração do hotspot.
Dúvidas? 📧 contato@mkcontroller.com
Perguntas Frequentes
Section titled “Perguntas Frequentes”O que é o sistema de vouchers do MKController?
O sistema de vouchers do MKController é um módulo de gerenciamento de acesso a hotspot construído sobre o serviço HotSpot do MikroTik. Ele permite que você crie códigos de acesso pré-pagos com velocidades, limites de tempo e preços definidos, e os gerencie de forma centralizada a partir do painel em nuvem do MKController.
Posso personalizar a página de login Wi-Fi dos vouchers?
Sim. O MKController inclui um construtor de portal onde você pode definir seu próprio logotipo, cores e layout para a página de login do hotspot. Os clientes veem a sua marca em vez de uma página genérica.
Como eu acompanho a receita dos vouchers no MKController?
Abra o Painel de Vouchers dentro de uma configuração de voucher. Ele mostra a receita por dispositivo, por lote e por intervalo de tempo. Você pode filtrar por revendedores ou locais específicos usando os filtros de Lote e Dispositivo.
Posso vender vouchers através de revendedores?
Sim. Crie um lote de vouchers, atribua-o a um revendedor, e ele pode distribuir os códigos de forma independente. O Painel de Vouchers permite que você acompanhe o desempenho por lote, para que possa ver exatamente como cada revendedor ou local está convertendo.
Os vouchers funcionam com múltiplos access points?
Sim, desde que os access points adicionais estejam configurados como bridges (não como roteadores independentes) na mesma rede MikroTik. Um único voucher então funciona em todas as antenas conectadas a esse MikroTik.