Set Up MikroTik Hotspot Vouchers — Onboarding
Nội dung này hiện chưa có sẵn bằng ngôn ngữ của bạn.
Summary This guide takes a MikroTik hotspot from nothing to its first paid connection in six steps: enable WiFi Monetization, link a device, design the captive portal, create a plan or codes, turn on a payment method, and go live. Each step links to a deeper guide, and the steps are ordered so the easiest, highest-clarity actions come first.
What You Will Set Up
Section titled “What You Will Set Up”WiFi Monetization (formerly Voucher) turns a MikroTik into a paid Wi-Fi hotspot managed entirely from the cloud. Instead of configuring RouterOS by hand, you follow a guided flow: MKController pushes the hotspot, RADIUS, and walled-garden configuration to the device for you, then you design the login page and start selling access by time, data, and speed.
By the end of this guide you will have a working captive portal, at least one thing to sell (a plan or a batch of codes), and a live payment method — so a guest can connect and pay.
Before You Begin
Section titled “Before You Begin”You need three things in place:
- A MikroTik router running RouterOS, already adopted into MKController over its encrypted tunnel. If you have not adopted a device yet, follow Add Your First MikroTik Device first.
- An ADVANCED-tier plan, which includes the WiFi Monetization feature. Accounts without it are prompted to upgrade when they open the feature.
- A rough idea of what you want to sell — for example, a 2-hour pass, a daily pass, or a monthly guest plan. You can change this at any time.
No public IP, port forwarding, or extra hardware is required.
Step 1: Enable WiFi Monetization and Create a Voucher
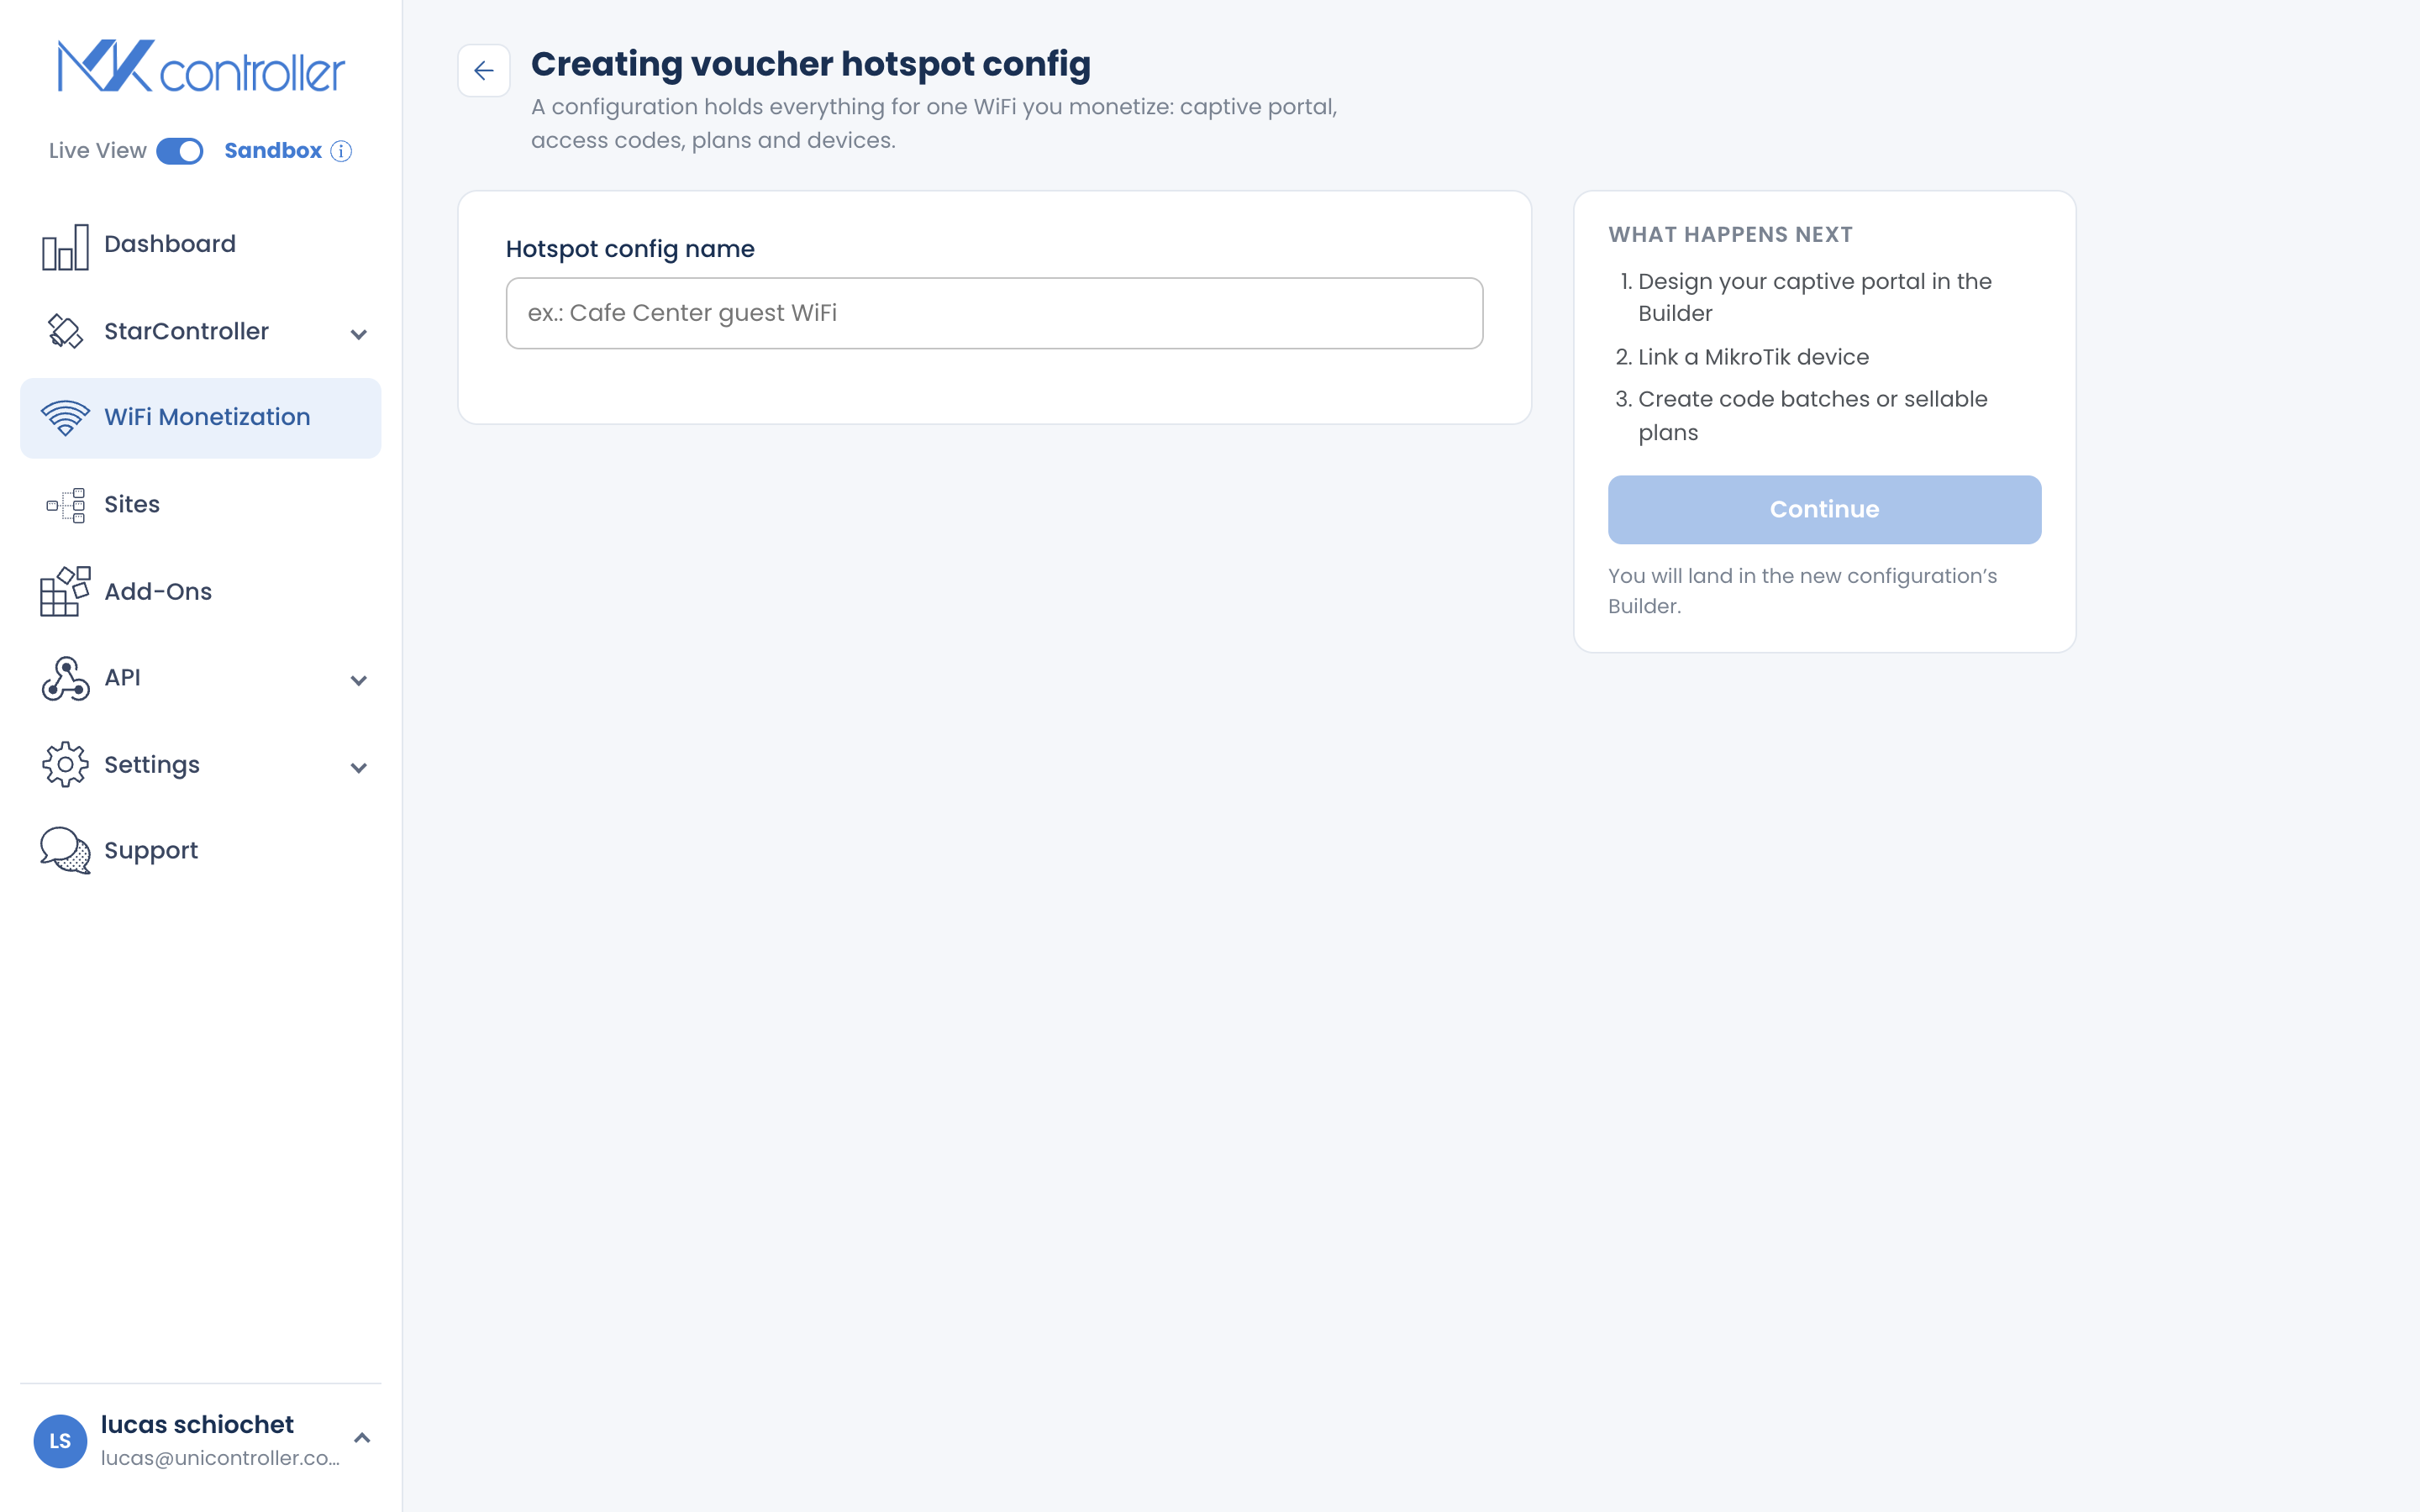
Section titled “Step 1: Enable WiFi Monetization and Create a Voucher”Open WiFi Monetization from the main menu and select Create. Give your voucher a clear name — this is the Wi-Fi campaign, such as “Café Counter Wi-Fi” or “Aurora Towers Guests” — and continue. MKController takes you straight into the Builder for your new voucher.
Think of a voucher as one hotspot campaign: it holds the devices, the captive portal design, the plans, and the reports for a single location or offer.
Step 2: Link Your MikroTik Device
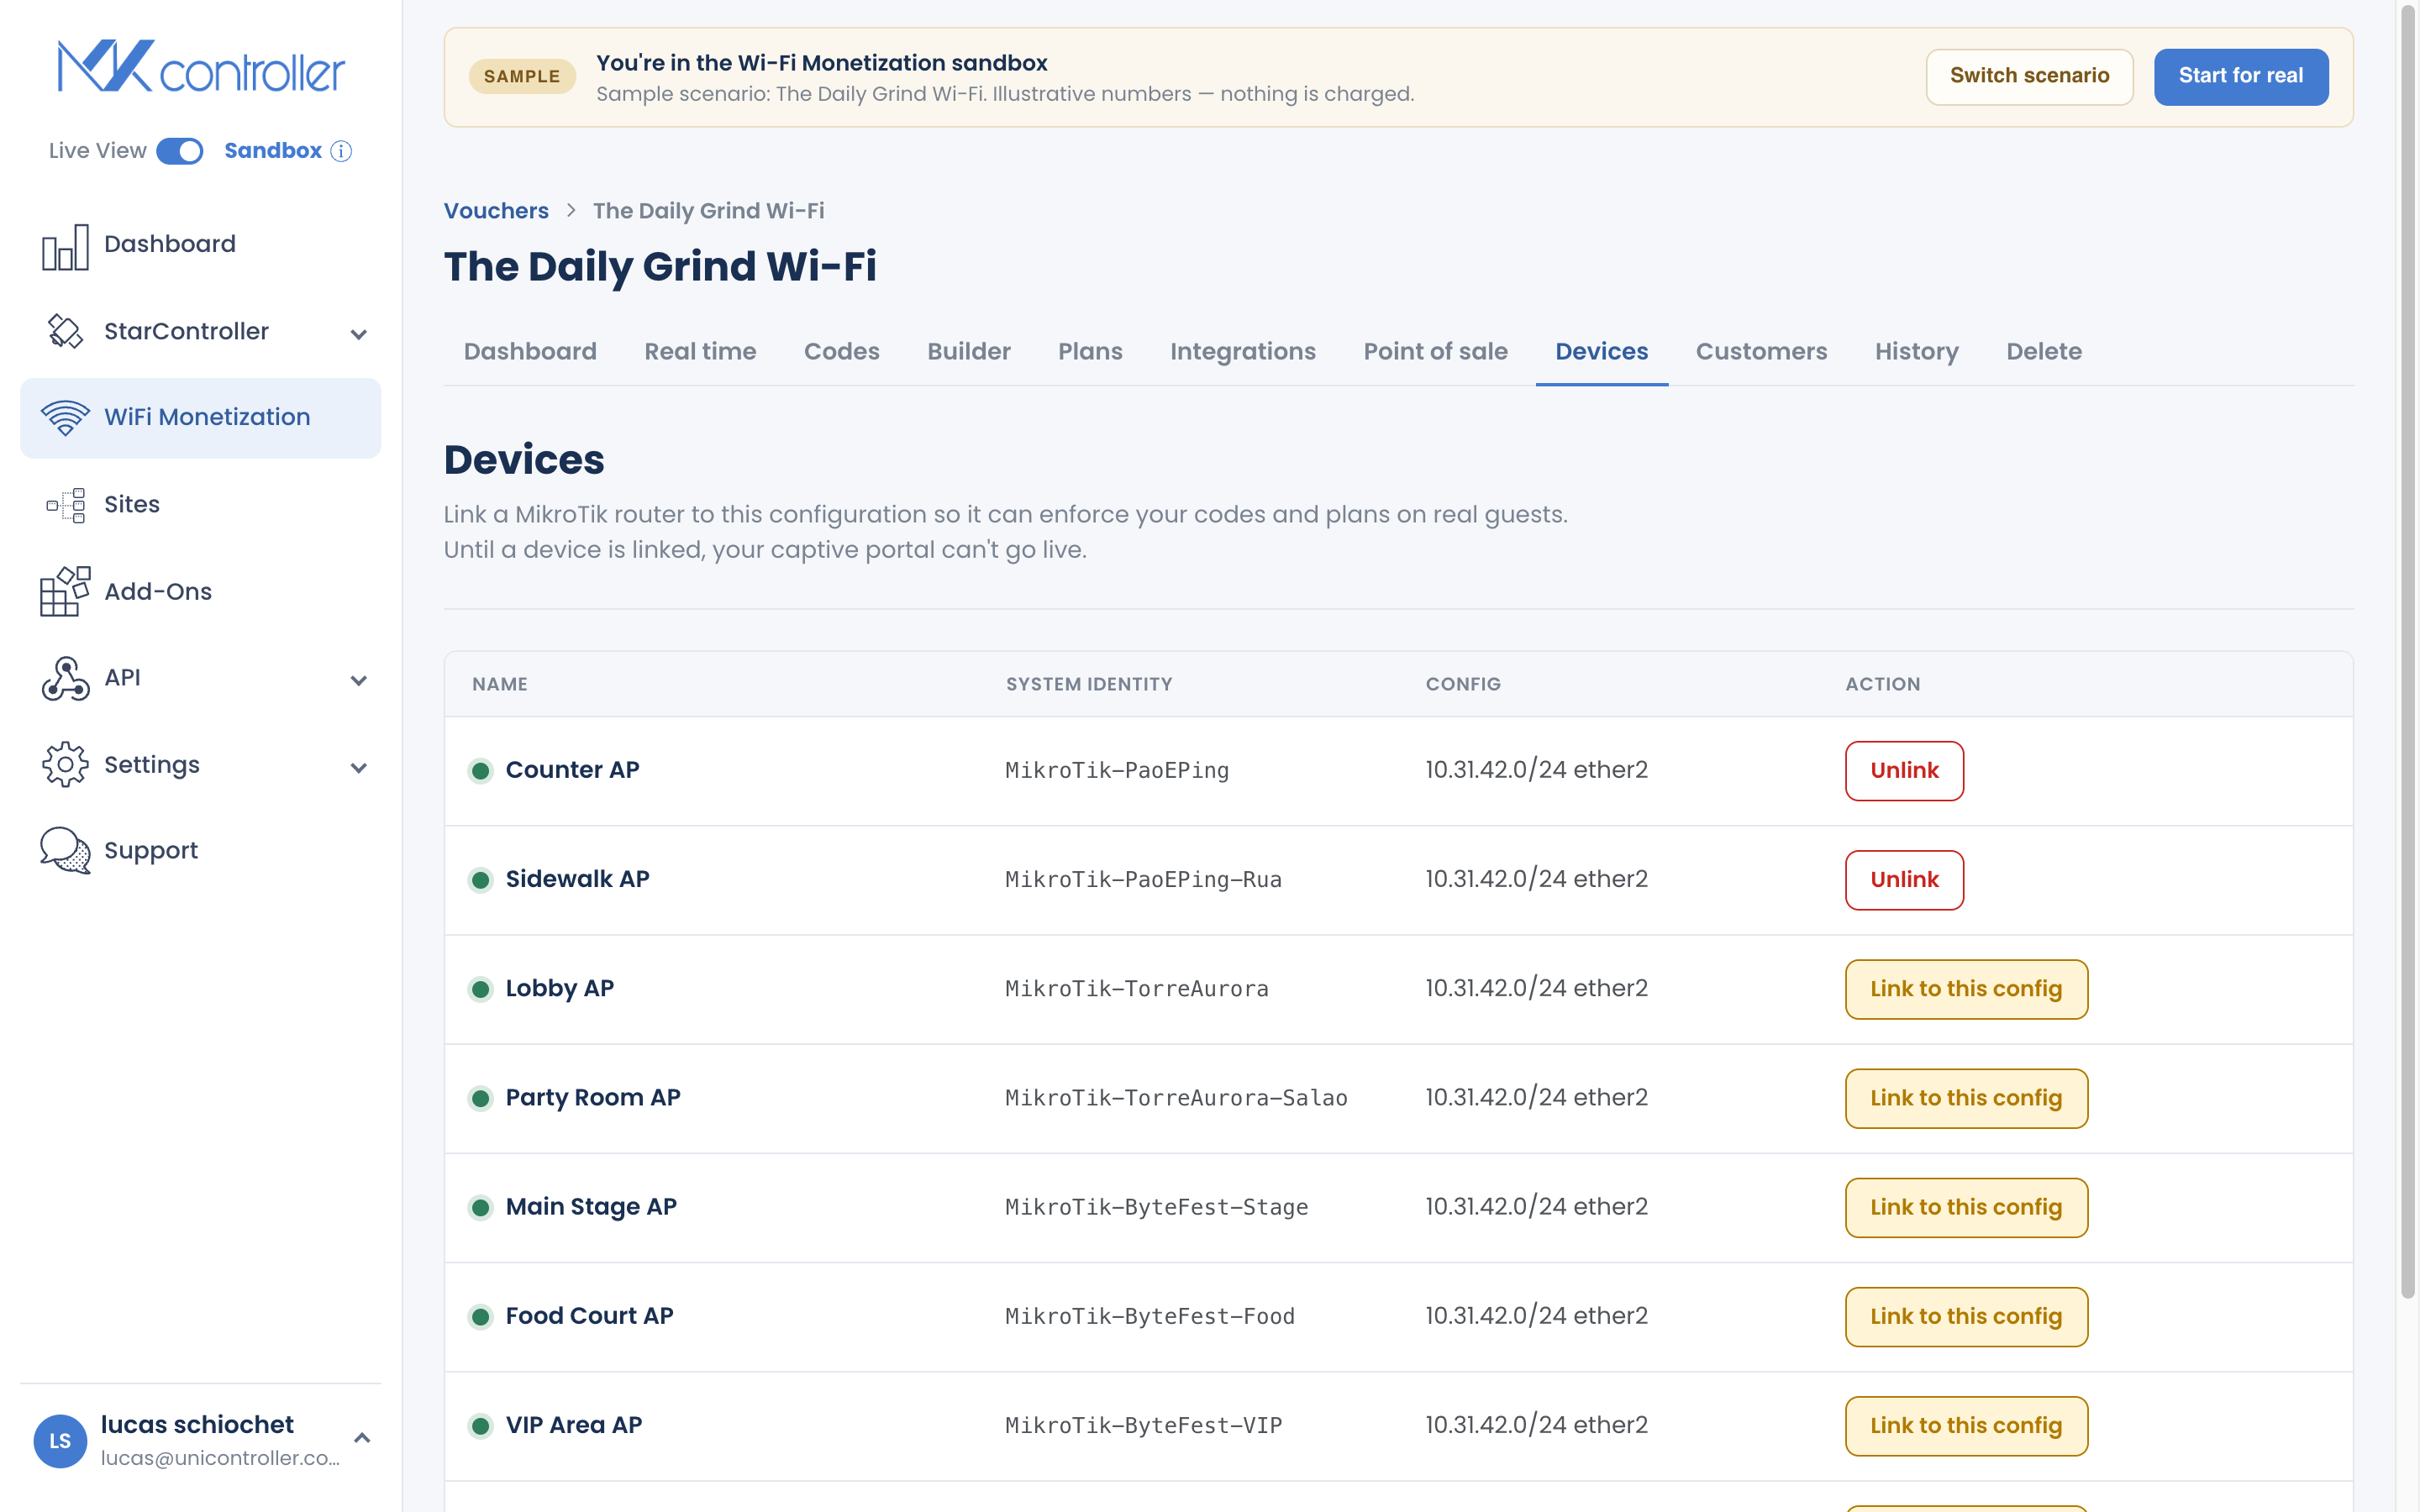
Section titled “Step 2: Link Your MikroTik Device”Open the Devices section of your voucher and start the guided deploy wizard. It:
- Detects the interface guests will connect through (with a manual fallback if needed).
- Suggests an IP subnet — the default
10.31.42.1/24works for most setups. - Backs up the router, configures the interface, RADIUS, DHCP, and walled garden, and uploads everything over the tunnel.
Wait for the wizard to reach Done. If it reports an error, the wizard tells you which stage failed so you can retry — it will not show a false success.
Full walkthrough, including multi-access-point setups: Link a MikroTik Device.
Step 3: Design Your Captive Portal
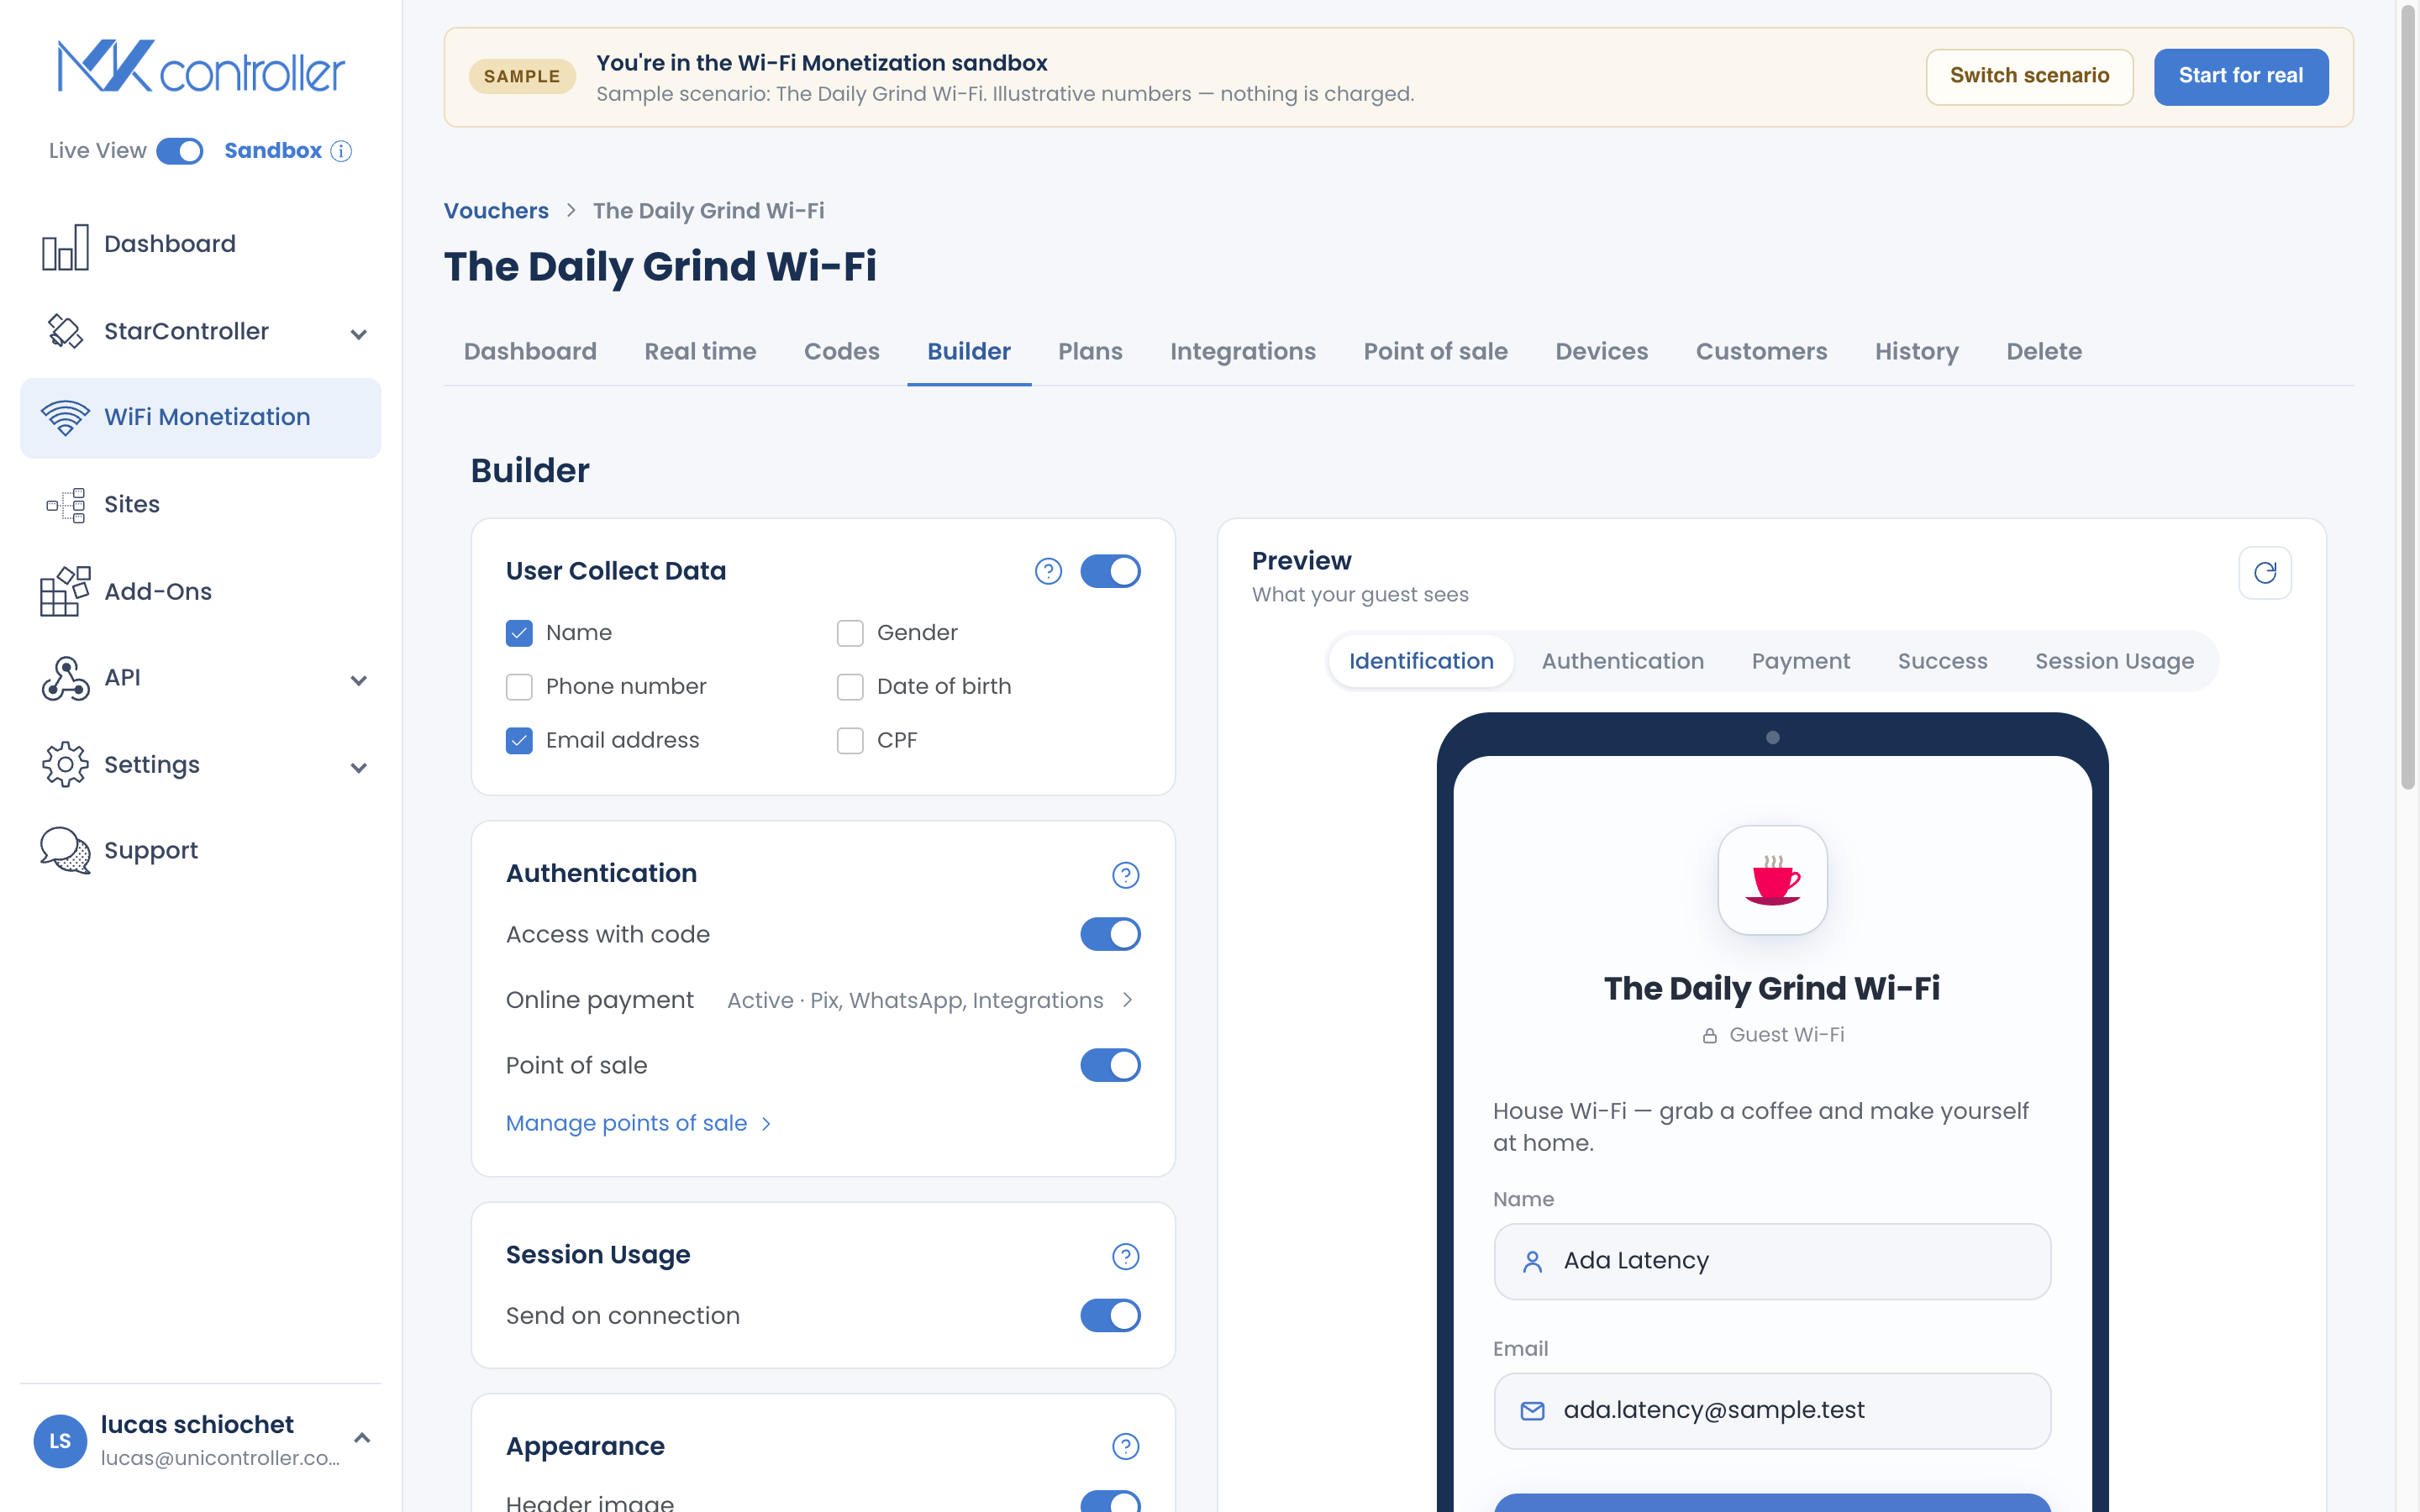
Section titled “Step 3: Design Your Captive Portal”In the Builder, add your logo, a short welcome message, your terms of use, and an optional marketing image. Choose which personal details to collect from guests (name, phone, email, and so on) — collect only what you need.
The Builder shows a live preview of the login page as you edit. When you are ready, the “test as a guest” simulator lets you walk the entire flow — code entry, payment, success, and status page — before any real guest sees it.
Full guide: Design Your Captive Portal.
Step 4: Create a Plan or a Batch of Codes
Section titled “Step 4: Create a Plan or a Batch of Codes”Now create something to sell. You have two options, and you can use both:
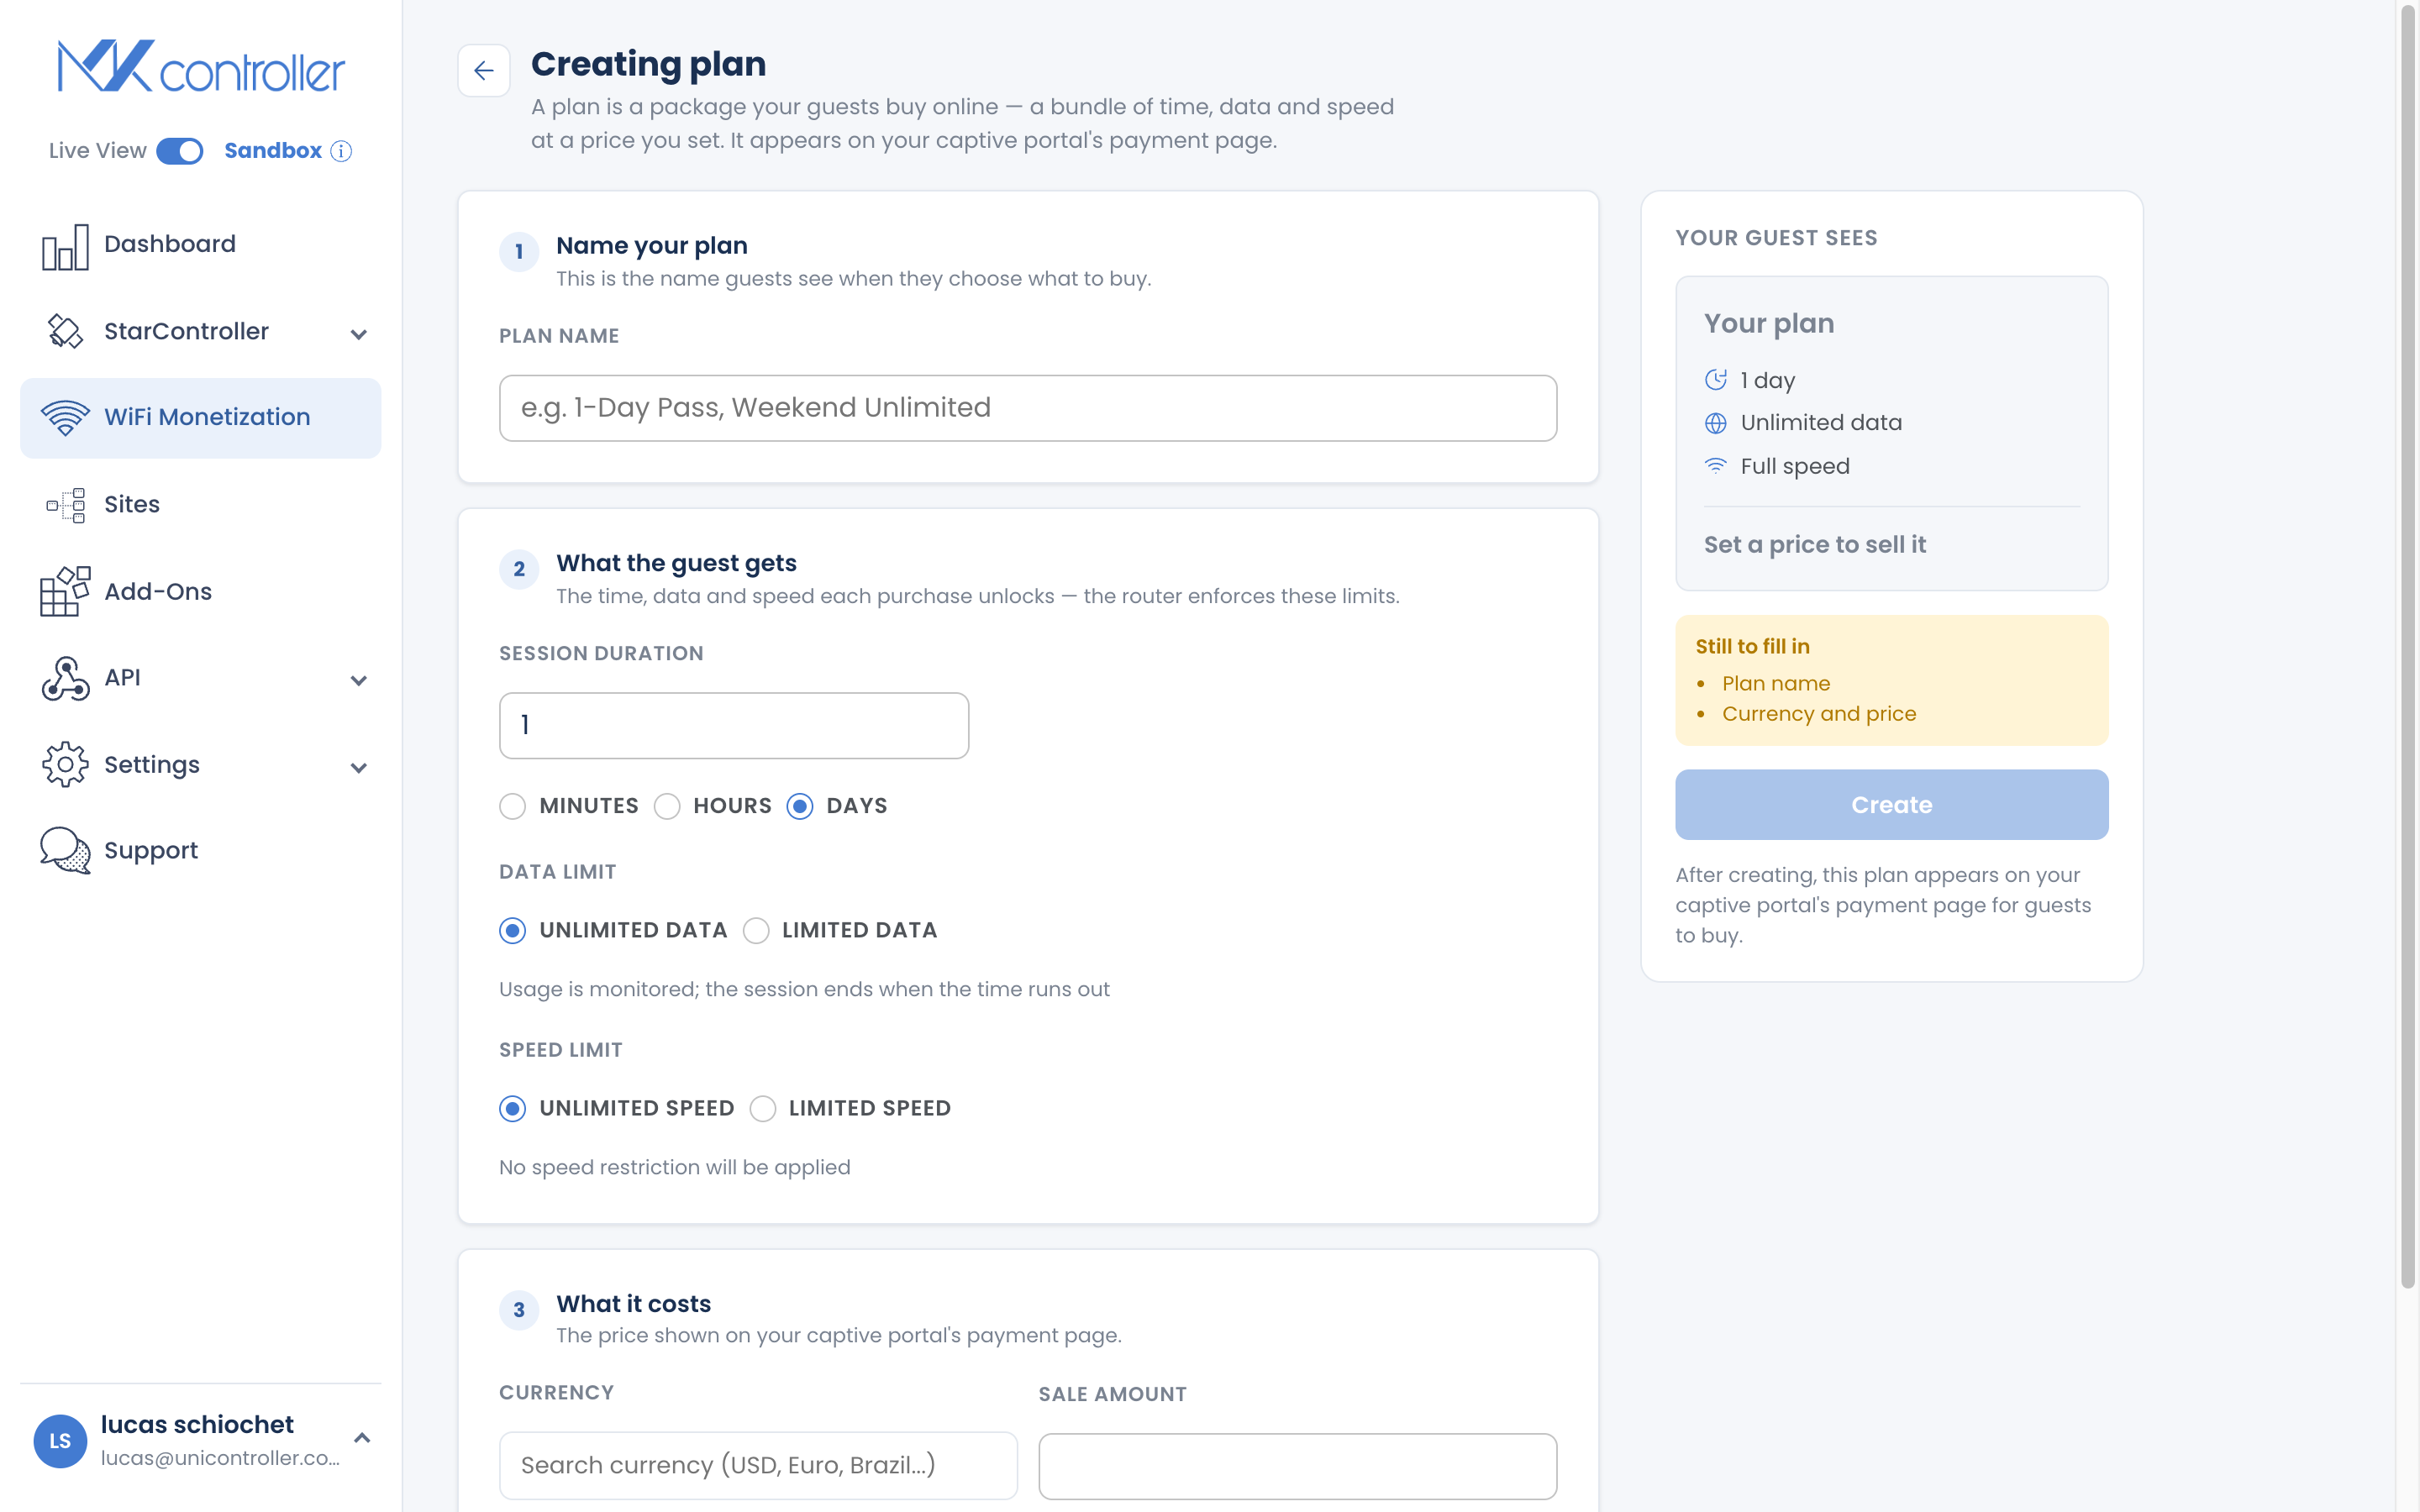
- Online plan — a package of time, data, and speed at a price that guests buy on the captive portal (for example, “R$5 buys 1 hour at 5 Mbps”). See Create & Sell Online Plans.
- Batch of codes — printed cards you hand out or sell at a counter. Choose how many codes, single- or multi-use, the session rules, and a price. See Create & Print Voucher Codes.
Always set a price, even a nominal one, so revenue is tracked on the Dashboard.
Step 5: Turn On a Payment Method
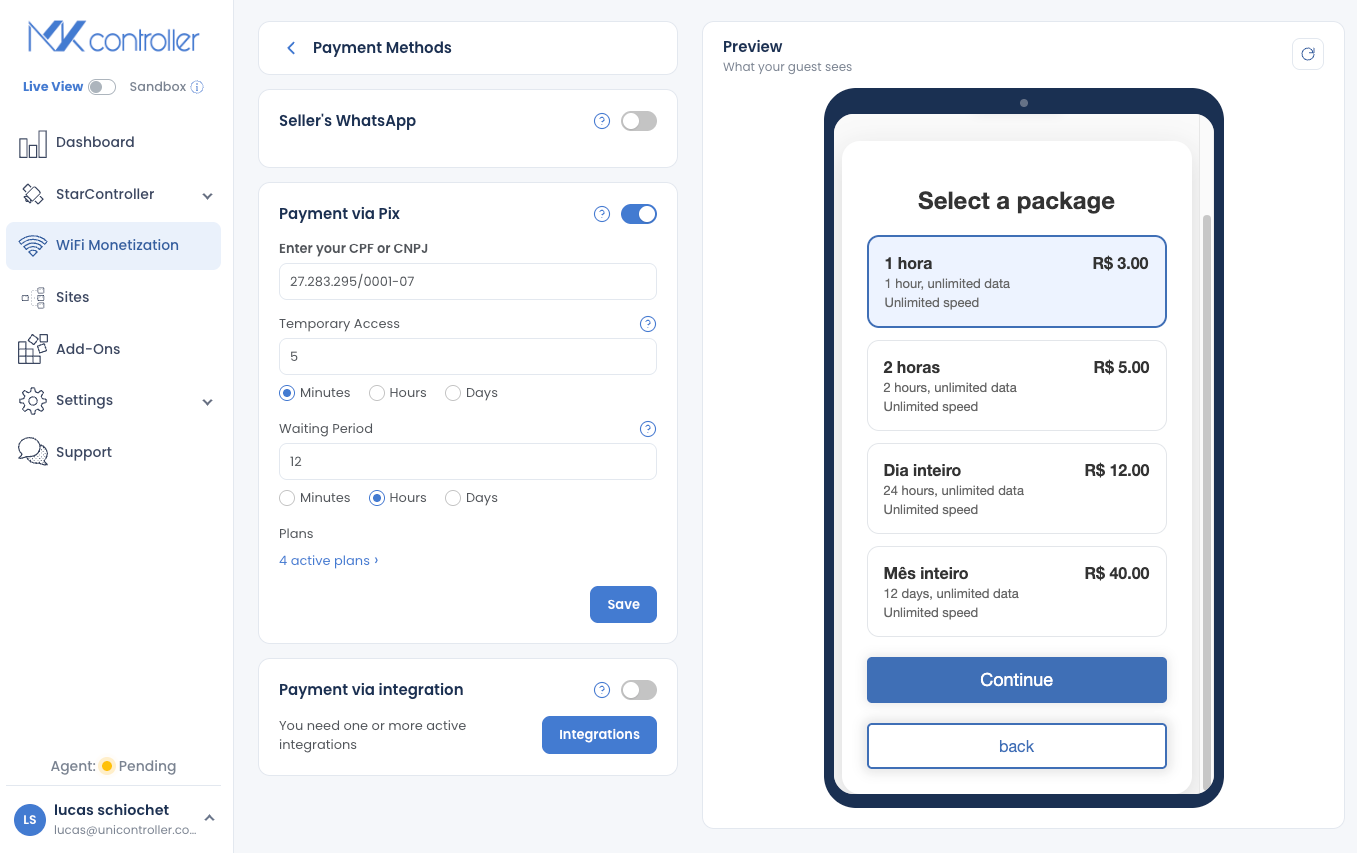
Section titled “Step 5: Turn On a Payment Method”Open Payment Methods and enable how guests will pay:
- Pix — instant Brazilian payments through MKController’s platform (a default 5% fee applies). See Receive Pix Payments.
- Card or mobile money — connect your own Stripe, Asaas, or M-Pesa account. See Configure Payment Gateways.
- WhatsApp — add a seller number so guests can arrange payment directly with you.
If you enable Pix but have no plans yet, the screen reminds you — there is nothing to sell until a plan exists.
Step 6: Test as a Guest and Go Live
Section titled “Step 6: Test as a Guest and Go Live”Back in the Builder, use “Simular acesso” (test as a guest) to experience exactly what a buyer sees — enter a code, pick a plan, and view the status page — using safe test data with no real charges.
When it looks right, you are live: connect a phone to your Wi-Fi, and the captive portal opens automatically. Watch connections, revenue, and active sessions in real time on the Dashboard.
Multi-AP Environments: Use Bridge Mode
Section titled “Multi-AP Environments: Use Bridge Mode”Print or Export Voucher Cards
Section titled “Print or Export Voucher Cards”To hand out codes physically:
- Open the batch you want to distribute and select Print Batch.
- Choose Print Directly for immediate printing, or Save as PDF to distribute later.
Frequently Asked Questions
Section titled “Frequently Asked Questions”What do I need before I start? A MikroTik running RouterOS adopted into MKController, and an ADVANCED-tier plan. No public IP or port forwarding is required.
Can I customize the Wi-Fi login page? Yes. The Builder lets you set your logo, welcome message, terms, and a marketing image, and choose which guest details to collect.
Do vouchers work across multiple access points? Yes — as long as the extra access points are configured as bridges, not routers, one voucher works across every antenna connected to that MikroTik.
How do I track revenue? Open the Dashboard inside your voucher. It shows revenue by plan, by batch, and by time range, plus active sessions in real time.
Can resellers sell my codes? Yes. Set up a Point of Sale reseller, assign plans and a commission, and track their sales. See Sell Cash with Point of Sale.
Explore next: Link a MikroTik Device · Design Your Captive Portal · Create & Sell Online Plans · Receive Pix Payments · WiFi Monetization FAQ
Ready to sell your first Wi-Fi access? Start your free MKController account or talk to our team on WhatsApp.