MikroTik Voucher Builder — Design & Print
⚠️ Legacy — this page describes the previous Voucher feature. For up-to-date information, see the new WiFi Monetization documentation.
Summary The MKController Captive Portal Builder is the login-page customization tool for MikroTik hotspots managed through the Voucher module. It lets you add a brand logo, welcome message, terms of use, and a marketing image to the Wi-Fi sign-in screen — all without editing HTML or RouterOS templates. Changes apply instantly to the live captive portal.
What Is the MKController Captive Portal Builder?
Section titled “What Is the MKController Captive Portal Builder?”The MKController Captive Portal Builder is a visual editor that customizes the Wi-Fi login page shown to users when they connect to a MikroTik hotspot and enter their voucher code. Each element — logo, welcome text, terms of use, and marketing image — is toggled on or off independently, so you can build a professional-looking branded portal in minutes.
For ISPs and WISPs offering hotspot services to venues: a branded captive portal gives clients a white-label experience without any template editing or RouterOS expertise.
For venue operators (hotels, cafés, coworking spaces): the marketing image slot is an opportunity to display promotions, events, or social media handles directly on the login screen every customer sees.
Prerequisite: A hotspot must already be configured and linked to a MikroTik device before using the Builder. See the Voucher Onboarding guide.
What Can You Customize with the Captive Portal Builder?
Section titled “What Can You Customize with the Captive Portal Builder?”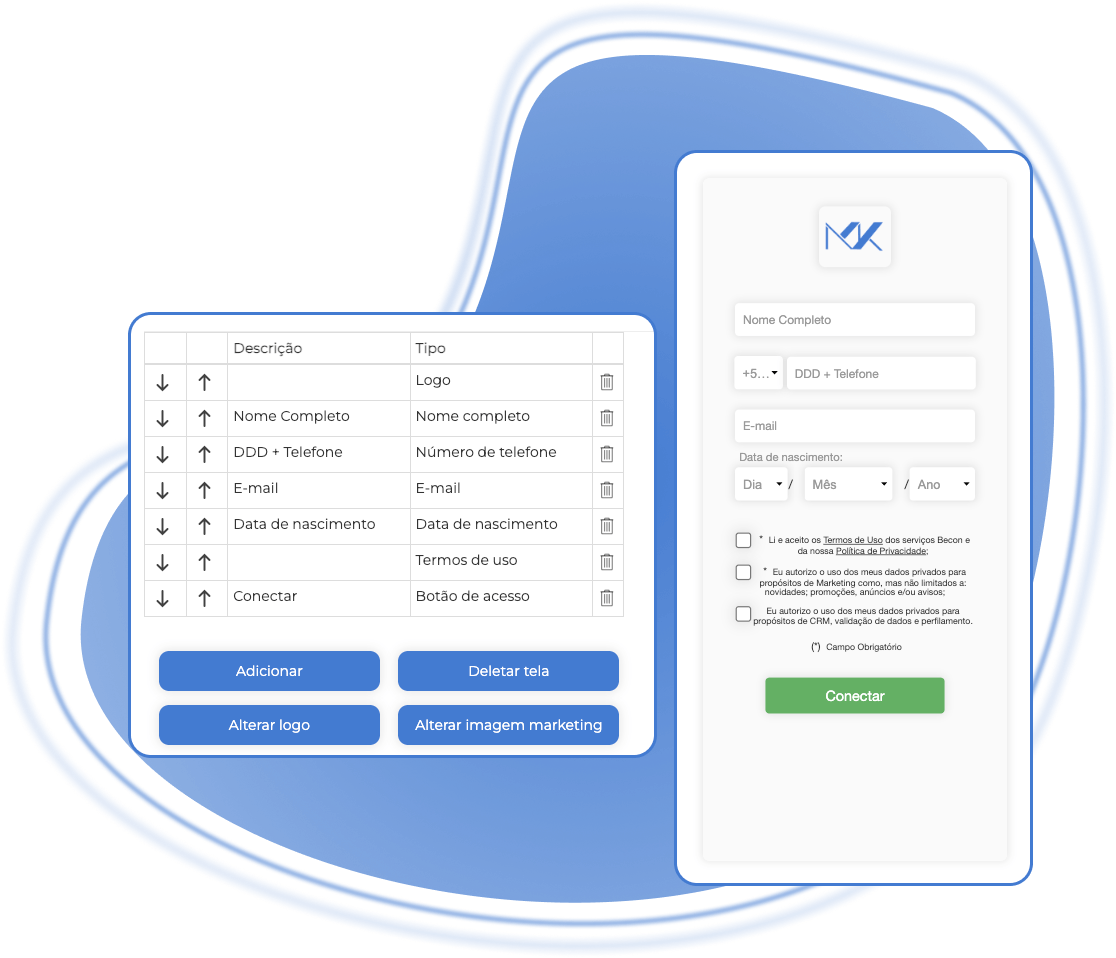
How to Customize the Captive Portal
Section titled “How to Customize the Captive Portal”Step 1: Open the Builder
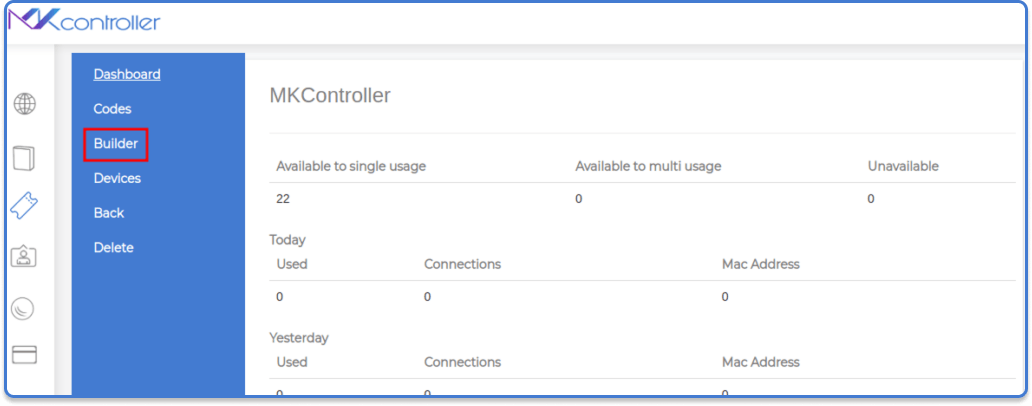
Section titled “Step 1: Open the Builder”Inside the Voucher section of MKController, click the Builder option for your hotspot.
Step 2: Add Your Logo
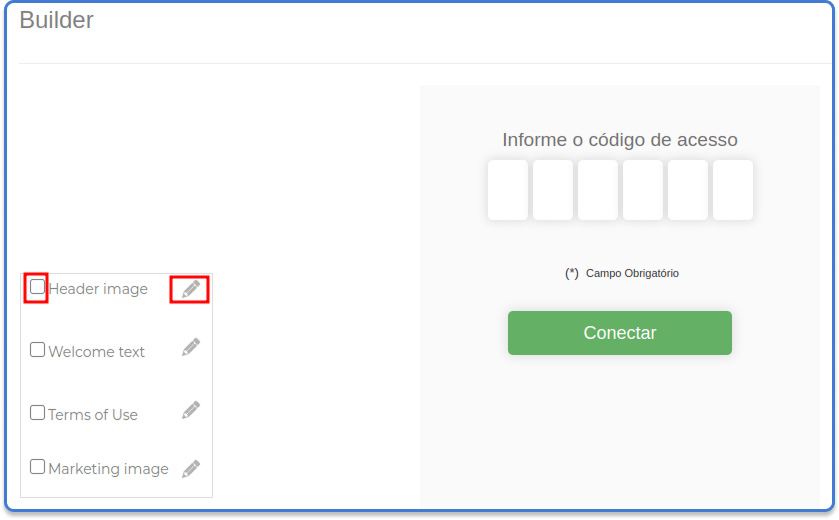
Section titled “Step 2: Add Your Logo”Enable the Header Image toggle, then click the pencil icon to upload the logo file that represents your brand. Recommended format: PNG with transparent background, minimum 400 px wide.
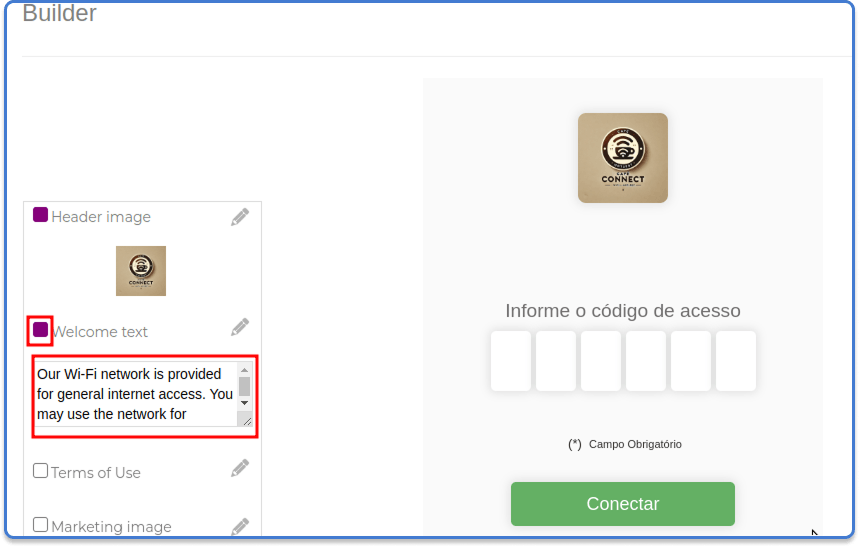
Step 3: Add a Welcome Message
Section titled “Step 3: Add a Welcome Message”Enable the Welcome Message toggle and type the message your customers will see when they land on the login page — for example: “Welcome to [Venue Name]! Enter your voucher code to connect.”
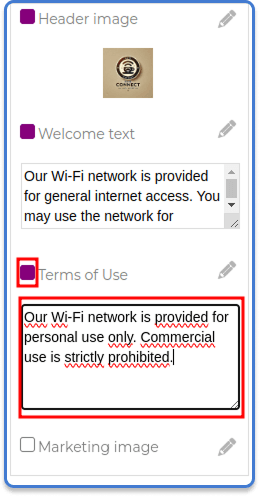
Step 4: Add Terms of Use
Section titled “Step 4: Add Terms of Use”Enable the Terms of Use toggle and enter the terms that apply to Wi-Fi usage at your venue. Include any relevant legal requirements for your country and usage context (data limits, acceptable use policy, liability disclaimers).
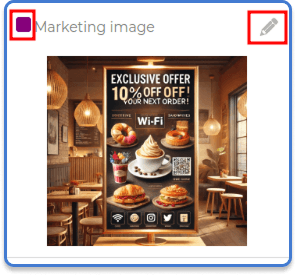
Step 5: Add a Marketing Image
Section titled “Step 5: Add a Marketing Image”Enable the Marketing Image toggle and upload an image to display below the login form. Use this space to show a current promotion, an event announcement, a loyalty program QR code, or social media handles.
Changes are applied live to the captive portal — customers connecting after you save will see the updated page immediately.
Captive Portal Design Tips
Section titled “Captive Portal Design Tips”Keep the logo under 500 KB. Large image files increase the page load time, which is especially noticeable on mobile devices connecting over a congested hotspot network.
Write a specific welcome message rather than a generic one. “Welcome! Enter your code to connect.” works, but “Welcome to Café Bloom — enjoy your coffee and free Wi-Fi!” gives the customer a better experience and reinforces your brand.
Use the marketing image slot for a QR code. Place a QR code linking to your Instagram, Google review page, or current promotion. Every customer who logs into your Wi-Fi sees it — it is prime real estate.
Keep terms of use clear and brief. Customers are unlikely to read a dense legal document. Include the essentials: no illegal activity, bandwidth may be shared, sessions expire. Link to a full policy page if required.
Use Cases for the Captive Portal Builder
Section titled “Use Cases for the Captive Portal Builder”Hotels — Upload the hotel logo, add a welcome message with the room number entry prompt, and display a promotional image for the hotel restaurant or spa. Each building or floor can have its own voucher batch.
Cafés and restaurants — Brand the portal with the café logo and a menu QR code in the marketing image slot. Generate daily voucher batches and write the code on the receipt.
WISPs offering hotspot as a service — Create a portal branded with each client’s logo and colors. The client sees their own brand; you manage everything from one MKController account.
Event venues — Upload event-specific artwork, include the event name and hashtag in the welcome message, and generate a single-use voucher batch for the event duration.
Troubleshooting the Captive Portal
Section titled “Troubleshooting the Captive Portal”The captive portal page is not showing when users connect. Check that the hotspot is properly configured on the MikroTik and that users are connecting to the correct SSID. Also verify that the MikroTik device is online in MKController and that the Voucher service is active.
The logo or marketing image is not displaying. Ensure the uploaded file is under 2 MB and in a supported format (PNG or JPG). Browsers on captive portals sometimes cache older versions — try connecting with a fresh device or clearing the browser cache.
Changes made in the Builder are not appearing on the live portal. Changes are applied in real time, but cached DNS or browser state on already-connected devices may show the old version. New connections will always see the updated portal.
Questions about captive portal customization or branding? Contact MKController support on WhatsApp.
Questions? 📧 contato@mkcontroller.com