
Wi-Fi 6 on MikroTik is the latest technology in wireless networks, offering faster speeds, lower latency, and a greater capacity to connect multiple devices simultaneously. In this tutorial, you will learn how to configure your MikroTik router to take full advantage of all the benefits of Wi-Fi 6 (AX).
Prerequisites:
- Wi-Fi 6 compatible MikroTik router (e.g., hAP ax2)
- Connection to Winbox or MikroTik web interface
Wi-Fi 6 Configuration on Mikrotik
Connect to your MikroTik using Winbox.
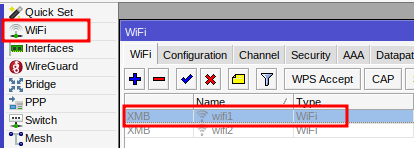
Select the Wi-Fi Menu.
Select the wireless interface you want to configure (e.g., wifi1).
In the General tab:
- Name: Define the interface identification name (e.g., wifi-5ghz).
- Mode: Select the operating mode (station, ap, bridge, etc.). For a hotspot, “ap” (access point) mode is most common.
Click OK.

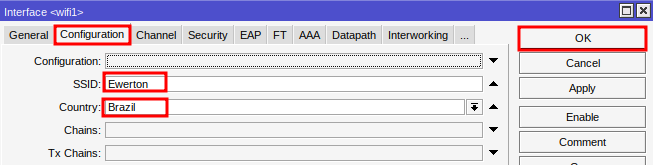
In the Configuration tab:
- SSID: Define the name of your Wi-Fi network (e.g., Ewerton).
- Country: Select the country (e.g., Brazil).
Click OK.
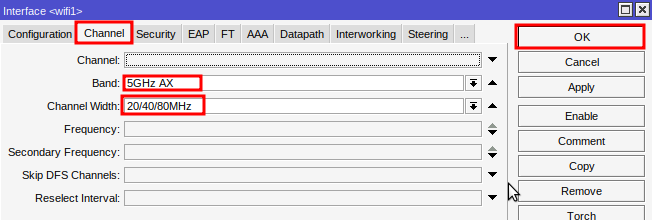
In the Channel tab:
- Band – Choose the frequency band (e.g., 5GHz AX).
- Channel Width – select the bandwidth (e.g., 20/40/80MHz).
Click OK.
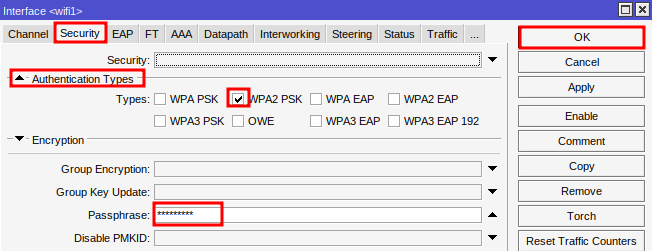
In the Security tab:
- Authentication Types: expand this menu and select the security type (e.g., WPA2 PSK).
- Passphrase: create a strong password, with a combination of letters, numbers, and special characters.
Click OK.
To ensure a smoother user experience in voucher authentication, it is ideal to keep the Wi-Fi network password-less. The voucher code will be used to validate the connection and provide internet access.
By following this guide, you will have configured your MikroTik to take full advantage of the benefits of Wi-Fi 6, such as higher speeds and lower latency. Remember: configurations may vary depending on your MikroTik model and RouterOS version (in this tutorial, we used the hAP ax2 with RouterOS 7.15).
Did you not find the information you were looking for? Do you have other questions? Do you want to help us improve the material? Do not hesitate to contact us and seek support from MKController! Click here for any questions.
If you have Mikrotiks in your network, enhance the control, efficiency, and remote access of your Mikrotik with MKController. Click here to try it now and discover the power of advanced and intuitive management to elevate your experience to new heights!
