What is a MikroTik Hotspot WiFi?
MikroTik hotspot is a wireless access point that allows devices such as smartphones, tablets, and laptops to connect to the internet. It offers a secure and convenient way to share your internet connection, whether in residential, commercial, or public environments.
Typical applications of a MikroTik hotspot:
- Public hotspots: In cafes, restaurants, hotels, and other public places.
- Business networks: To provide internet access for employees and visitors.
- Home networks: To create a secure Wi-Fi network at home.
- Internet of Things (IoT): To connect IoT devices to the internet.
Setting up a MikroTik Hotspot has never been easier! With MKController, you can create a professional WiFi hotspot in just a few clicks. Our intuitive platform offers automation, customization, and full control over your network. Create custom login screens and manage your MikroTik hotspots efficiently and centrally. Optimize your Wi-Fi services with MKController and provide an amazing experience for your customers.
In this article, you will learn everything you need to know about setting up MikroTik hotspots on MKController.
How to Set Up a WiFi MikroTik Hotspot using MKController
Access MKController
Log in to your MKController account.
Creating Access Screen Settings
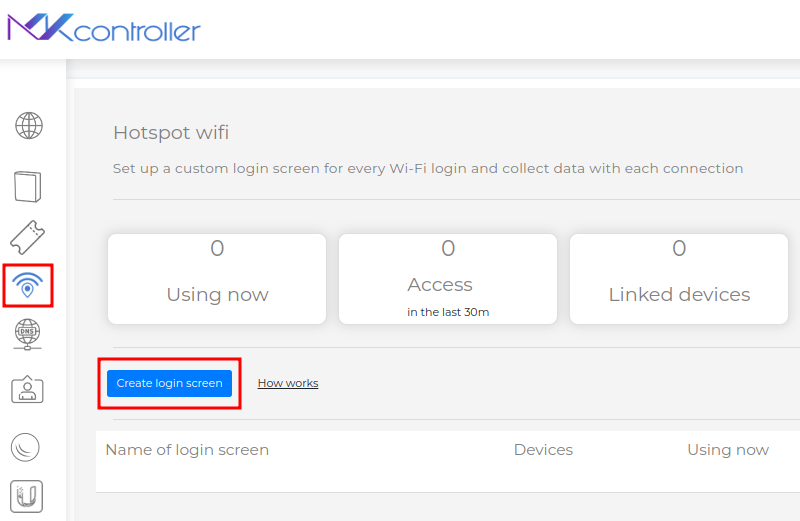
Select the WiFi Hotspot menu.
Click the Create access screen button.
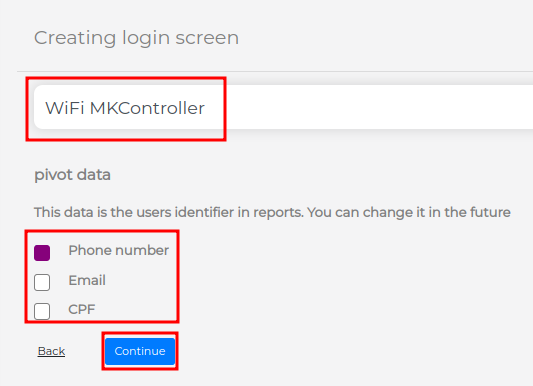
Enter an identifier name for your configuration (e.g., WiFi MKController).
Choose a primary identification field for users (e.g., Phone number).
Click the Continue button.
Linking to the MikroTik Device
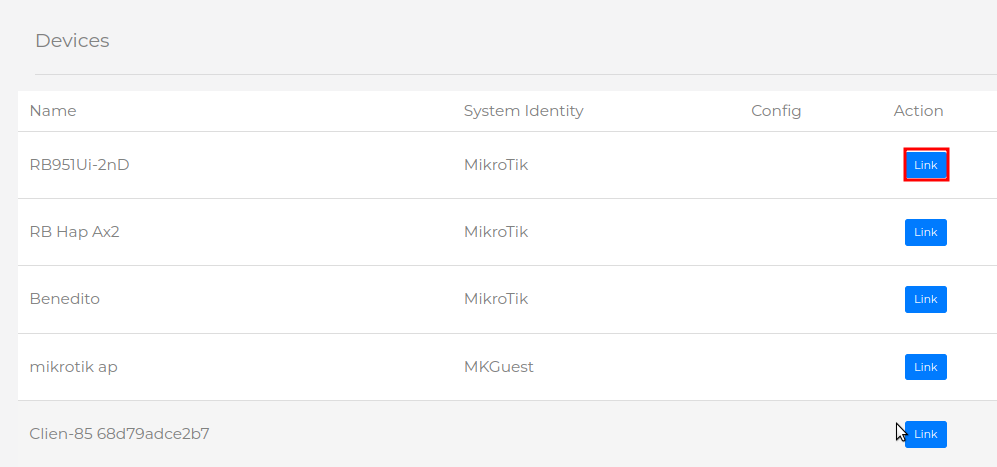
Select the Devices option.
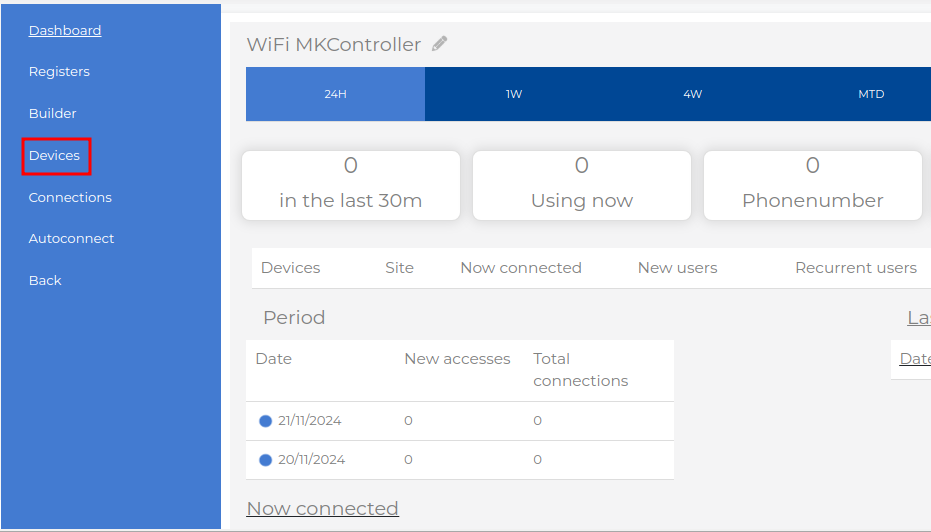
In the Action column, click Link on the RB MikroTik you want to configure.
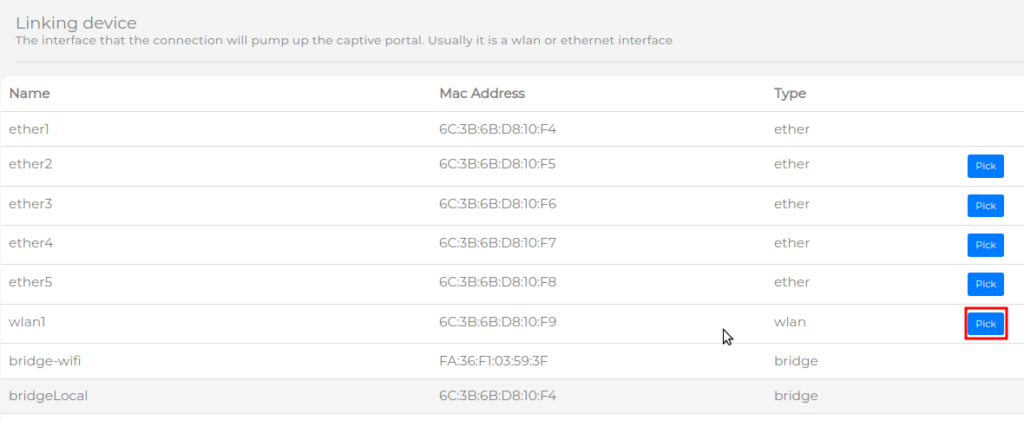
Select the interface that will be enabled as a hotspot (e.g., wlan1).
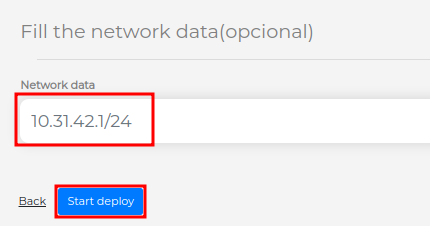
IP Pool Configuration
- Define the IP pool – Enter a specific IP and subnet mask to create a custom pool, or use the pool suggested by the system.
- Start settings – Click “Start settings” to start the automatic configuration on the MikroTik device.
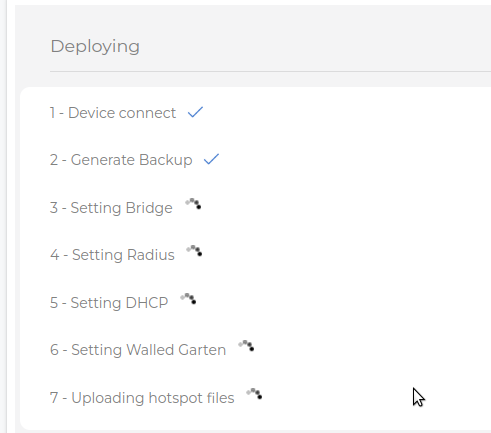
Finalization
Wait for completion – The configuration process may take a few minutes.
Confirmation – After completion, a pop-up will confirm the creation of the hotspot.

The system will display the information of the configured IP pool and the MikroTik interface linked to the hotspot.
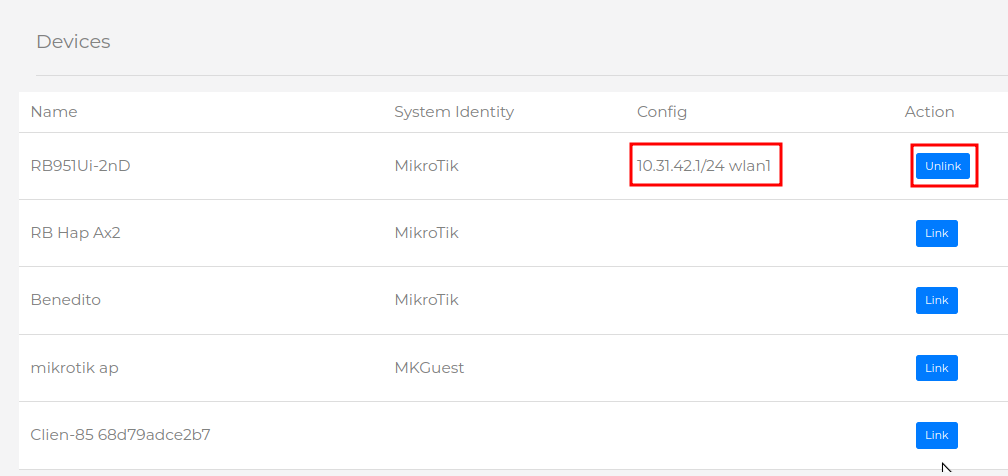
With this step-by-step guide, you will have successfully configured a WiFi hotspot on your MikroTik, allowing your devices to connect to the internet securely and manageably.
Enjoy a 7-day free trial and discover how MKController’s Hotspot can transform your network. We have flexible plans to meet your needs. For questions or to learn more about our payment options, contact our support team.
Didn’t find the information you were looking for? Have other questions? Want to help us improve our materials? Don’t hesitate to contact us for MKController support!
Discover the ease of managing your Mikrotik network with MKController. Read our tutorial “Make Mikrotik Remote Access Easy: A Step-by-Step Guide with MKController” and try it out now.

