Mikrotik DHCP Client in Minutes: Complete Guide
Mikrotik DHCP Client is a module in the RouterOS system that allows a Mikrotik device, such as a router or switch, to automatically obtain an IP address, subnet mask, default gateway, and other network parameters from a DHCP server. This simplifies network configuration, especially in environments where IP addresses need to be changed frequently.
Benefits of using Mikrotik DHCP Client:
- Automatic configuration: DHCP Client eliminates the need to manually configure network parameters on each device. This can save time and reduce the risk of errors.
- Dynamic IP address assignment: DHCP Client allows IP addresses to be dynamically assigned to devices, which makes it easier to manage IP address pools.
- Support for DHCPv4 and DHCPv6: Mikrotik DHCP Client supports both DHCPv4 and DHCPv6 protocols, which means it can be used in IPv4 and IPv6 networks.
- Advanced options: Mikrotik DHCP Client offers several advanced options, such as the ability to specify a hostname for the device, request a specific IP address, and set custom DHCP options.
How to configure Mikrotik DHCP Client
Configuring Mikrotik DHCP Client is quite simple. You need to follow these steps:
Open Winbox and connect to your Mikrotik device.
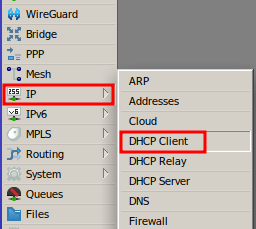
In the main menu, select IP > DHCP Client.
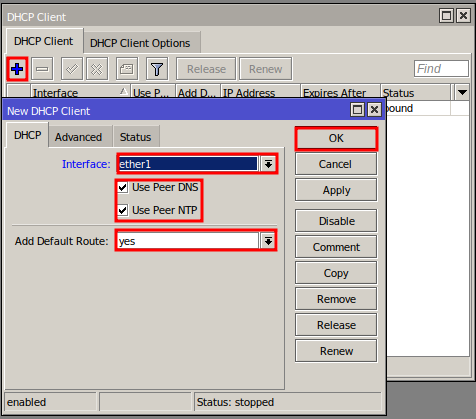
Click the + button to add a new entry.
Fill in the fields:
- Interface: Select the interface you want to configure with the DHCP Client (ex: ether1).
- User Peer DNS: Optional, if you want the device to use the DNS servers of the DHCP server.
- User Peer NTP: Optional, if you want the device to use the NTP server of the DHCP server to synchronize its time.
- Add Default Route: Recommended, allows the device to automatically add a default route to the DHCP server gateway.
Click OK to save the new configuration.
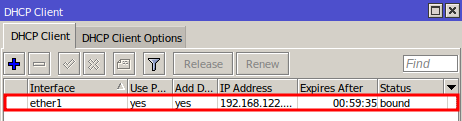
In the DHCP Client tab, you will see the list of active configurations.
The status of the DHCP Client will indicate whether it is connected to the DHCP server and if it has obtained an IP address.
That’s it! Your Mikrotik device is now configured to automatically obtain an IP address and other network parameters from the DHCP server.
You can see the content of this article in the video below, if you prefer!