Monitoring by MAC Address is an essential feature for anyone who wants to monitor devices connected to MikroTik, such as printers, IP cameras, routers, and other equipment. With this tool, you gain greater control and visibility over all devices on your network, allowing you to:
- Real-time monitoring: View the status of each device, quickly identifying whether they are active or disconnected.
- Problem detection: Anticipate failures and resolve potential instabilities before they impact network operation.
- Enhanced security: Monitor suspicious or unauthorized devices, ensuring that only permitted equipment remains connected.
- Efficient network management: Identify bottlenecks, optimize the use of available resources, and improve the overall performance of your infrastructure.
Having devices monitored offers an additional layer of control, fundamental to avoid interruptions, protect the data transmitted, and ensure the proper functioning of services that depend on the network, such as video surveillance and printing systems.
Before starting the process, it is necessary to ensure that the Mikrotik is properly added to MKController, as this is the premise for monitoring to work. If you need guidance on how to perform this configuration, see the article: “Simplified Mikrotik Remote Access with MKController: Step-by-Step Tutorial”.
Now, follow the steps below to enable and configure MAC Address Monitoring on your Mikrotik.
How to Configure Monitor Connected Devices on MikroTik
Access the Devices menu and click the View More button corresponding to the Mikrotik RB.
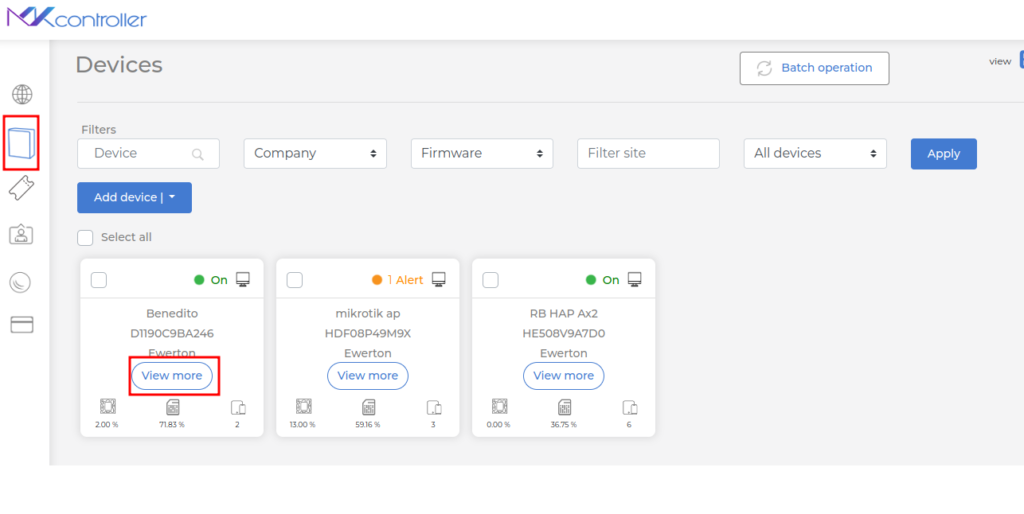
Select the MAC Monitoring option.

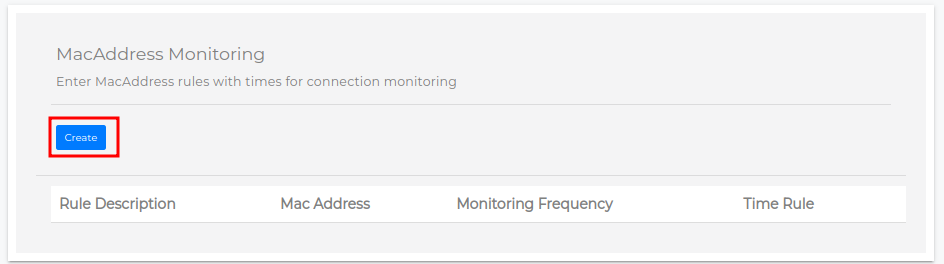
Click the Create button.
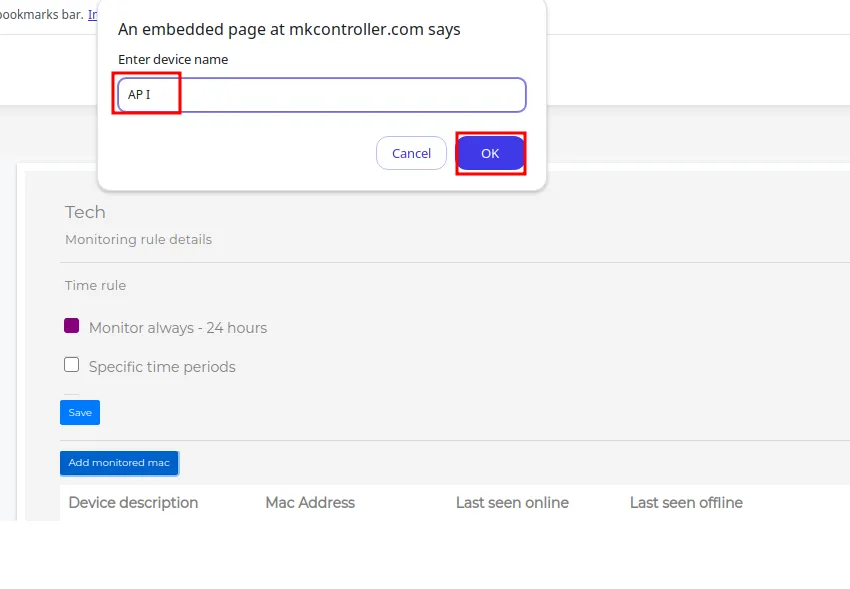
In the pop-up that will appear, enter a name for the description (e.g., Tech).
Click OK.

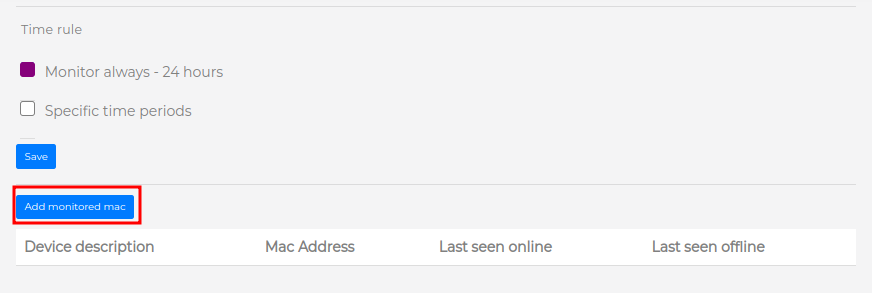
In the Time Rule section, choose one of the available options:
- Always monitor (24 hours): monitoring will be continuous.

Specific time period: configure the options below:
- Days of the week: select the days when monitoring should occur.
- Start and end times: fill in the fields with the desired times manually or click the clock icon to select the hours, minutes, and AM/PM format.
Click the Save button.

Click the Add MAC Monitoring button.
In the pop-up displayed, enter the MAC Address of the device you want to monitor.
Click OK.

In the pop-up displayed, enter an easily identifiable name for the device to be monitored.
Click OK.
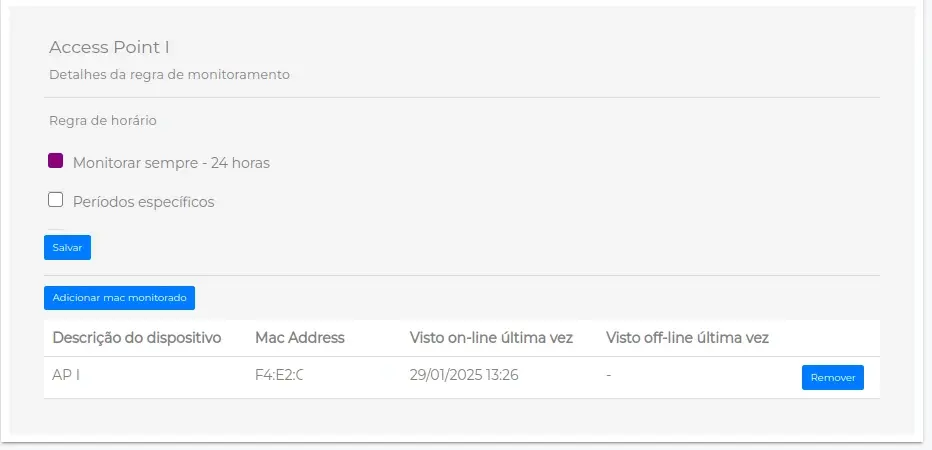
When you return to the MAC Address Monitoring page, you can track the status and behavior of the monitored device.
Offline Device Alerts
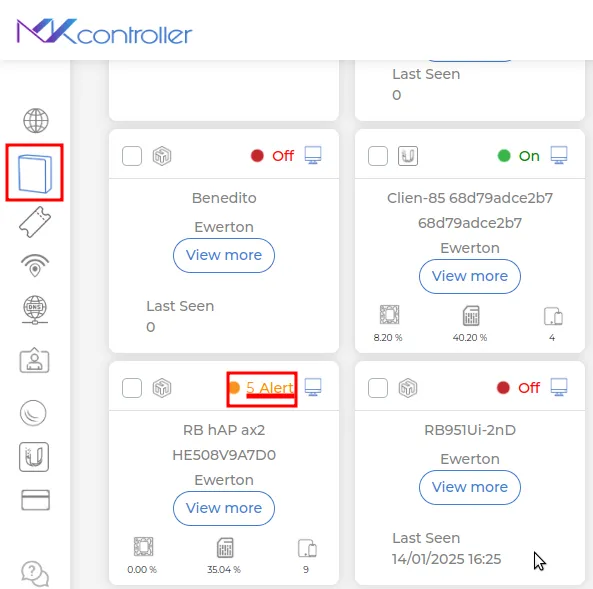
When the device goes offline, an alert will be displayed in the representation of the Mikrotik on the platform.
To view the alert message, click on “Alert”, as highlighted in the image below.
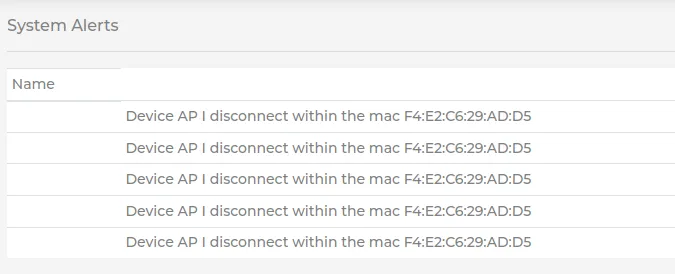
The alert messages for the monitoring will be displayed on the platform as illustrated in the image below, allowing for quick identification of any problems.
With MAC Address Monitoring properly configured, you will have more control over the devices connected to your MikroTik network. By monitoring the status in real time and receiving disconnection alerts, it will be possible to act quickly to resolve problems and ensure the stability of the infrastructure.
Now that monitoring is active, simply access the platform whenever necessary to view the information and keep your network secure and optimized.
Didn’t find the information you were looking for? Have other questions? Want to help us improve our materials? Don’t hesitate to contact us for MKController support!
Discover the ease of managing your Mikrotik network with MKController. Read our tutorial “Make Mikrotik Remote Access Easy: A Step-by-Step Guide with MKController” and try it out now.
