Mikrotik Failover, also known as link failover, is a feature that allows your Mikrotik router to automatically switch to a backup internet connection if the primary connection fails. This ensures high availability and uptime of your internet connection, minimizing disruptions for devices connected to your network.
Benefits of Mikrotik Failover:
High Availability: Minimizes internet downtime, keeping your devices connected.
Business Continuity: Ideal for businesses that heavily rely on a stable internet connection.
Flexibility: Allows load balancing between multiple internet connections (depending on the configuration).
Cost Reduction: Avoids losses caused by internet disruptions.
Configuring Mikrotik Failover involves:
Defining internet connections (PPPoE, DHCP, etc.).
Configuring static routes.
Optionally, using Netwatch for monitoring.
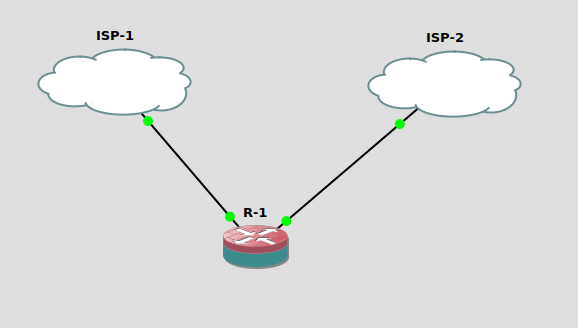
For this article, a scenario of a Mikrotik router with two internet links was used:
Link 1 (ISP-1): PPPoE connection.
Link 2 (ISP-2): DHCP connection.
Mikrotik Failover Configurations
Disabling Default Routes for Mikrotik Failover:
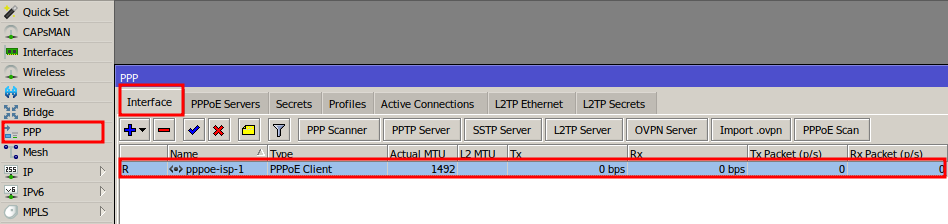
PPPoE:
Access the PPP > Interface menu.
Select the PPPoE interface.
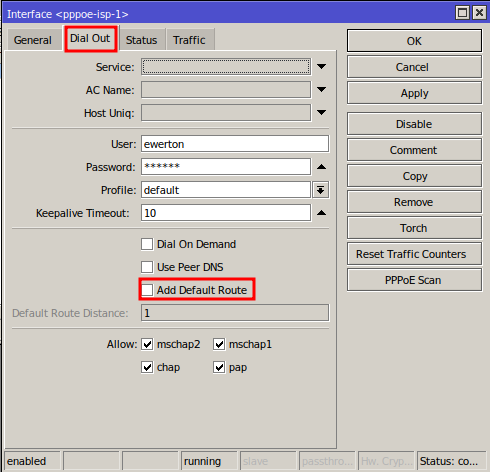
In the Dial out tab, uncheck “Add Default Route”.
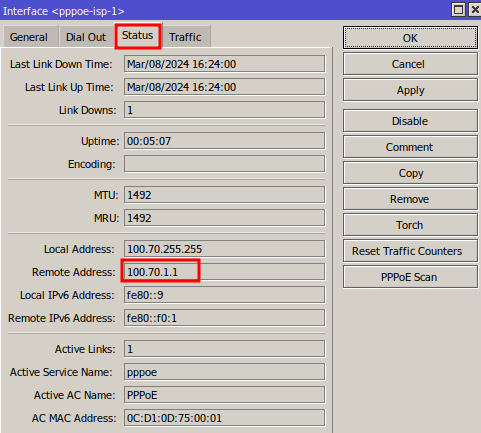
In the Status tab, note the “Remote Address” for later use.
Click OK to save.
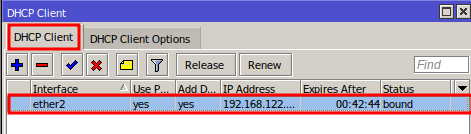
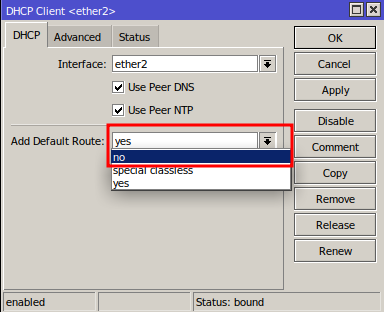
DHCP
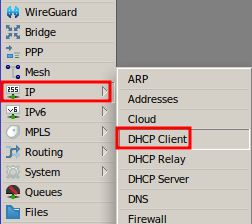
Access the IP > DHCP Client menu.
Select the interface with DHCP.
Select “Add Default Route” as “no”.
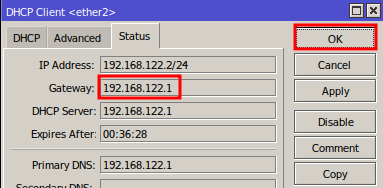
In the Status tab, note the “Gateway” for later use. Click OK to save.
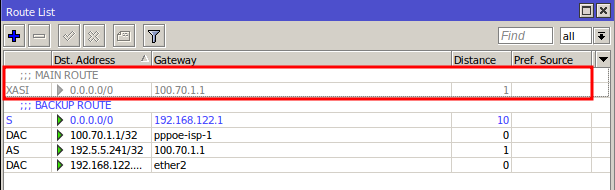
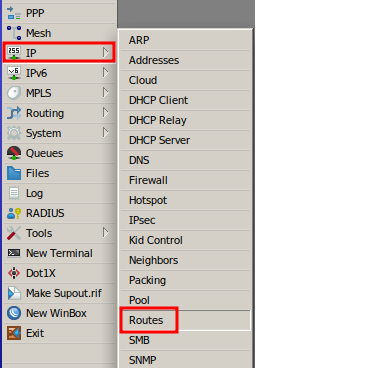
Configuring Static Routes
Main Route
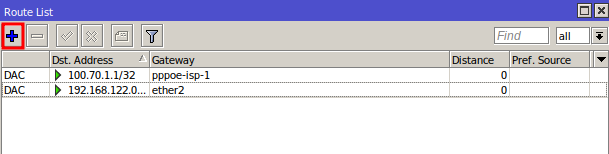
Access the IP > Routes menu.
In the Route List window, click the + button.
Create a new route with:
Dst. Address: 0.0.0.0/0.
Gateway: Next hop IP (e.g., 100.70.1.1).
Distance: 1
Click OK to save the information.
Backup Route
Create a new route with:
Dst. Address: 0.0.0.0/0.
Gateway: Next hop IP (e.g., 192.168.122.1).
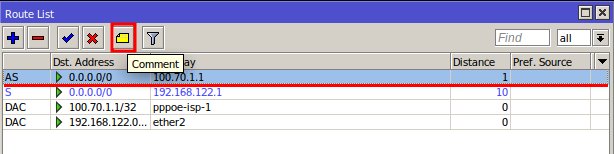
Distance: 10.
Click OK to save.
Note that the route with distance 10 is in blue, indicating that it has the lowest priority for sending data packets.
Adding a route identification comment
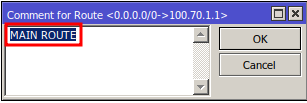
Click on the main route.
Select the Comment button (displayed on the screen as a yellow paper symbol).
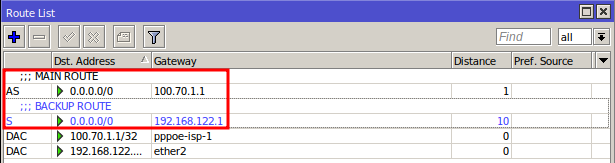
Add a comment for identification (e.g., MAIN ROUTE).
Click OK.
Repeat the same steps to leave both routes identified.
Monitoring with Netwatch
Selecting the Monitoring IP
Netwatch needs to monitor an IP address that is unlikely to go down to detect failures in your connection. As a recommendation, use the IP of an internet root server.
Root servers are special name servers that play a crucial role in the internet’s Domain Name System (DNS). They direct your browser to the correct website when you type in a web address.
Access the website https://root-servers.org/ and choose a server near your location to minimize test latency.
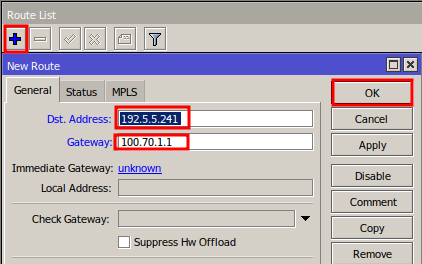
Configuring the Monitoring Route
Create a new route in IP > Routes with:
Dst. Address: IP of the root server (e.g., 192.5.5.241).
Gateway: IP of the main route router (e.g., 100.70.1.1).
Click OK to save.
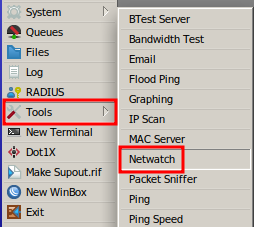
Configuring Netwatch
Access Tools > Netwatch.
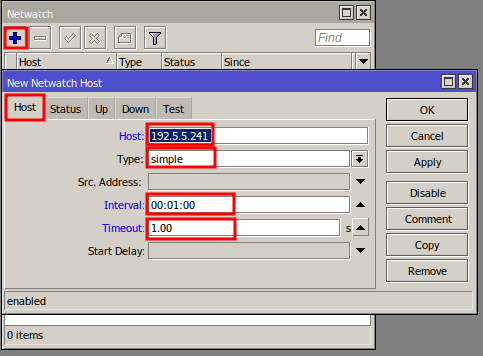
In the Netwatch window, click the + button.
Create a monitoring with:
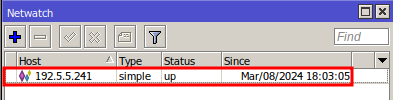
Host: IP of the root server (e.g., 192.5.5.241).
Type: simple.
Interval: 00:01:00 (1 minute).
Timeout: 1:00 (1 second).
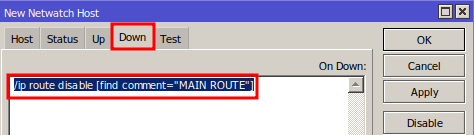
In the “Down” tab, add the command:
/ip route disable [find comment=”MAIN ROUTE”]
Notes on the command used:
1. Start the command with the “/” character. 2. The expression [find comment=”MAIN ROUTE”] (enclosed in double quotes) finds 3. The double quotes are necessary because the comment “MAIN ROUTE” contains a space.
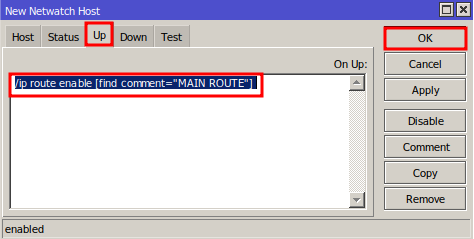
In the “Up” tab, add the command:
/ip route enable [find comment=”MAIN ROUTE”]
Click OK to save the information.
After configuring Netwatch, you can monitor the link monitoring status.
In case of a primary link failure, Netwatch automatically disables the main route. This will cause the main route to appear gray in the Route List window, indicating that it is inactive and data packets will be automatically routed to the backup route.
When the primary link is restored, Netwatch automatically reactivates the main route, and packets will be routed through the main route again.
This comprehensive guide provides a detailed step-by-step process for configuring routing on a Mikrotik with automatic failover and monitoring via Netwatch. It serves as an example that can be adapted to your specific needs.
Did you not find the information you were looking for? Do you have other questions? Do you want to help us improve the material? Do not hesitate to contact us and seek support from MKController! Click here for any questions.
If you have Mikrotiks in your network, enhance the control, efficiency, and remote access of your Mikrotik with MKController. Click here to try it now and discover the power of advanced and intuitive management to elevate your experience to new heights!

Note that the route with distance 10 is in blue, indicating that it has the lowest priority for sending data packets.

 Notes on the command used: