Activating and updating your MKController account - Payment - MKController
After the free trial period on the MKController platform, you will need to activate your account.
This same procedure will teach you to both update the financial plan and to add or decrease the number of devices to manage.
Here’s our step by step:
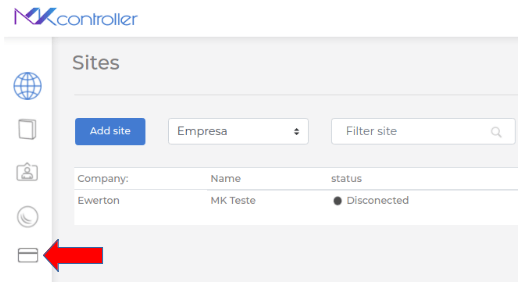
1 – After logging into the website https://app.mkcontroller.com/, click on the “Payment” button (it’s a small credit card on the sidebar).
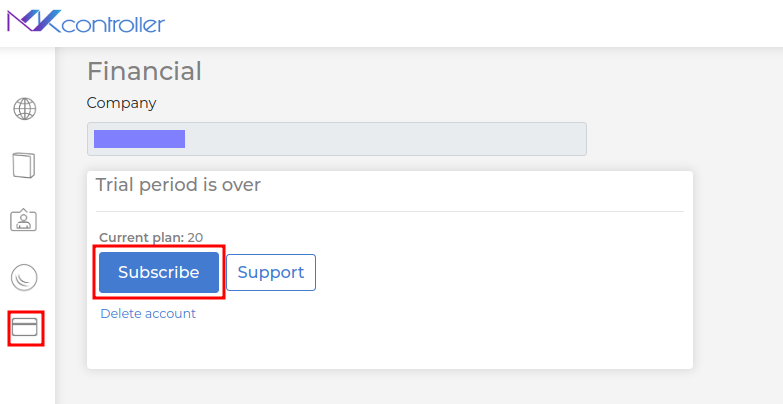
2 – Now select the “Subscribe” button..
3 – After that, you will see a summary of your current plan (“Update Plan”) with you company’s name as well as your current plan and period of payment. Now just click on Update.

4 – Select the number of devices you want to manage on the platform, increasing or decreasing as you please (as per the 1st indication). Then, just click on the “Next” button (2nd indication).

5 – Now, pay attention to whether the plan will be monthly or annual, as shown in the image below (1st indication). Then select the payment method, whether by Credit Card or Paypal (as highlighted in red in the figure). As soon as everything is done, just click Next, as show in the 2nd indication in the image below.

6 – The system will request your credit card or Paypal account data, depending on your choice, and once payment is confirmed, the system will release your account or enable it to add more Mikrotiks devices at MKController.
Didn’t find the information you were looking for? Did you have any problems? Do you have any other questions? Want to help us improve the material? Do not hesitate to seek support from MKController! Click here for any questions.