Mikrotik Security - Securing Your Network with Basic Steps
Mikrotik, renowned for its powerful RouterOS operating system, plays a crucial role in routing and network management. However, the effectiveness of Mikrotik is directly tied to the security implemented by the network administrator. This guide aims to provide some essential basic security steps in Mikrotik, highlighting fundamental measures to protect your network against potential threats.
Upon entering the Mikrotik realm, it is imperative to understand that, by default, some configurations may pose vulnerabilities. This text explores basic steps to securely manage users, protect service ports, and adopt proactive measures to safeguard your network environment. By following the recommended practices presented here, you will be strengthening Mikrotik’s defenses and contributing to a safer and more reliable network environment.
Managing Users for Mikrotik Security
When accessing Mikrotik, it is crucial to take immediate steps to enhance security. The admin user, which initially has no password, should be configured with a strong password or replaced (strongly recommended) by a new user with full permissions. This creates an additional layer of complexity for potential intruders.
Here is a step-by-step guide for creating a new user with full permission and deleting the admin user.
Creating a New User for Mikrotik Security
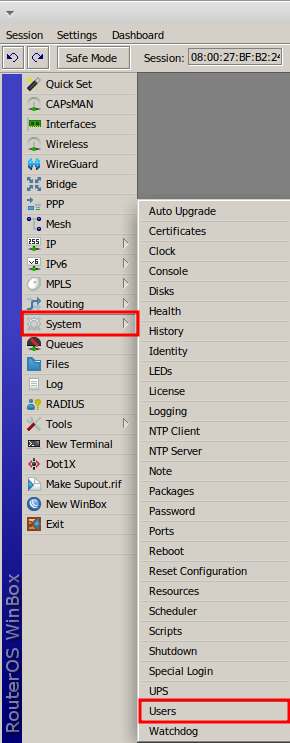
Access Mikrotik through Winbox and select the System menu, then the Users option.
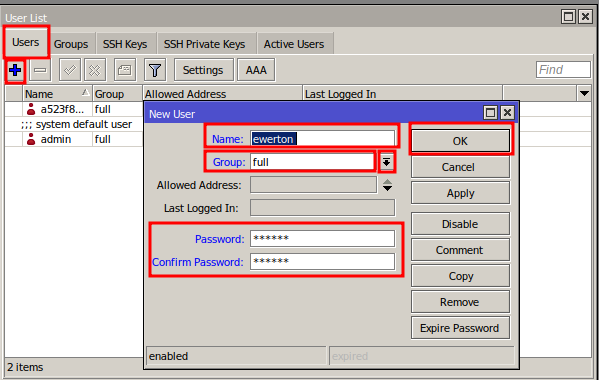
In the “User List” window, under the Users tab, click the “+” button to add a new user.
In the “New User” window, enter information in the fields:
- Name – username;
- Group – select the “full” option, where the user will have all administrator privileges;
- Password – enter a strong default password, combining letters, numbers, symbols, and digits;
- Confirm Password – confirm the password entered in the Password field.
Click the “Ok” button to save in RouterOS.
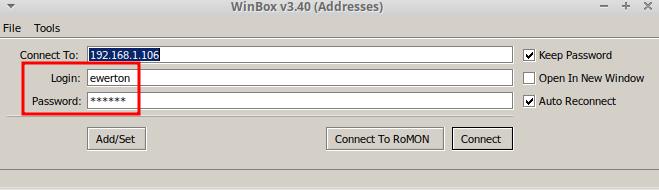
Disconnect from Winbox, and then test connecting with the new username and password.
Deleting Default Admin User
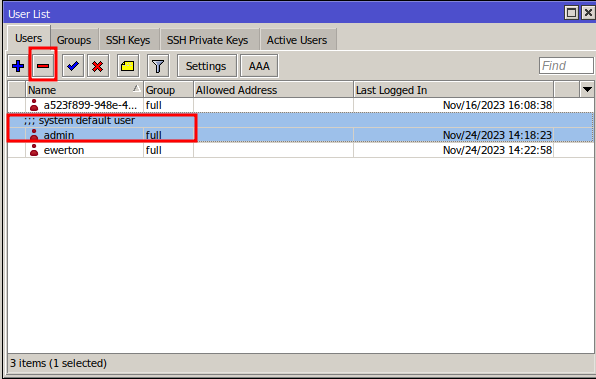
After ensuring access with the new user, return to “User List,” select the admin user, and click the “-” button to delete it.
Managing Service Ports
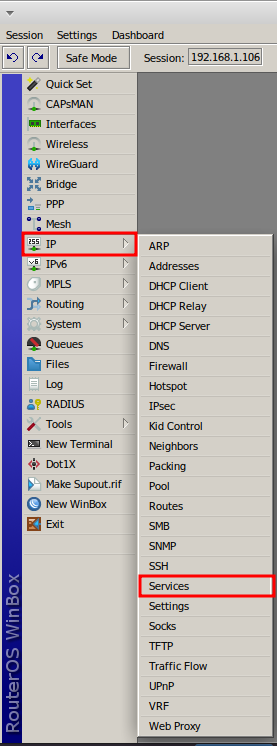
Access the IP menu and then the Services option; RouterOS provides options for ports accessed via IP.
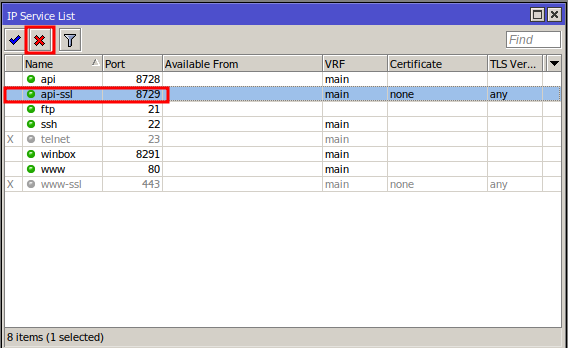
It is advisable to disable unused ports. In the scenario below, “telnet” (due to lack of encryption in its access) and “www-ssl” are already disabled.
To disable a port, select it with the mouse and click the “X” button. In the example below, the “api-ssl” port is selected.
Changing Port Numbers and Allowing Access for Specific Networks
Changing the default port numbers adds an extra layer of difficulty for an attacker trying to discover access to a particular service using the default port. High port numbers up to 65535 can be used for this purpose.
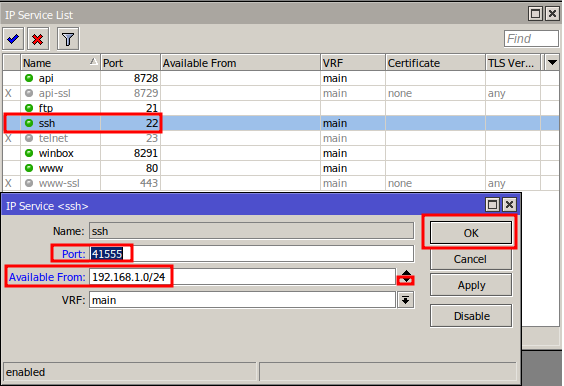
In “IP Service List,” double-click on the port you want to change, then modify the fields:
- Port – enter the port number to change; in this example, the number 41555 is used (note: use a different number for your scenario);
- Available From – if you want to further restrict access to a port, click the down arrow symbol (Add new value) to enable the field, then add the network or a specific IP that can access this port. In this example, the port is available for the internal network 192.168.1.0/24.
Click the “OK” button to confirm the changes.
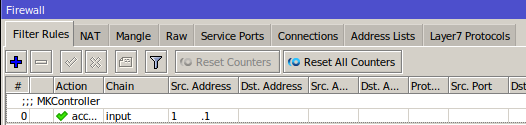
Note: If you are an MKController client and enter an IP in the “Available From” field, you will need to add the IP used in the VPN communication to the ports with the changes made. To find the IP for communication with the MKController VPN, access the IP menu and then Firewall; in the rule with the comment “MKController,” note the IP used and add it to the “Available From” field in IP Service.
MKController Port Numbers
MKController clients should ensure the synchronization of information after changing the default port numbers on Mikrotik.
After logging in to “https://app.mkcontroller.com,” access the Devices menu and then click the “View more” button on the device representation.
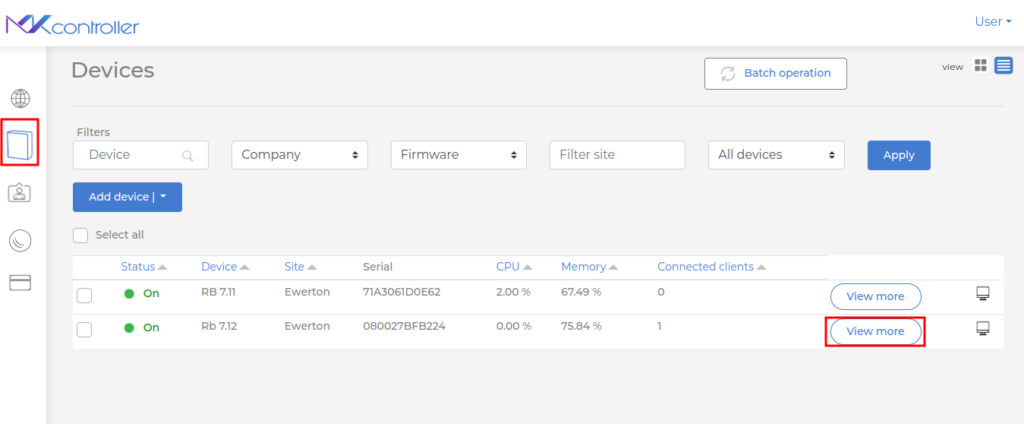
At the bottom of the screen, under Ports, check if the port information is updated as in Mikrotik. If not, click the pencil symbol (Edit ports).
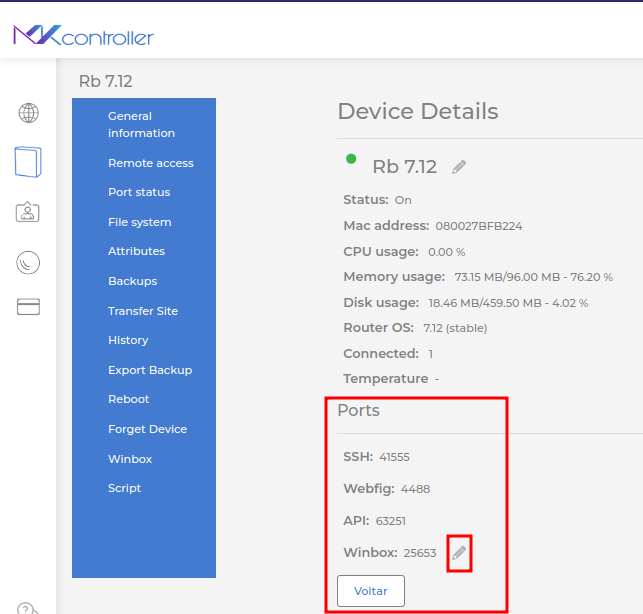
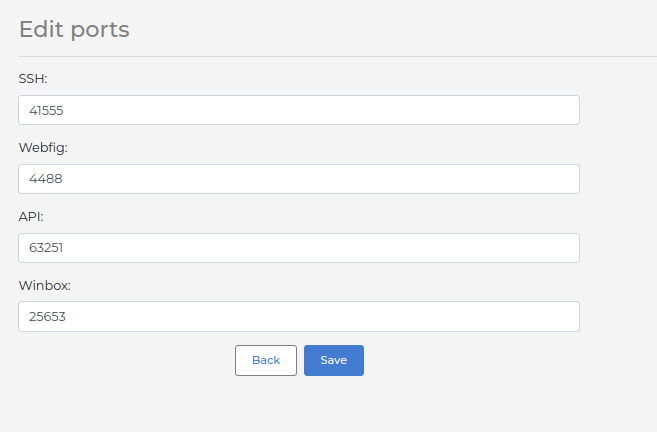
Provide the port numbers as configured on the Mikrotik device and click the Save button.
Embark on the Mikrotik security journey with confidence, implementing essential steps to strengthen your defenses and contribute to a safer and more reliable network environment.
Did not find the information you were looking for? Have other questions? Want to help us improve the material? Do not hesitate to contact us and seek support from MKController! Click here for any questions
Potencialize o controle, a eficiência e o acesso remoto do seu Mikrotik com a MKController. Clique aqui para experimentar agora e descubra o poder de uma gestão avançada e intuitiva para elevar sua experiência a novos patamares!