Experience the ease of Mikrotik Remote Access with MKController. Manage your Mikrotik devices via Webfig or Winbox, using a robust VPN, all without the need for a public IP. Additionally, users have the advantage of monitoring and receiving custom alerts via email or Telegram, covering aspects such as CPU, memory, disk, and connections.
Why choose Mikrotik remote access with MKController?
By adopting Mikrotiks on the MKController platform, you simplify and enhance your network management with a single action. Explore all the features and benefits for your day-to-day with our 14-day free trial.
In this detailed tutorial, you will learn step by step how to:
- Create a free account on MKController.
- Configure your Mikrotik for remote access.
Implementing a device for Mikrotik remote accessAccess Your Account
Log in to the website https://app.mkcontroller.com.
If you don’t have an account, create one for free at https://app.mkcontroller.com to take advantage of the 7-day trial.
Creating a Site on MKController fo Mikrotik Remote Access
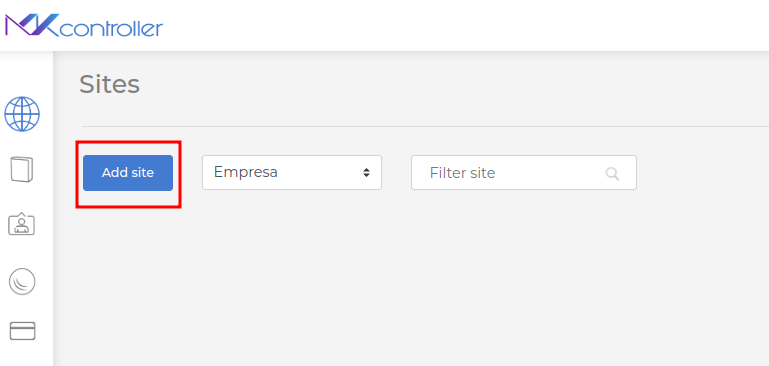
After logging in, click “Add Site” to create a new site in your account.
Name the site in the “Site Name” field (example: MKController) and click “Save”.
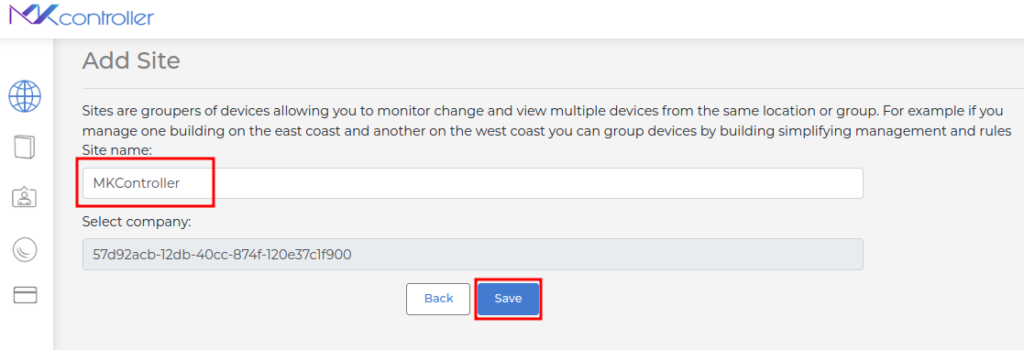
On the MKController platform, Sites allow you to organize and manage your Mikrotiks efficiently and intuitively. Group your devices by location, client, branch, or any other criteria that facilitates your work.
Adding a Mikrotik Device
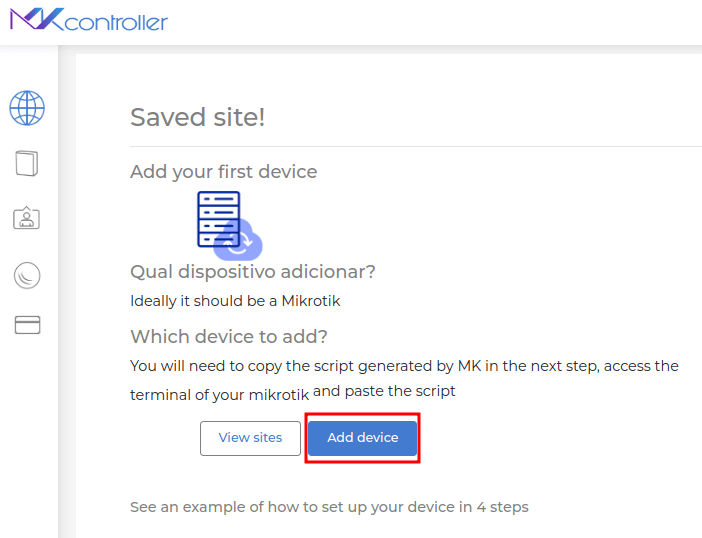
With the site created, click “Add Device”
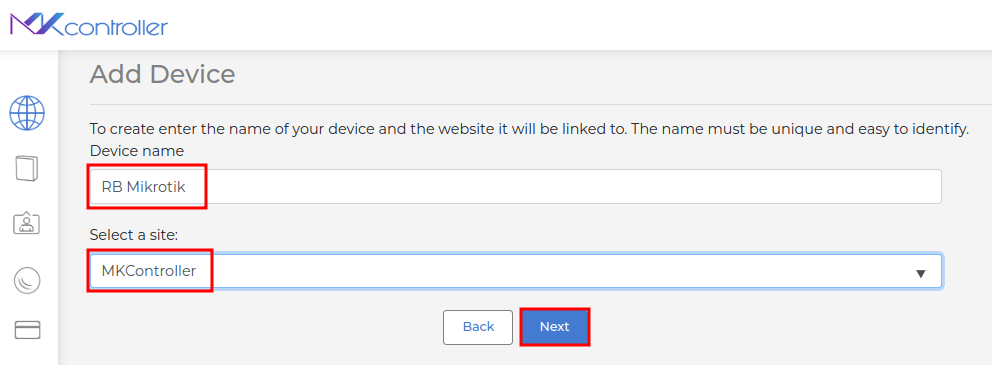
Enter a name to identify the Mikrotik, select the site, and click “Next”.
Select the “Copy and proceed” button.
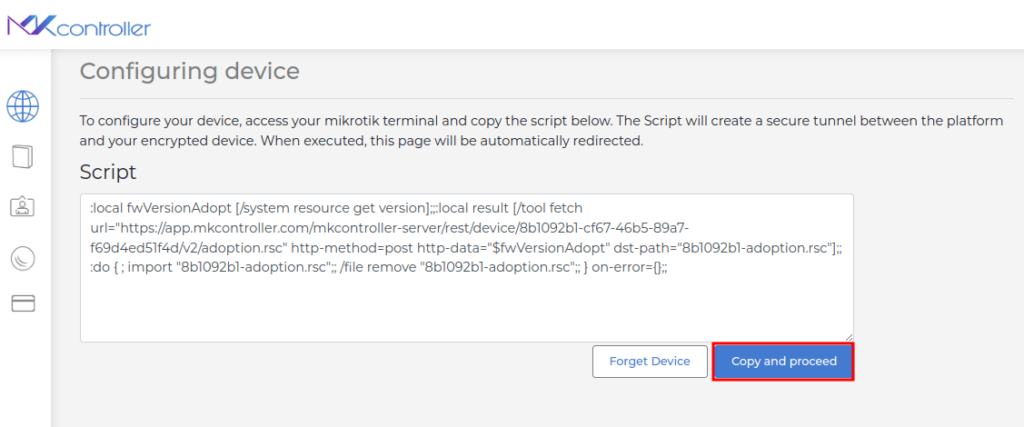
Validating Connectivity and Configuration for Effective Testing on the RB Mikrotik
Before running the script on your Mikrotik device, follow these crucial steps to ensure accurate and successful testing.
Network Connectivity
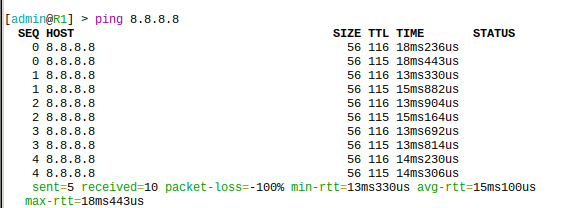
Verify that the RB Mikrotik is connected to the internet and that there is network traffic flowing.
Test connectivity using the ping feature (in this example, the test was performed with “ping 8.8.8.8”).
DNS Name Resolution
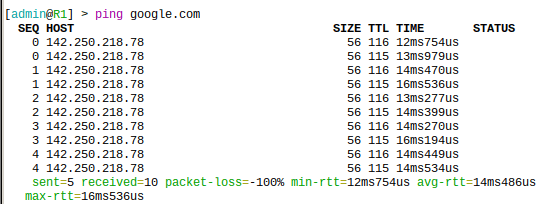
Crucial Verification – ensure that the RB Mikrotik is resolving domain names through DNS.
Use the ping command (in this example, the test was performed with “ping google.com”) to verify if the device can resolve names.
With due attention to these steps, you will be ready to proceed to the next step.
Running the script on the RB Mikrotik
Accessing the Mikrotik device via Winbox, select the “NewTerminal” option.
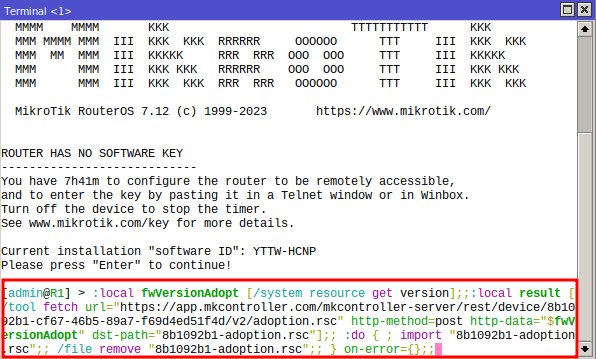
In the “Terminal” window, right-click and select the “Paste” option to paste the script generated on the MKController platform.
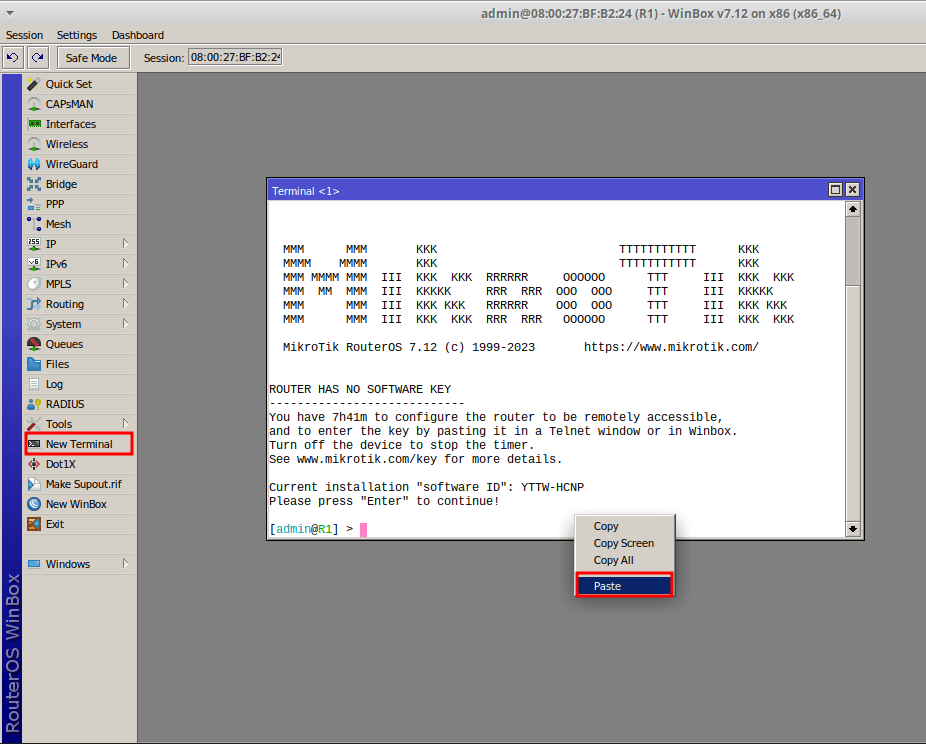
After copying the script to the Mikrotik terminal, press the Enter key on the keyboard to execute.
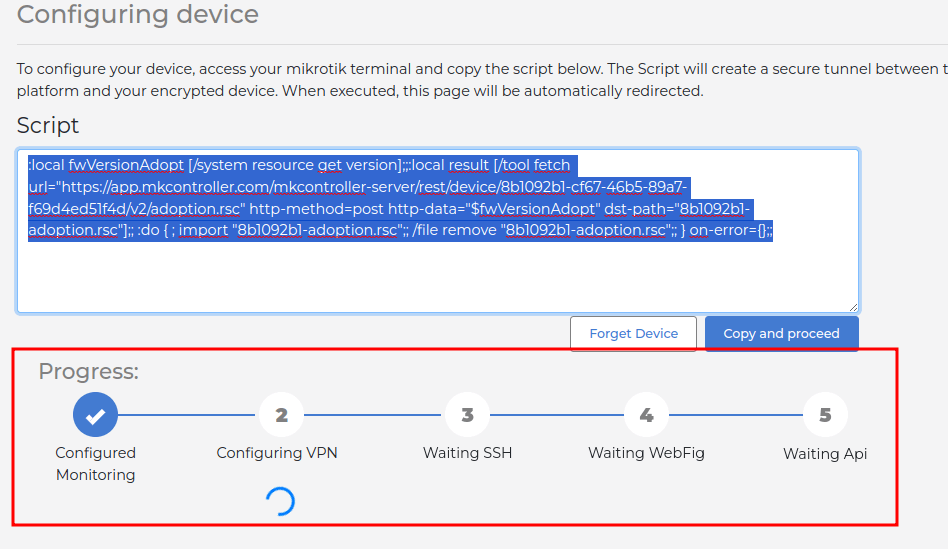
After running the script on the MKController platform, enjoy a complete and intuitive monitoring of the progress of the settings made.
By integrating your Mikrotik devices with the MKController platform, you open the doors to a world of possibilities in remote management. To enhance your understanding and explore the wide range of remote access options offered, we invite you to consult our comprehensive article: “How to access a Mikrotik RB remotely by MKController“. In this detailed content, you will find valuable insights and guidance to further optimize the control and efficiency of your Mikrotik devices through MKController. Explore every facet of remote access and deepen your knowledge with our specialized information.
Watch the video below for a visual version of this article
Not a MKController customer yet?
Access the platform and free trial for 7 days.
After testing, US$ 3.00 fee per device


