
What is OSPF Mikrotik?
OSPF (Open Shortest Path First) is an interior routing protocol (IGP) used for Mikrotik routers to communicate and exchange routing information within the same Autonomous System (AS). Imagine a computer network as a city and OSPF as a GPS for routers. It works by analyzing all available routes (streets) and selecting the best path (shortest, least traffic) for packets (passengers) to reach their destination (another computer) in the most efficient way possible.
Benefits of OSPF on Mikrotik:
- Efficient Routing: OSPF finds the shortest path for routers within an Autonomous System, optimizing network traffic.
- Adaptability: OSPF adapts to network changes, such as link failures or new device additions, ensuring active routes.
- No Routing Loops: OSPF prevents routing loops, which can cause congestion and network unavailability.
- Scalability: OSPF is a scalable protocol, supporting complex networks with multiple Mikrotik routers.
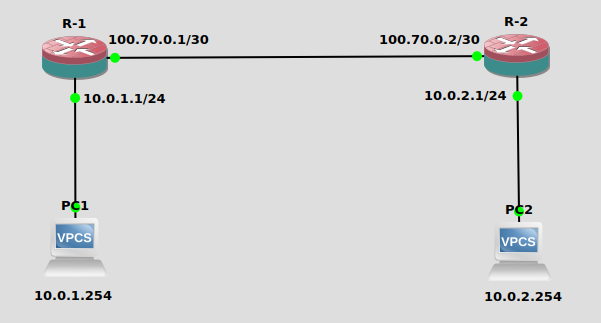
This tutorial guides you step-by-step through configuring OSPF on Mikrotik routers to allow PC 2 on Router R-2’s 10.0.2.0/24 network to communicate with PC 1 on Router R-1’s 10.0.1.0/24 network.
Objective:
Establish communication between PCs on different networks using the OSPF protocol.
Configuring OSPF Router on Mikrotik
Open Winbox and connect to your Mikrotik router.
Configuring OSPF Mikrotik
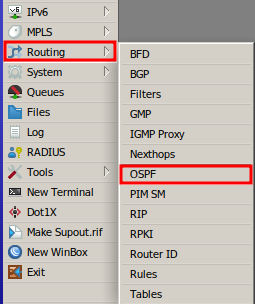
In the main menu, navigate to IP > Routing > OSPF.
Creating OSPF Instance
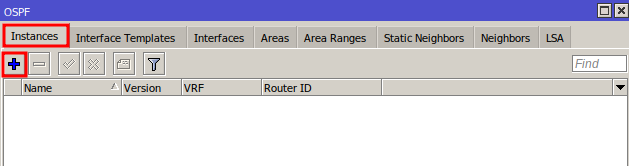
In the Instance tab, click “+” to create a new OSPF instance.
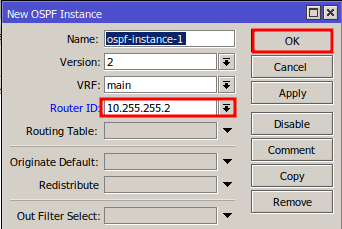
In the Router ID field, enter the IP of the loopback interface (recommended).
Click OK to save the settings.
Need help with Loopback IP on Mikrotik? Access our guide “Configuring Loopback IP on Mikrotik: A Step-by-Step Guide” and set it up in minutes!
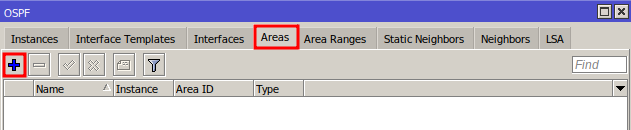
Creating OSPF Area
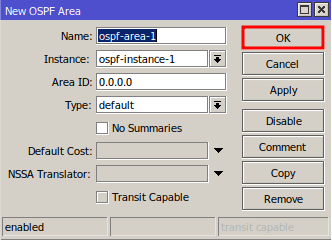
In the Areas tab, click “+” to add a new OSPF area.
The default Area ID is a good starting point, but you can adapt it to your network.
Click OK to save the settings.
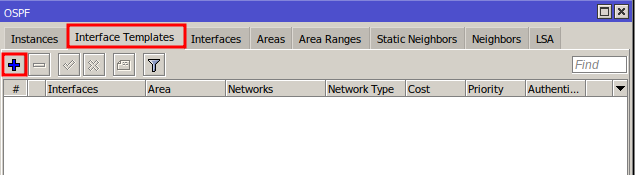
Configuring OSPF Interfaces
In the Interface templates tab, click “+” to add a new interface.
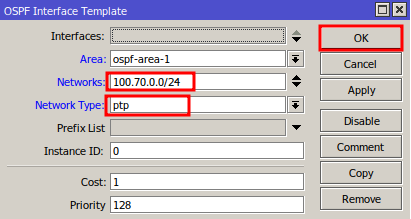
For the network that connects to R-1:
- In Network, enter the network in CIDR format (e.g., 100.70.0.0/24).
- In Network Type, select ptp.
- Click OK to save.
Repeat the process for the internal network interface (e.g., 10.0.2.0/24):
- In Interfaces, select the interface (e.g., ether2).
- In Network Type, select broadcast.
- Check the Passive box.
- Click OK to save.
Verifying Connectivity
In the Neighbors tab, check if the neighbor status is Full.

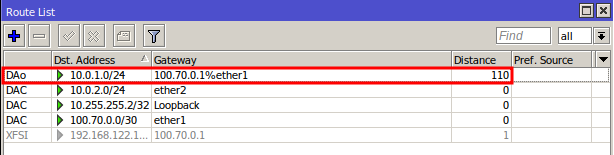
In IP > Routes, check if the route to the network (e.g., 10.0.1.0/24) is present with the prefix DAo (dynamic active ospf).
With OSPF configured, your networks will be connected and ready to communicate seamlessly!
Did you not find the information you were looking for? Do you have other questions? Do you want to help us improve the material? Do not hesitate to contact us and seek support from MKController! Click here for any questions.
If you have Mikrotiks in your network, enhance the control, efficiency, and remote access of your Mikrotik with MKController. Click here to try it now and discover the power of advanced and intuitive management to elevate your experience to new heights!
