PPPoE Client on Mikrotik: How to configure PPPoE Client on Mikrotik
PPPoE (Point-to-Point Protocol over Ethernet) is a networking protocol that allows a client to connect to an internet access server through an Ethernet connection. PPPoE is an evolution of PPP (Point-to-Point Protocol), which is used in dial-up connections by creating a PPPoE Client on Mikrotik
The term “Client” in PPPoE indicates that the device or computer is configured to connect to the network using PPPoE. When a device is configured as a PPPoE Client, it typically authenticates with the PPPoE server of the Internet Service Provider using credentials provided by the user, such as a username and password. After successful authentication, an internet connection is established and data can be transmitted over that connection.
In summary, the PPPoE Client is a part of the PPPoE protocol that operates on the client side to establish and manage the broadband connection through an Ethernet network.
In this article, you will learn how to configure PPPoE Client on Mikrotik, a popular router used by internet providers and home users.
Steps to create PPPoE Client on Mikrotik
To configure PPPoE Client on Mikrotik, follow these steps.
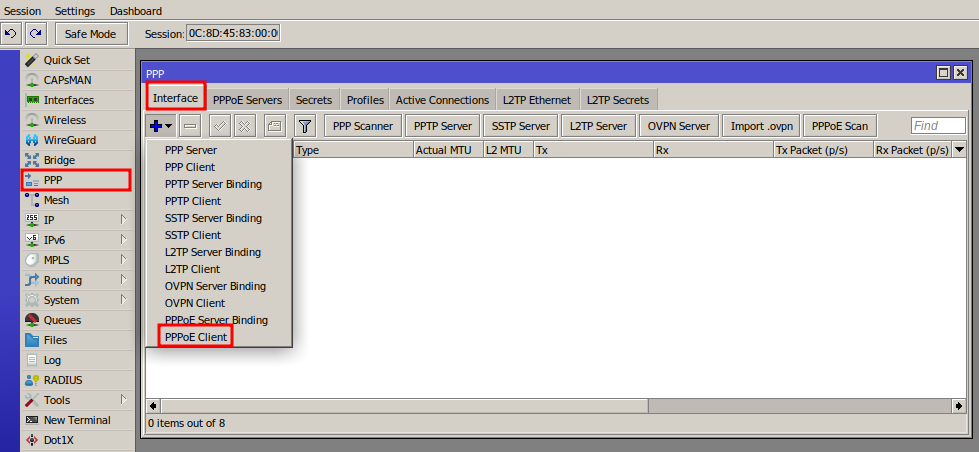
Access Mikrotik through Winbox, select the “PPP” menu and in the “Interface” tab, click on the “PPPoE Client” option.
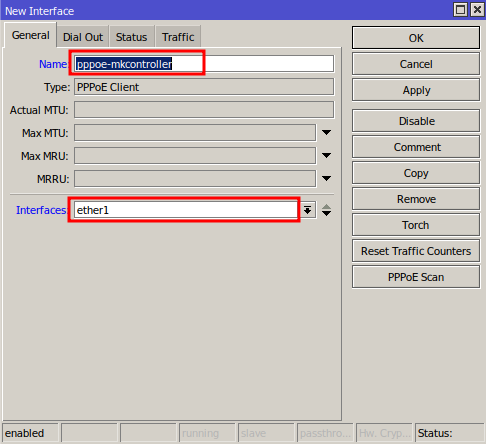
In the “New Interface” window, enter a name for easy identification in the “Name” field, and then select the RB Mikrotik port that connects the network cable from the link in the “Interfaces” field.
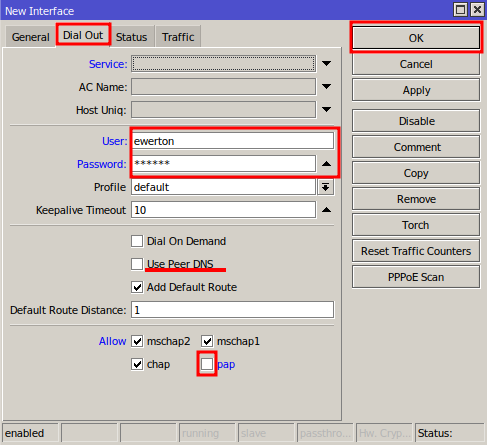
In the “Dial Out” tab, fill in the fields as follows:
User – The username created on the PPPoE Server.
Password – the password created for the user on the PPPoE Server.
Allow – disables the “pap” authentication option for security, keeping the remaining options enabled.
User Peer DNS – optional if you want to use the DNS configured by the provider.
Click on the “OK” button.
After completing these steps, the connection will be created and the letter “R” (running) will appear in the “Interface” tab to indicate successful contact with the PPPoE server.

To allow devices to access the internet, configure NAT on the PPPoE Client interface. To do this, follow the steps described in the article “NAT on Mikrotik: How to configure NAT to access the internet“.
Configuration of PPPoE Client on Mikrotik is a simple process that can be completed by following the steps described in this article. With this configuration, you will be able to connect your devices to the internet through an Ethernet network.
You can see the content of this article in the video below, if you prefer!