OpenDns Parental Controls for blocking unwanted websites
Having security to use a network, both professionally and personally, is a current and relevant concern. With technological advances and the increasing use of the internet for our daily demands, we may be exposed to malware, viruses and other malicious software that put personal, financial and other information at risk. Given this scenario, it is necessary to increase the control and security of the network that we use on a daily basis. Using OpenDns Parental Controls to block unwanted websites is an alternative to increase security within corporate and home networks.
The use of OpenDns Parental Controls block websites prevents access to malicious pages, hosts of so-called modern problems, which harm users’ lives by having their computers and network devices contaminated.
In this tutorial, we will adopt OpenDNS rating filter service for website blocking. It is a free product offered by Cisco, in which all the rules will be kept in the DNS service. In this way, the processing of the internal network is minimized and it facilitates the creation of rules. With the application of the filter, the blocking is done by terms or categories of selected websites.
There are several gains with the use of OpenDNS to block websites, such as: increased productivity by reducing the risk of network problems, damage to computers and other impacts; Control so that your family can use the internet safely; Protection for carrying out activities online and many others.
Check out the step-by-step guide to apply OpenDNS to block websites in your daily life in order to protect yourself from dangers and virtual threats.
Register on the OpenDNS Parental Controls
To start the process, you need to register for free on OpenDNS, check out the steps for this action.
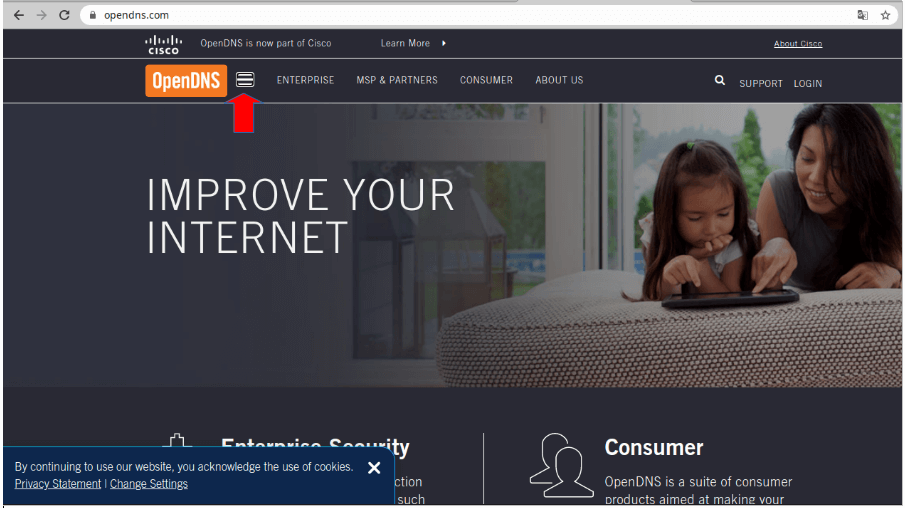
1 – Access the website https://www.opendns.com/ and click on the icon next to OpenDns, as shown in the image below.
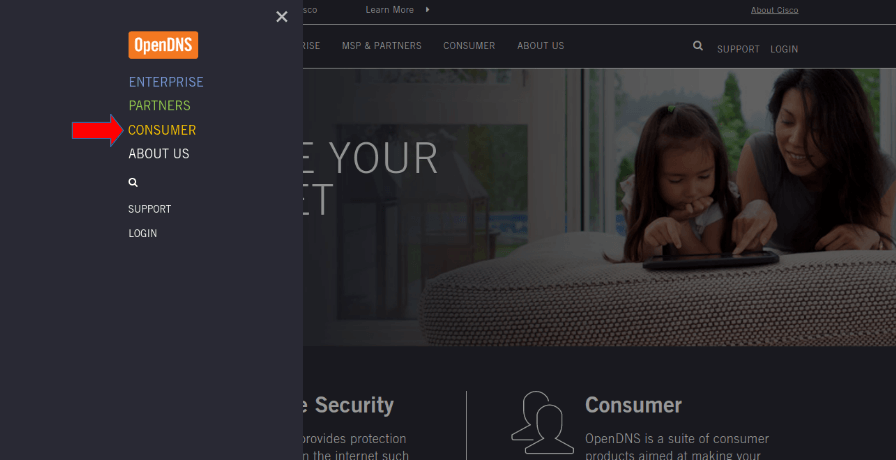
2 – Then, click on the “Consumer” option.
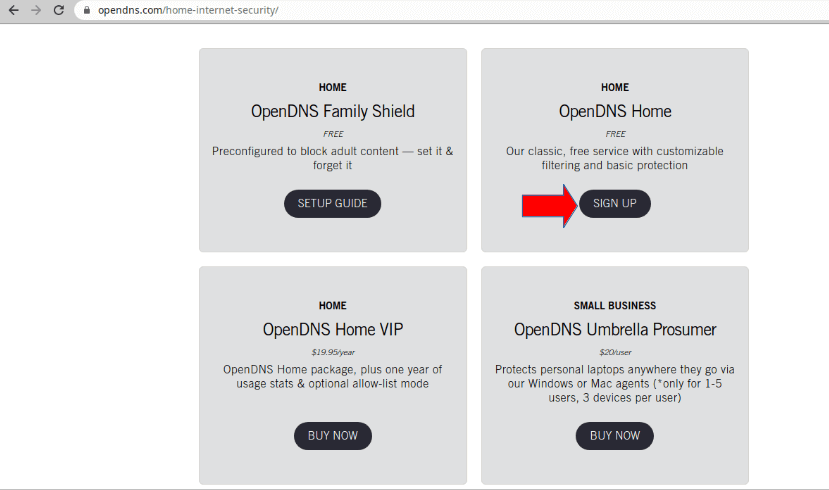
3 – In the next window, within the “OpenDNS Home” option, click on “SIGN UP”.
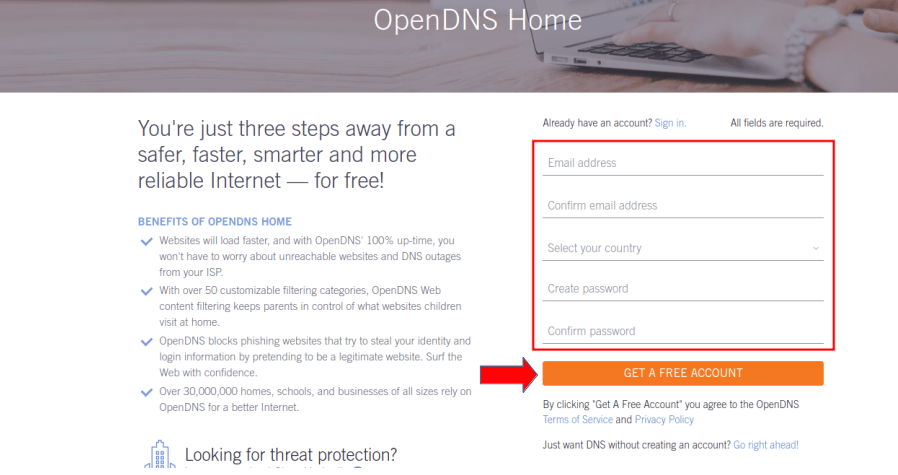
4 – Fill in all the information requested by the form (highlighted in red, in the figure below), then click on the “GET A FREE ACCOUNT” button.
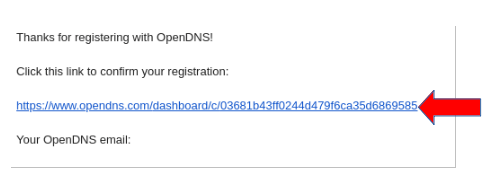
5 – OpenDNS itself will send, in the registered email, a link for confirmation. Upon receiving the email, click on this link to proceed with the process.
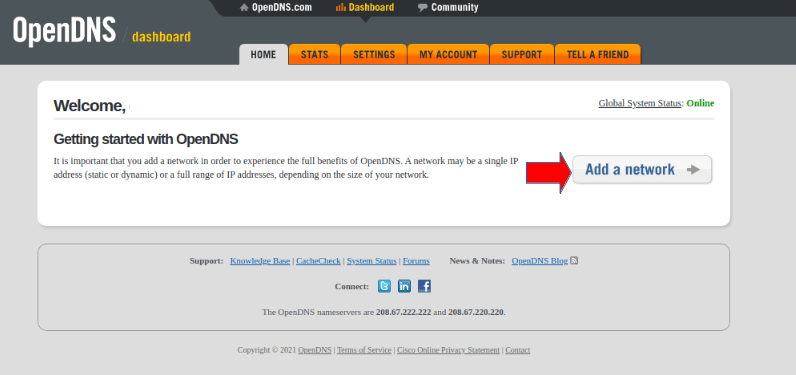
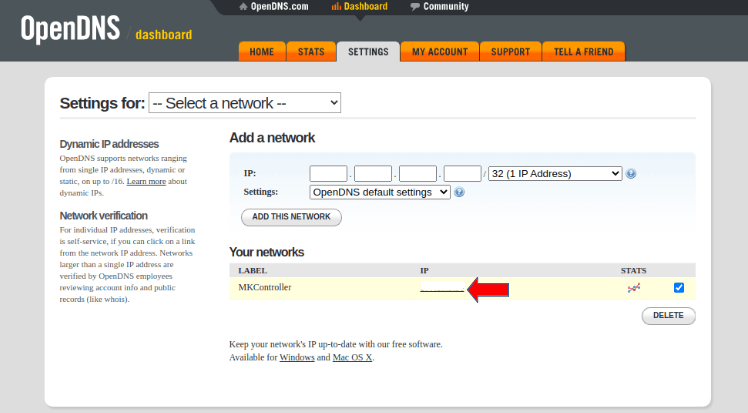
6 – After confirming, the user is directed to a page that requests that a new network be added. To perform this step, click on the “Add a network” button.
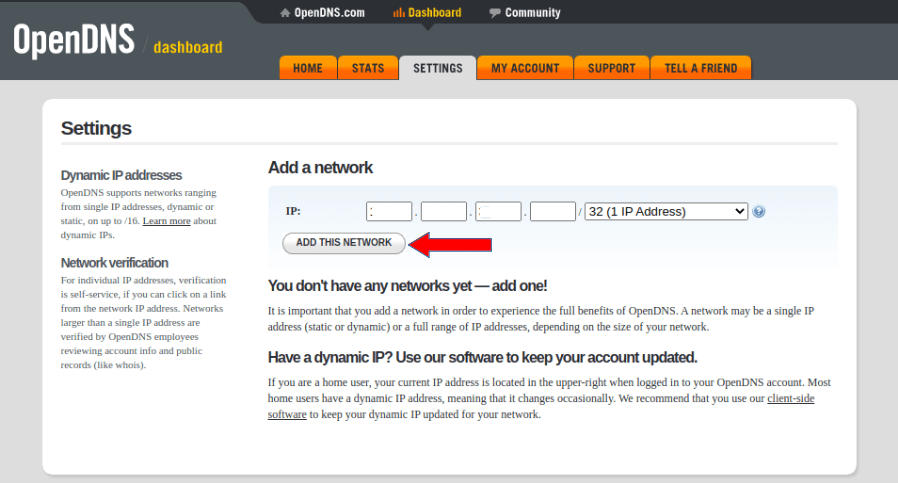
7 – In this step, the system fills in the information of the IP of the network to which it is connected. If the objective is to configure another network, just inform the IP in the appropriate field, which can be dynamic or static, to end this phase click on the “ADD THIS NETWORK” button.
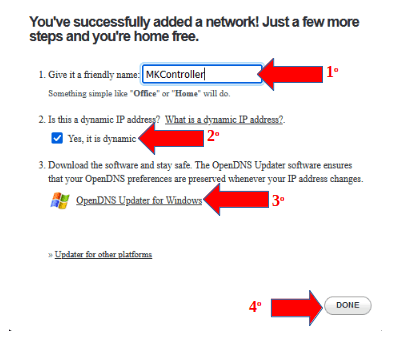
8 – In this step, you are asked to indicate a name. We recommend defining an easily identifiable name, as an example, we will inform “MKController” (1st indication);
8.1 – If the IP is dynamic, leave Item 2 (2nd indication) selected, otherwise just uncheck the option;
8.2 – Item 3 (3rd indication), directs the user to download the software that performs the synchronization on the OpenDNS website, when there is a change in the dynamic IP. After installed, it informs the user and password for the synchronization, if you use Public IP, disregard this item;
8.3 – To finish this step, click on the “DONE” button (4th indication) to proceed.
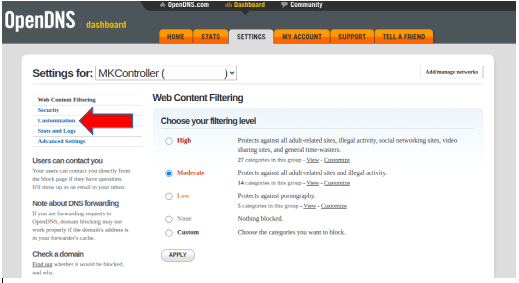
9 – To define the content blocking level, click on your IP information, as shown in the image below.
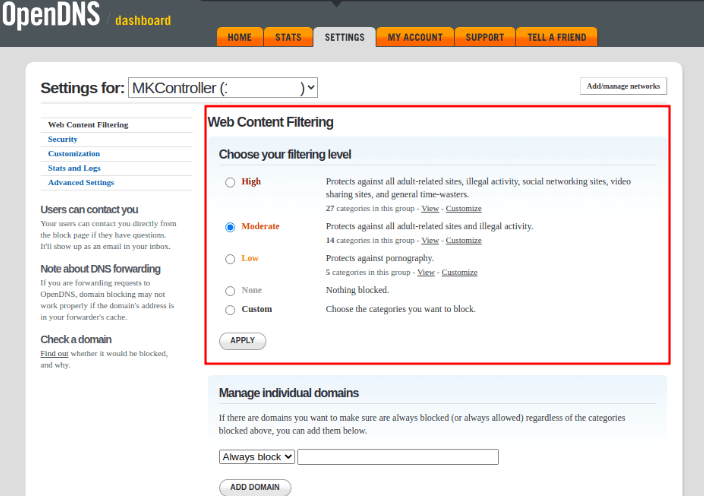
10 – For this example, we selected the “High” level (1st indication). Then we click on the item “Customize” (2nd indication) to check the selected categories.
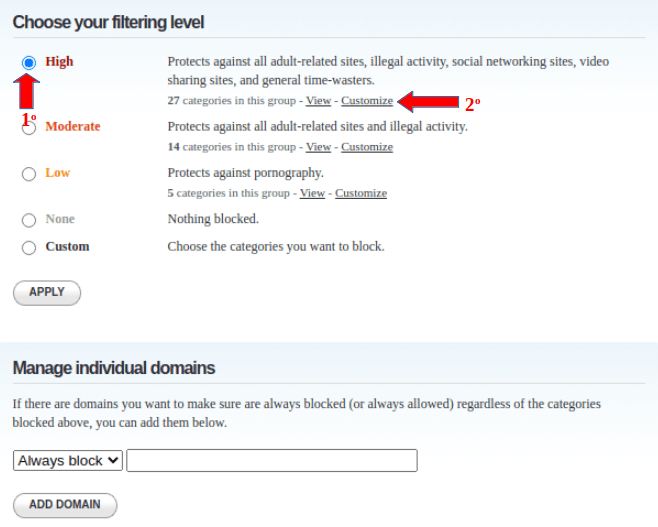
11 – If you want to add another category, just select the desired options and proceed by clicking on the “APPLY” button.
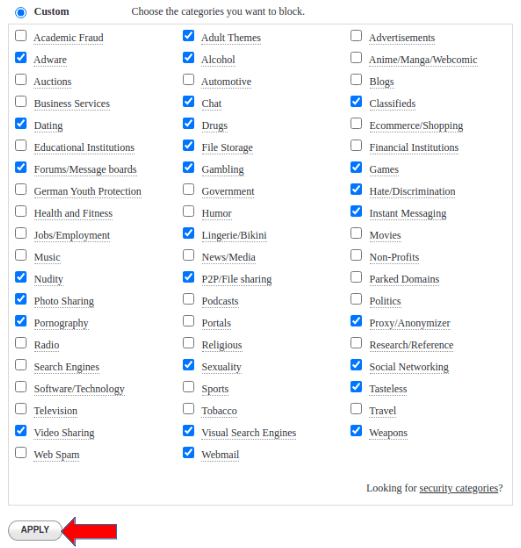
After applying the settings, a message will appear asking you to wait 03 (three) minutes to finish the synchronization process.
12 – At the bottom of the site will be presented the OpenDNS IP information to configure in the Mikrotik device. It is important to keep this information, as it will be requested soon.

Perform settings on Mikrotik
With the account created in OpenDNS, as explained in the previous step, the next action is to configure the Mikrotik device so that the blocking is carried out in the internal network. Check the step by step for this step.
Configuring DNS IP
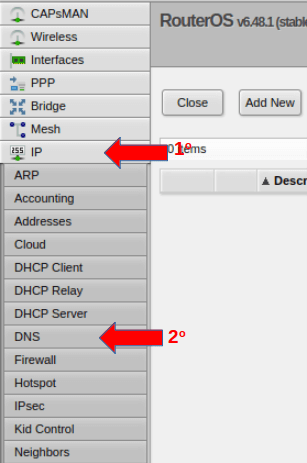
1 – On the Mikrotik device, click on the “IP” option (1st indication) and then on the “DNS” option (2nd indication).
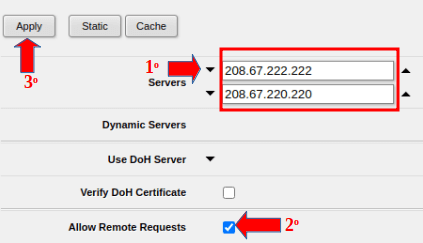
2 – Click on the down arrow next to the word “Servers” (according to the 1st indication), to open another field;
2.1 – Enter the OpenDNS IPs (highlighted in red in the figure) – Here you will use the information presented in Item 12 of the previous step (Register on the OpenDNS platform);
2.2 – Then, check the option “Allow Remote Requests (2nd indication);
2.3 – Click on the “Apply” button (3rd indication).
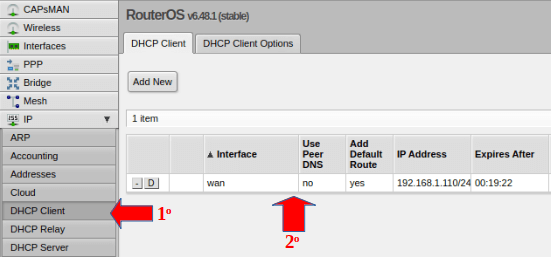
3 – If you are using DNS information from the ISP or some other router and information is appearing in the “Dynamic Servers” field of the DNS in the Mikrotik, click on the “DCHP Client” option (1st indication);
3.1 – Then, click on the line with the interface information (2nd indication).
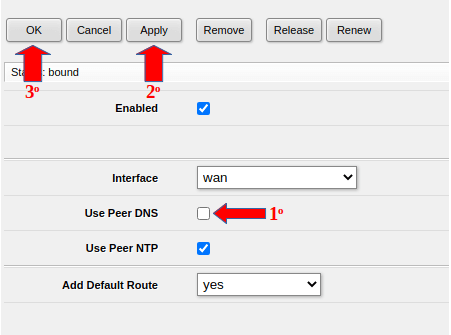
4 – Uncheck the “User Peer DNS” option (1st indication);
4.1 – Subsequently, click on the “Apply” button (2nd indication);
4.2 – To finish this phase, click on “Ok” (3rd indication).
Applying rules in Mikrotik Firewall
With the “Allow Remote Requests” option enabled in the DNS, as per the previous step, it is allowed that the workstations make DNS queries on the Mikrotik device. However, it is necessary to define rules in the Firewall against attacks that come from external queries. Check how to perform this action in the next steps.
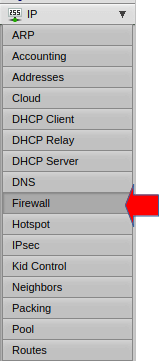
1- Click on the “Firewall” option.
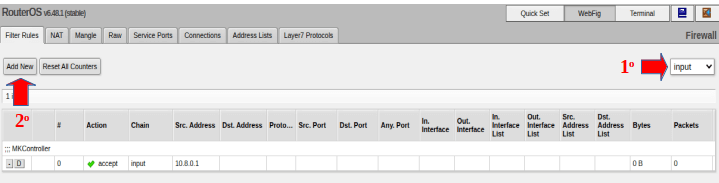
2 – Change the option to “input” (1st indication) and click on the “Add New” button (2nd indication), as shown in the figure below.
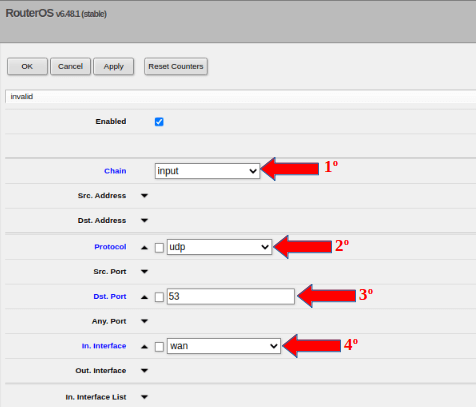
The first point is to block external queries via UDP, following these steps:
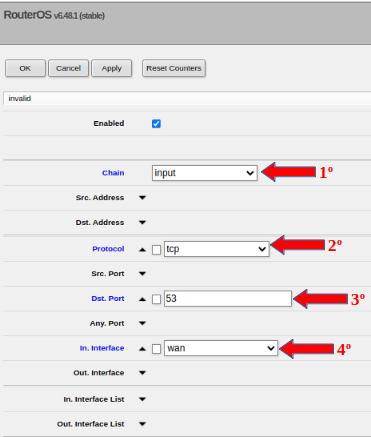
3 – In the “Chain” field, select the “input” option (1st indication);
3.1 – In the “Protocol” field, select the “UDP” option (2nd indication);
3.2 – In the “Dist. Port” inform the UDP port number “53” (3rd indication);
3.3 – In the “Int. Interface”, select the “wan” option (4th indication), referring to the link input interface.
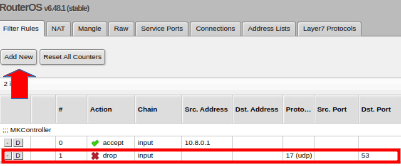
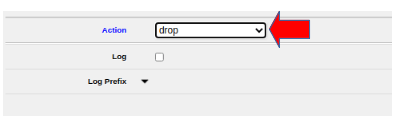
4 – In the “Action” field, select the “Drop” option to block any external consultation.

5 – Click on the “Apply” button (1st indication) and then on “OK” (2nd indication) to finish this step.

With the personalization settings defined, when accessing a blocked website, according to the blocking rules, a message will be displayed with the configurations made in the browser. Check out the example below:
6- Click on the “Add New” button.
7 – In the field “Chain” select the option “input” (1st indication);
7.1- In the “Protocol” field, select the “tcp” option (2nd indication);
7.2 – In the “Dist. Port” select port option “53” (3rd indication);
7.3 – In the “Int. Interface”, select the option that indicates the link input interface, in this example the “wan” option will be used (4th indication).
8 – In “Action” select the option “Drop”, so that any external query is blocked.
9 – Click on the “Apply” button (1st indication) and then on “OK” (2nd indication).

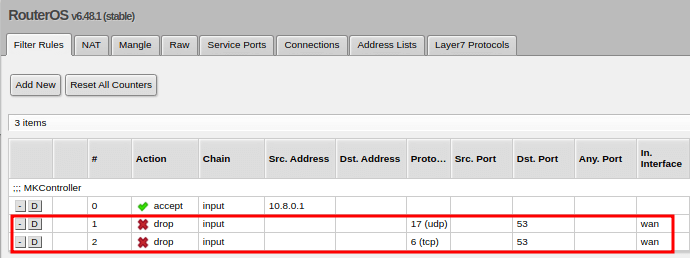
Now you can see, as shown below, that rules were created to block external DNS queries via UDP and TCP.
In order to force computers on the network to query the DNS of the Mikrotik device, even those that were manually configured, it is necessary to redirect the NAT. Check out the step by step for this action:
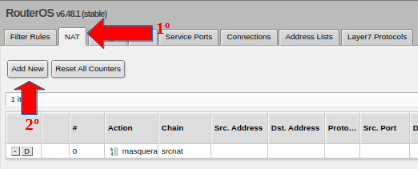
10 – Click on the “Nat” tab (1st indication);
10.1 – Click on the “Add New” button (2nd indication).
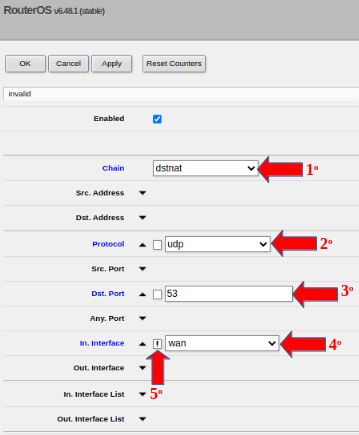
11 – In the “Chain” field, select the “dstnat” option (1st indication);
11.1 – In the “Protocol” field, select “udp” (2nd indication);
11.2 – In the “Dst. Port” inform the port “53” (3rd indication);
11.3 – In the “Int. Interface” select “wan”(4th indication);
11.4 – Still in the “Int. Interface” click on the box, according to the 5th indication, so it is possible to create the filter for all interfaces, except the Wan that arrives through the link.
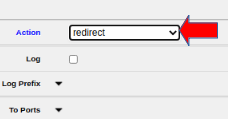
12 – In the “Action” field, select the “redirect” option, this will redirect all DNS queries made on the internal network to the configured Mikrotik.
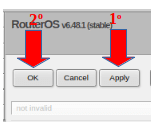
13 – Click on the “Apply” button (1st indication) and click on “OK” (2nd indication).
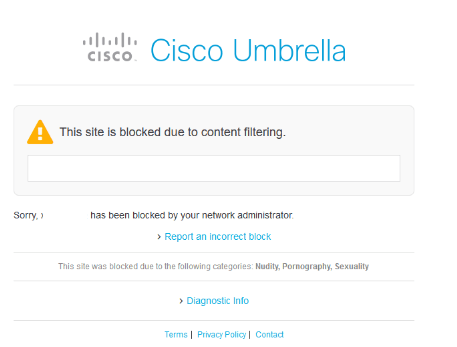
As confirmation that the settings were successfully performed, whenever accessing a website blocked according to the content filtering configured in OpenDNS, the image below will appear.
Customize OpenDNS Parental Controls warning screen for website blocking
The OpenDns website allows customization of the warning screen when a website is blocked. In this option, it is possible to insert a logo and messages, as will be shown in the following steps.
1 – Access the “Settings” tab on the OpenDNS website;
1.1 – Click on the “Customization” option.
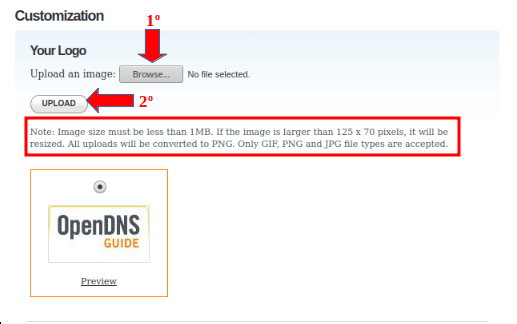
2 – To choose the Logo file, click on “Browse” (1st indication);
2.2 – After choosing the Logo, click on “UPLOAD” (2nd indication);
If the image is not loaded, check the information/guidelines below the “UPLOAD” button, as highlighted in the figure below.
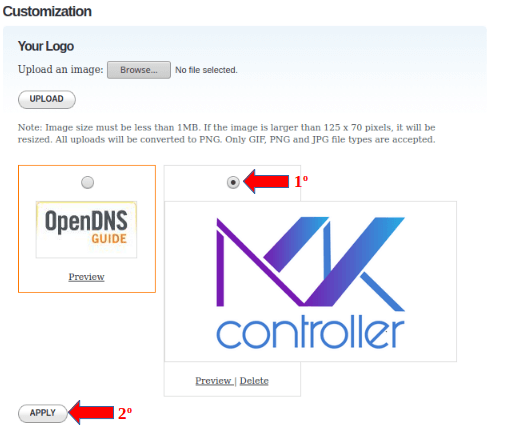
3 – Next, select the logo image that was loaded (1st indication);
3.1 – Click on the “APPLY” button (2nd indication).
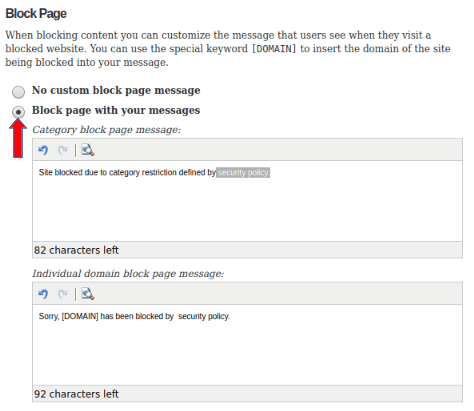
4 – On the “Block page” screen, select the “Block page with messages” option to customize the blocking messages, by category and individual domain, that will appear on the screen.
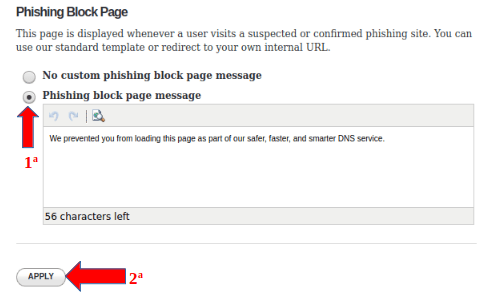
5 – In “Phishing Block Page” select the option “Phishing Block Page Messages” (1st indication), if you want to customize the messages of this category, to finalize this configuration click on the “APPLY” button (2nd indication).
With the personalization settings defined, when accessing a blocked website, according to the blocking rules, a message will be displayed with the configurations made in the browser. Check out the example below:
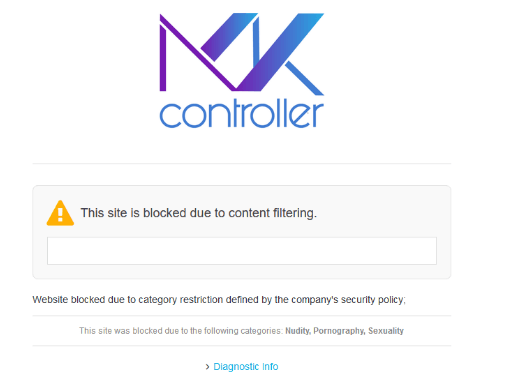
settings made in the browser.
Enable the Statistics option when using OpenDNS Parental Controls
The statistical function is an interesting resource for gathering information and data. Because by enabling this option it is possible to generate reports and logs of the sites that are accessed on the network. Check out the step by step to enable this tool:
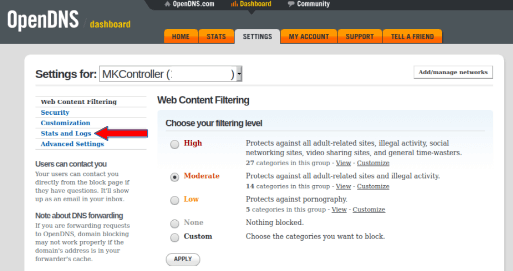
1 – In the “Settings” tab, click on “Stats and Logs”.
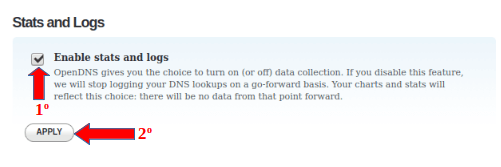
2 – Select the field “Enable stats and logs” (1st indication);
2.1 – Click on the “APPLY” button (2nd indication).
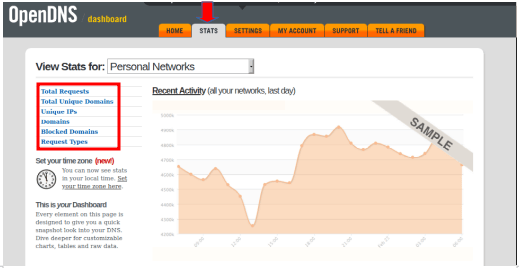
3 – In the “Stats” tab, it is possible to check the reports by clicking on one of the options highlighted in the figure below.
OpenDNS Updater Software Synchronization
To finish this article, we will present the OpenDNS Updater software whose main function is to perform the synchronization when the IP undergoes changes because it is dynamic. See the step by step for this activity:
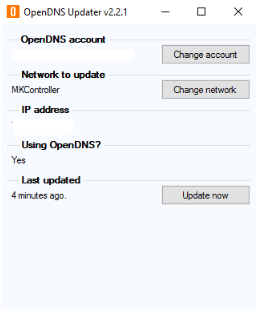
1- Search the Windows computer or device where the program was installed, then click on its icon.

2 – The program will display all the information of the registered account and the current IP of the network.
The use of OpenDNS Parental Controls for website blocking is one of the measures to increase security when using corporate or home networks.
Didn’t find the information you were looking for? Do you have other questions? Do you want to help us improve the material? Do not hesitate to contact and send help from MKController! Click here for any question. If you have not adopted your Mikrotik device in MKController, simply click here to follow the documentation.